为什么需要 Bun 测试框架?
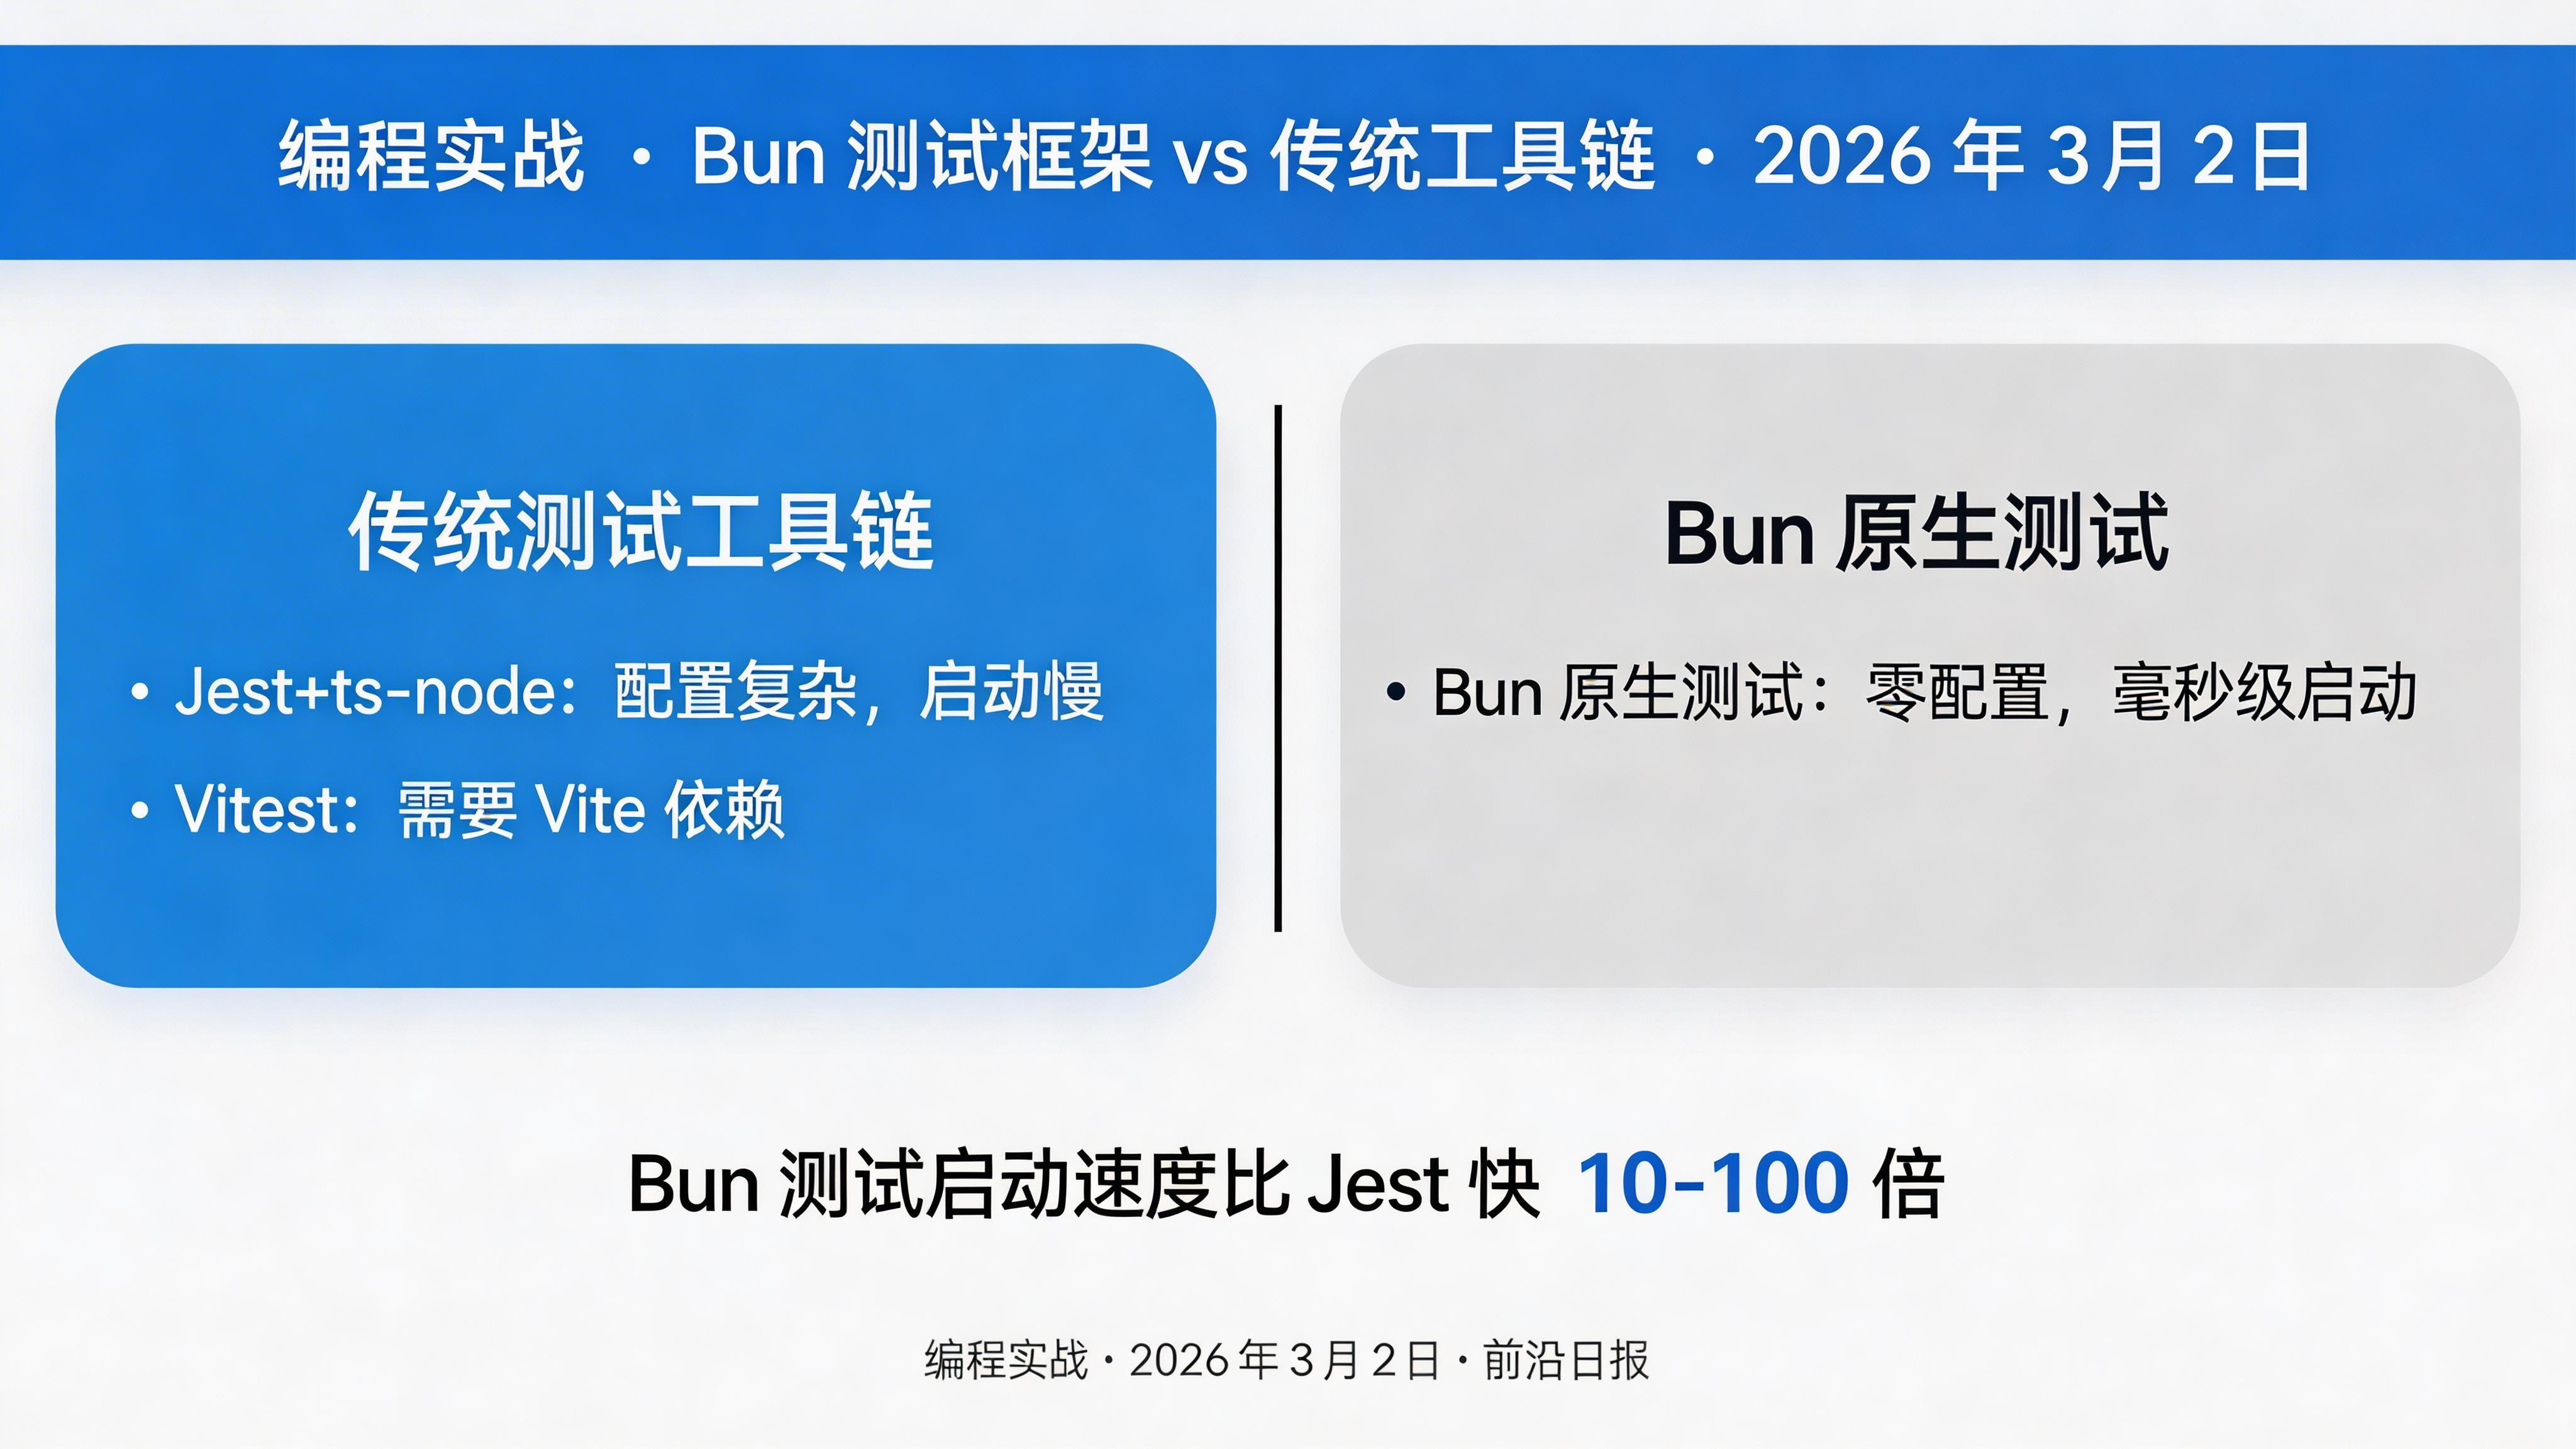
在 2026 年的现代 JavaScript/TypeScript 开发中,测试工具链的选择直接影响开发效率。传统的 Jest + ts-node + babel 组合需要多层配置,启动速度慢,内存占用高。而 Bun 2.0 内置的测试运行器提供了零配置、原生 TypeScript 支持、毫秒级启动的全新体验。
本教程将带你从零开始,掌握 Bun 2.0 测试框架的核心功能,包括:
- 环境搭建与类型配置
- 基础测试语法与断言
- 快照测试完整工作流
- Mock 与生命周期钩子
- 并发测试与性能优化
- CI/CD 集成实战
准备工作
Bun 2.0+
高性能 JavaScript 运行时
TypeScript 5.7+
类型安全支持
bun-types
Bun 类型定义包
1
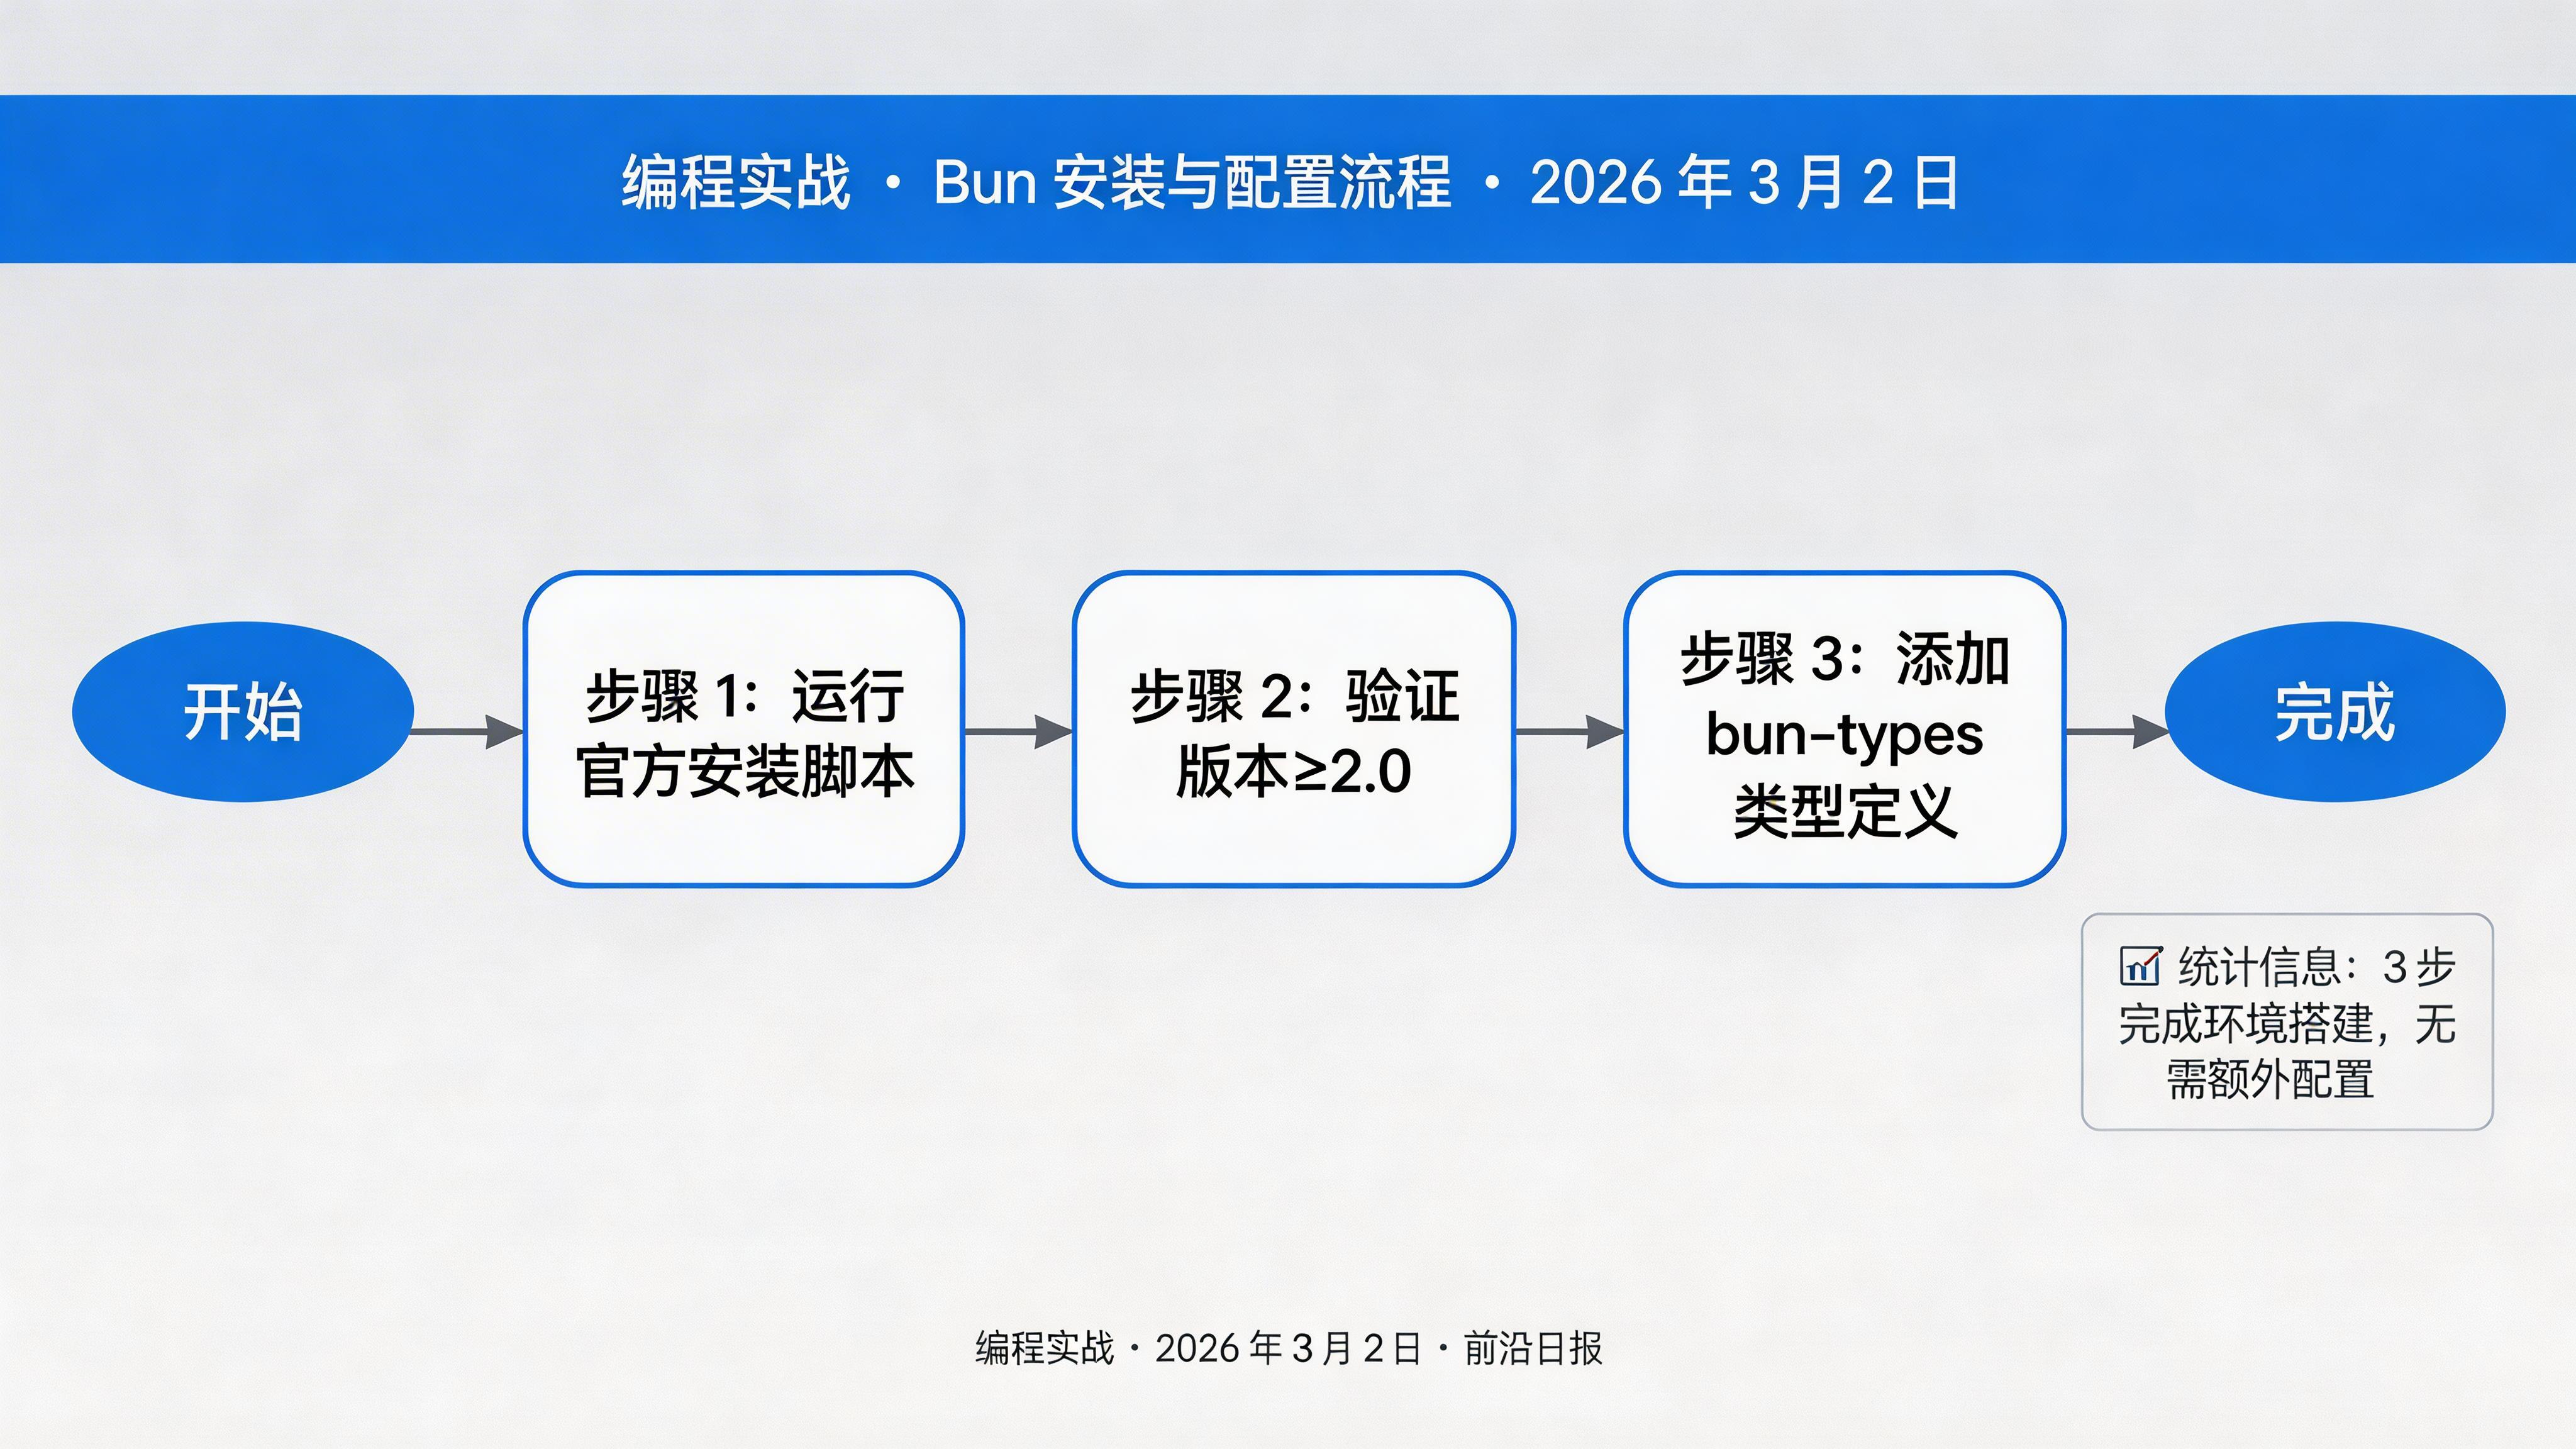
安装 Bun 2.0
使用官方安装脚本快速安装 Bun:
# macOS/Linux 一键安装
curl -fsSL https://bun.com/install | bash

# 验证安装版本(确保≥2.0)
bun --version

# Windows 用户使用 PowerShell
powershell -c "irm bun.com/install.ps1 | iex"
安装完成后,Bun 会自动添加到 PATH。如需手动配置,将 ~/.bun/bin 加入环境变量。
2
初始化项目与类型配置
创建新项目并配置 TypeScript 类型支持:
# 初始化项目
mkdir bun-test-demo && cd bun-test-demo
bun init -y

# 安装 Bun 类型定义(开发依赖)
bun add -d bun-types
创建或更新 tsconfig.json,启用严格模式并配置路径别名:
{
  "compilerOptions": {
    "target": "ES2022",
    "module": "ESNext",
    "moduleResolution": "bundler",
    "strict": true,
    "esModuleInterop": true,
    "skipLibCheck": true,
    "forceConsistentCasingInFileNames": true,
    "types": ["bun-types"],
    "baseUrl": ".",
    "paths": {
      "@/*": ["src/*"],
      "@test/*": ["test/*"]
    }
  },
  "include": ["src/**/*", "test/**/*"],
  "exclude": ["node_modules"]
}
关键配置:
"types": ["bun-types"] 让 TypeScript 识别 Bun 的全局 API 和测试类型。
3
编写第一个测试
创建测试目录结构:
mkdir -p src test
# 创建示例被测试函数
echo 'export const add = (a: number, b: number): number => a + b;' > src/math.ts
编写测试文件 test/math.test.ts:
import { test, expect, describe } from "bun:test";
import { add } from "../src/math";

// 基础测试
test("add 函数计算 2+2 等于 4", () => {
  expect(add(2, 2)).toBe(4);
});

test("add 函数处理负数", () => {
  expect(add(-1, -1)).toBe(-2);
  expect(add(-5, 10)).toBe(5);
});

// 使用 describe 组织测试组
describe("add 函数边界测试", () => {
  test("处理极大数值", () => {
    const max = Number.MAX_SAFE_INTEGER;
    expect(() => add(max, 1)).toThrow();
  });

  test("处理小数", () => {
    expect(add(1.5, 2.5)).toBe(4);
  });
});
运行测试:
# 运行所有测试
bun test

# 运行特定文件
bun test test/math.test.ts

# 详细输出模式
bun test --reporter=verbose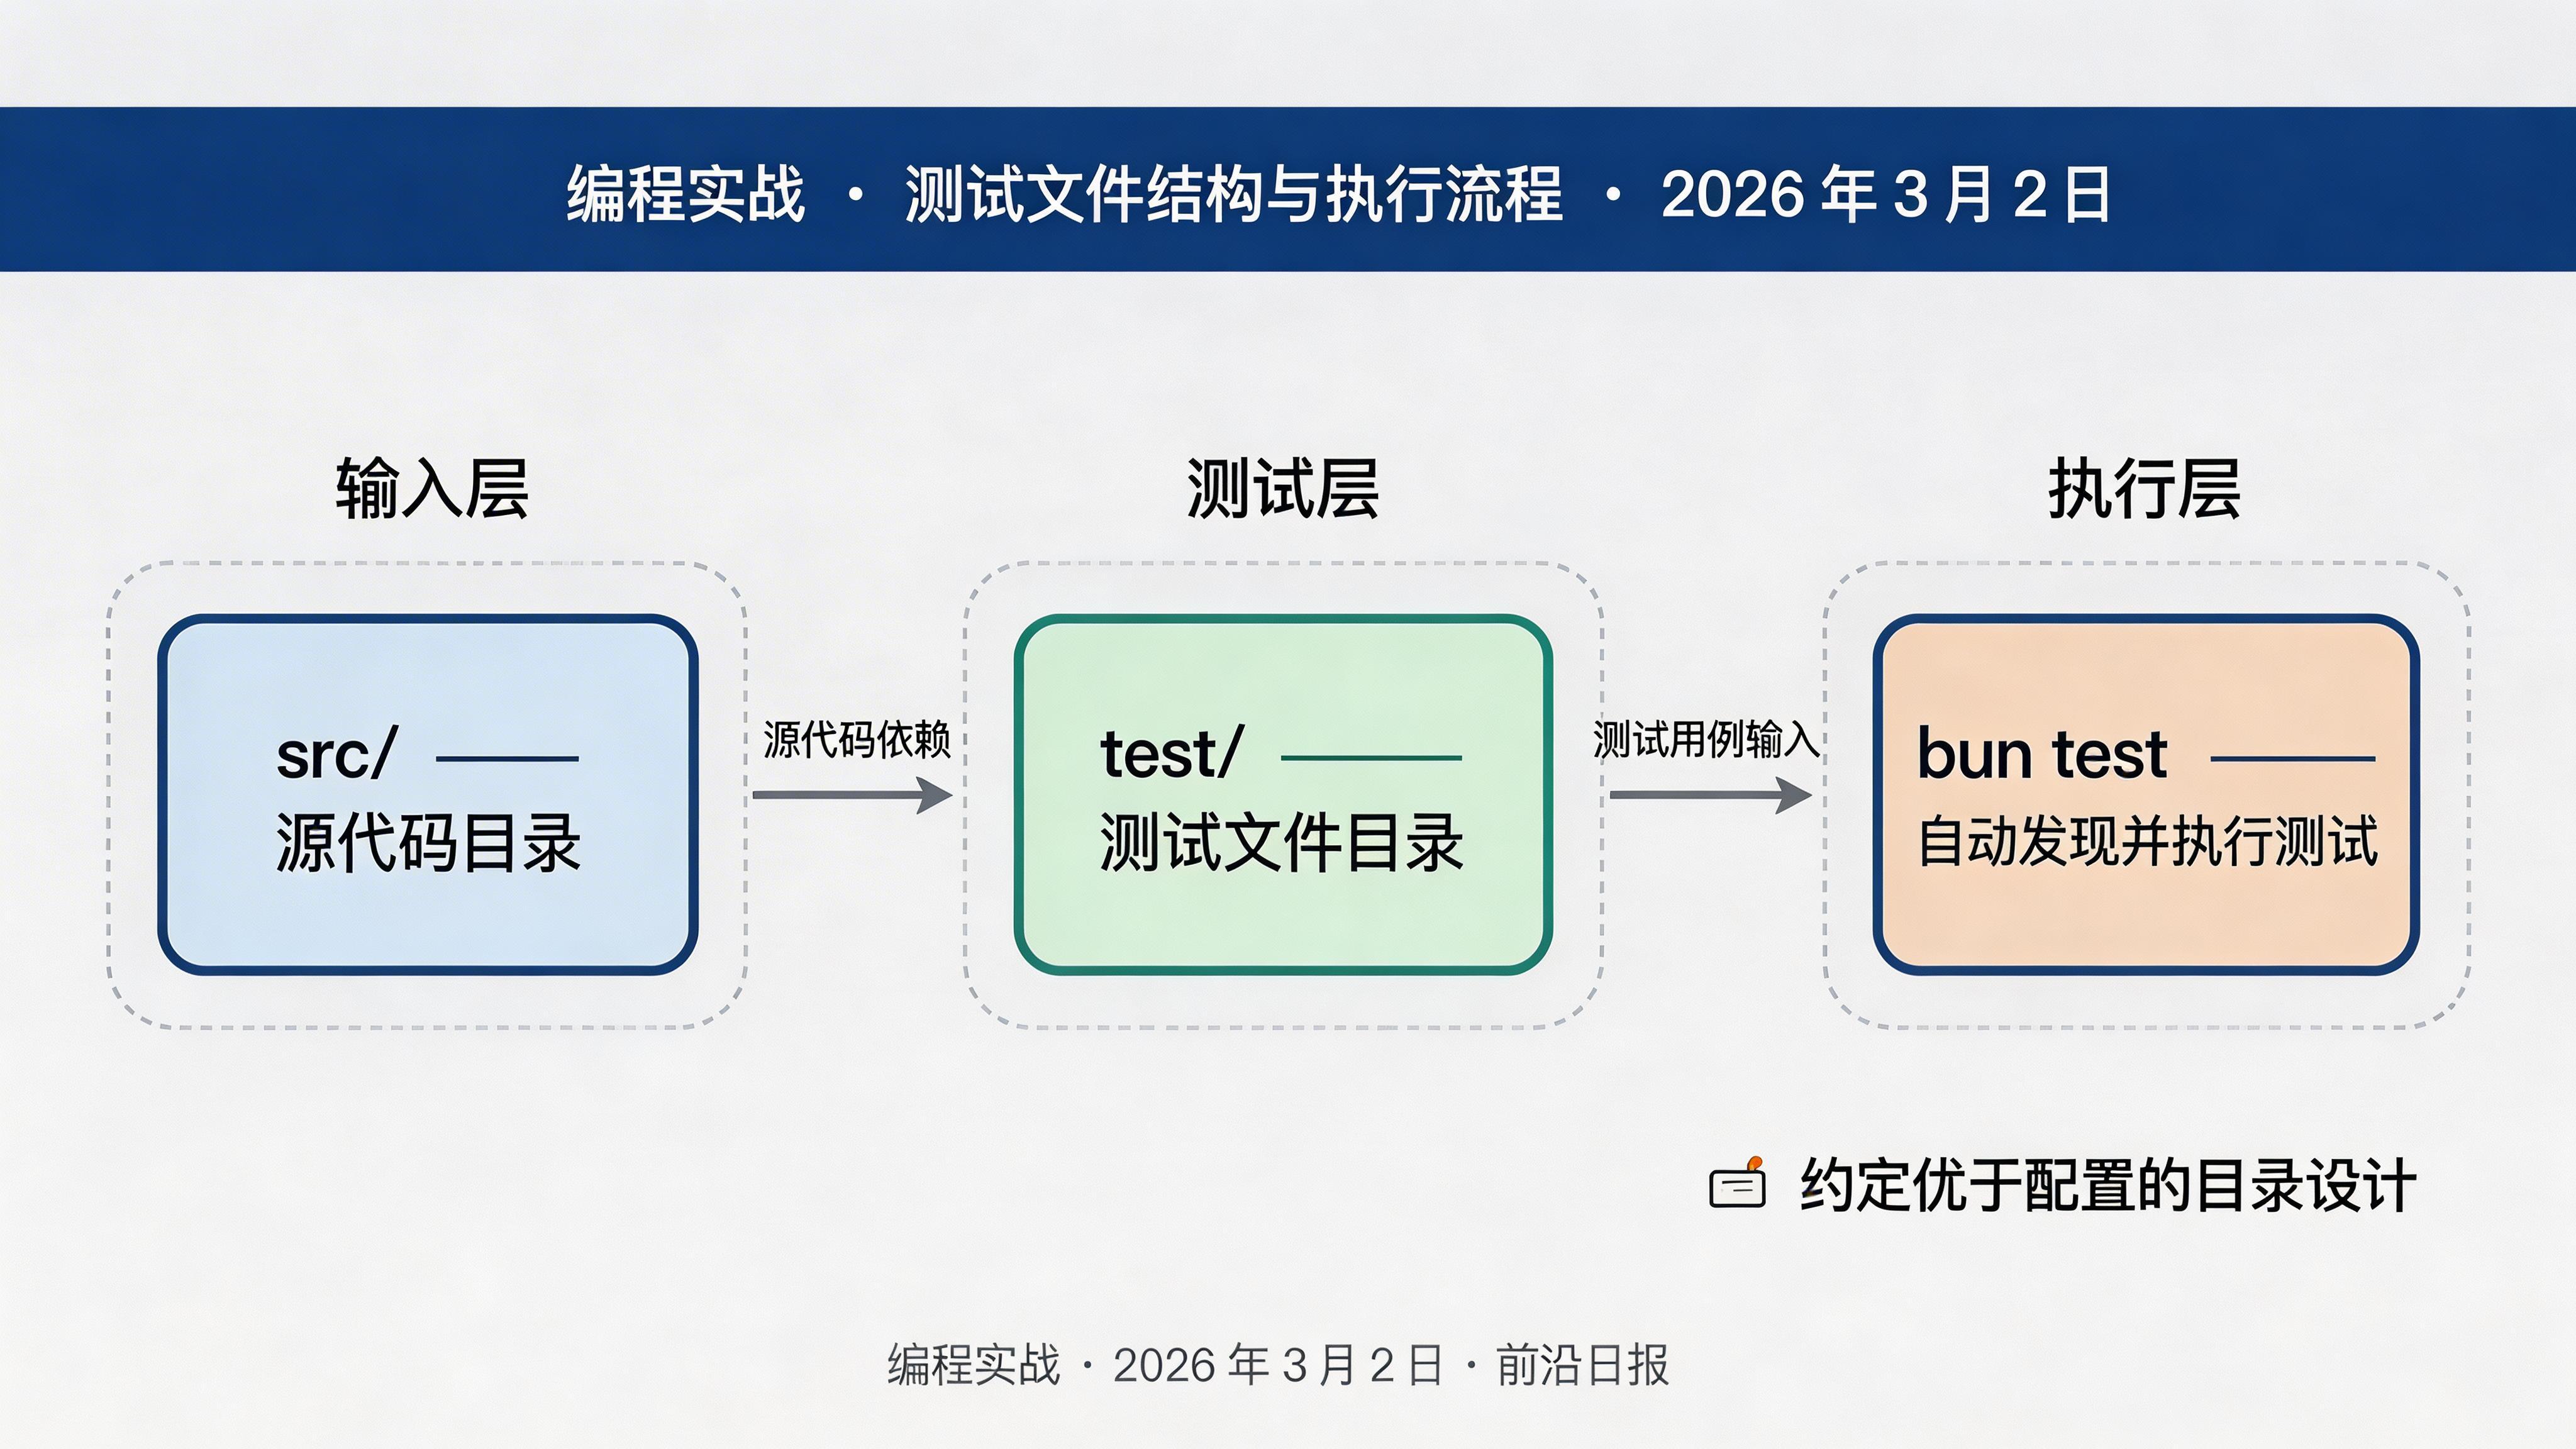
4
快照测试实战
快照测试适用于 UI 组件、复杂对象、API 响应等场景。Bun 的快照测试与 Jest API 兼容:
import { test, expect } from "bun:test";

// 测试用户对象结构
test("用户对象快照", () => {
  const user = {
    id: "usr_123",
    name: "张三",
    email: "zhangsan@example.com",
    role: "admin",
    permissions: ["read", "write", "delete"],
    metadata: {
      createdAt: "2026-03-02",
      lastLogin: null,
      settings: { theme: "dark", lang: "zh-CN" }
    }
  };

  expect(user).toMatchSnapshot();
});

// 测试格式化输出
test("日志格式化快照", () => {
  const logEntry = {
    level: "INFO",
    timestamp: "2026-03-02T10:30:00Z",
    message: "用户登录成功",
    context: { userId: "usr_123", ip: "192.168.1.1" }
  };

  const formatted = JSON.stringify(logEntry, null, 2);
  expect(formatted).toMatchSnapshot();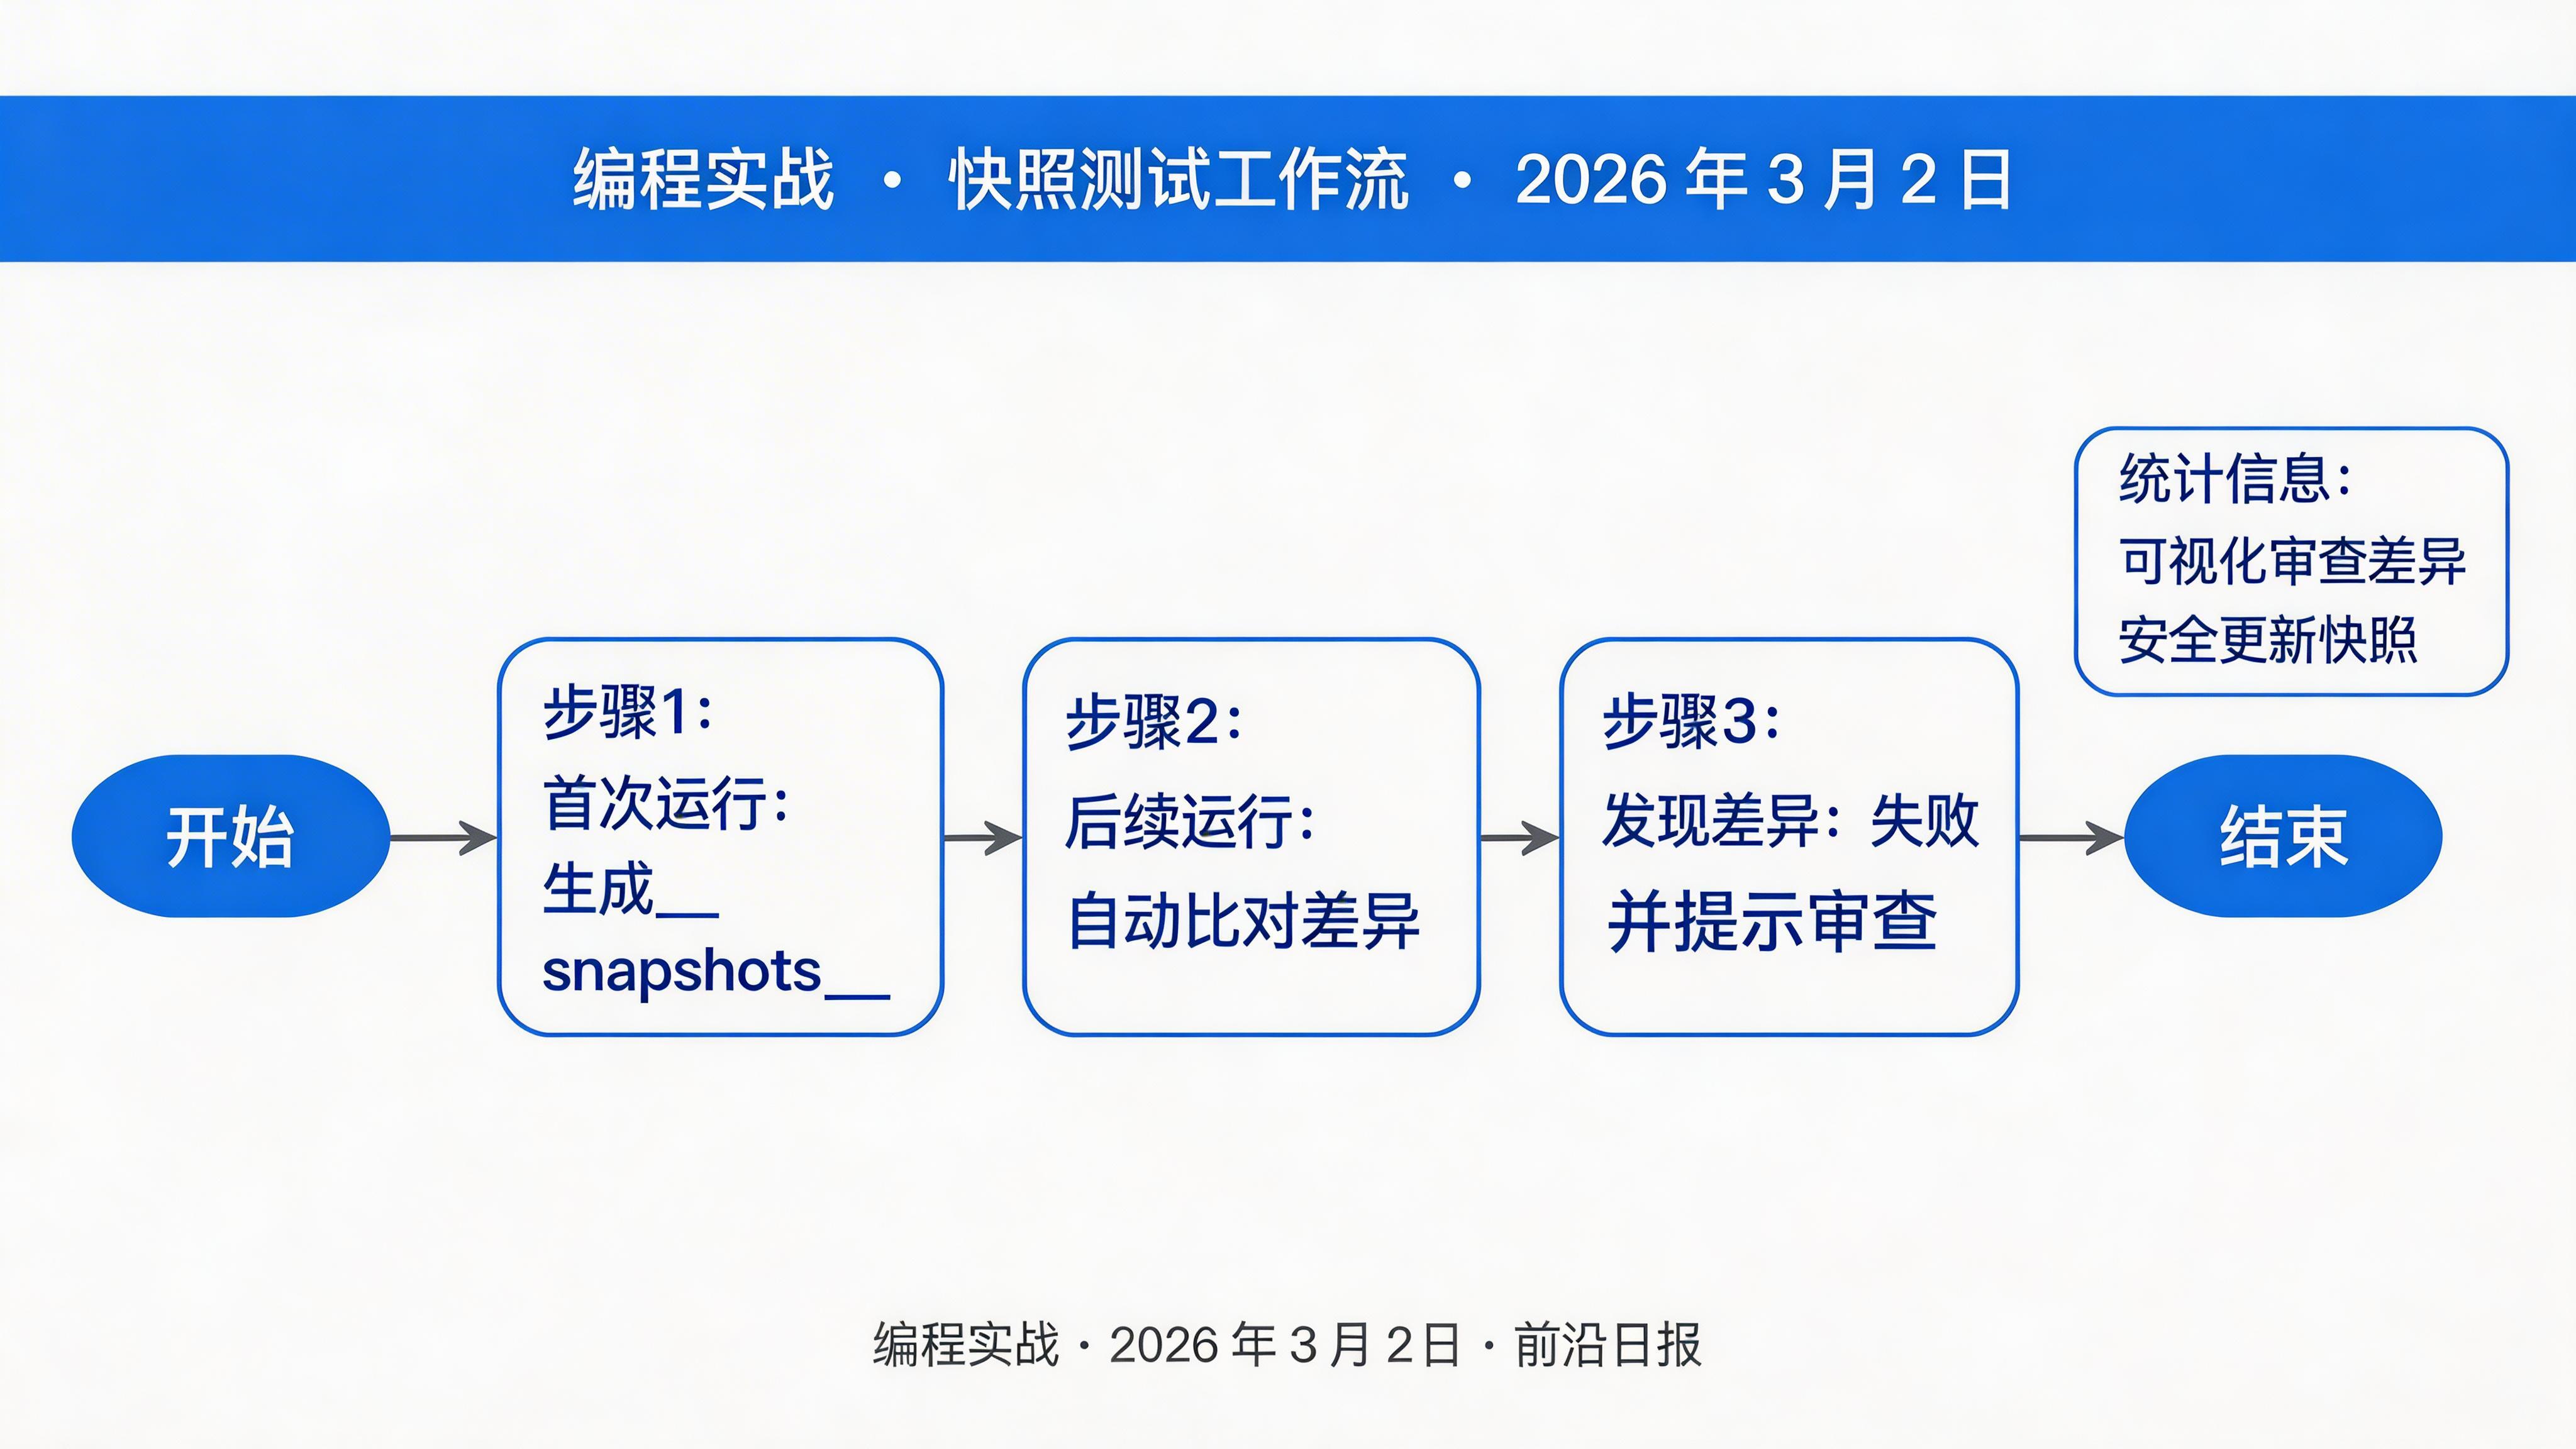
});首次运行会生成快照文件 test/__snapshots__/math.test.ts.snap:
# 运行测试生成快照
bun test

# 查看生成的快照
cat test/__snapshots__/math.test.ts.snap后续运行会自动比对快照,发现差异时失败:
# 更新快照(谨慎使用)
bun test --update-snapshot

# 或交互模式审查差异
bun test --update-snapshot=interactive
警告:不要盲目更新快照!每次更新前仔细审查差异,确保是预期的变更。
5
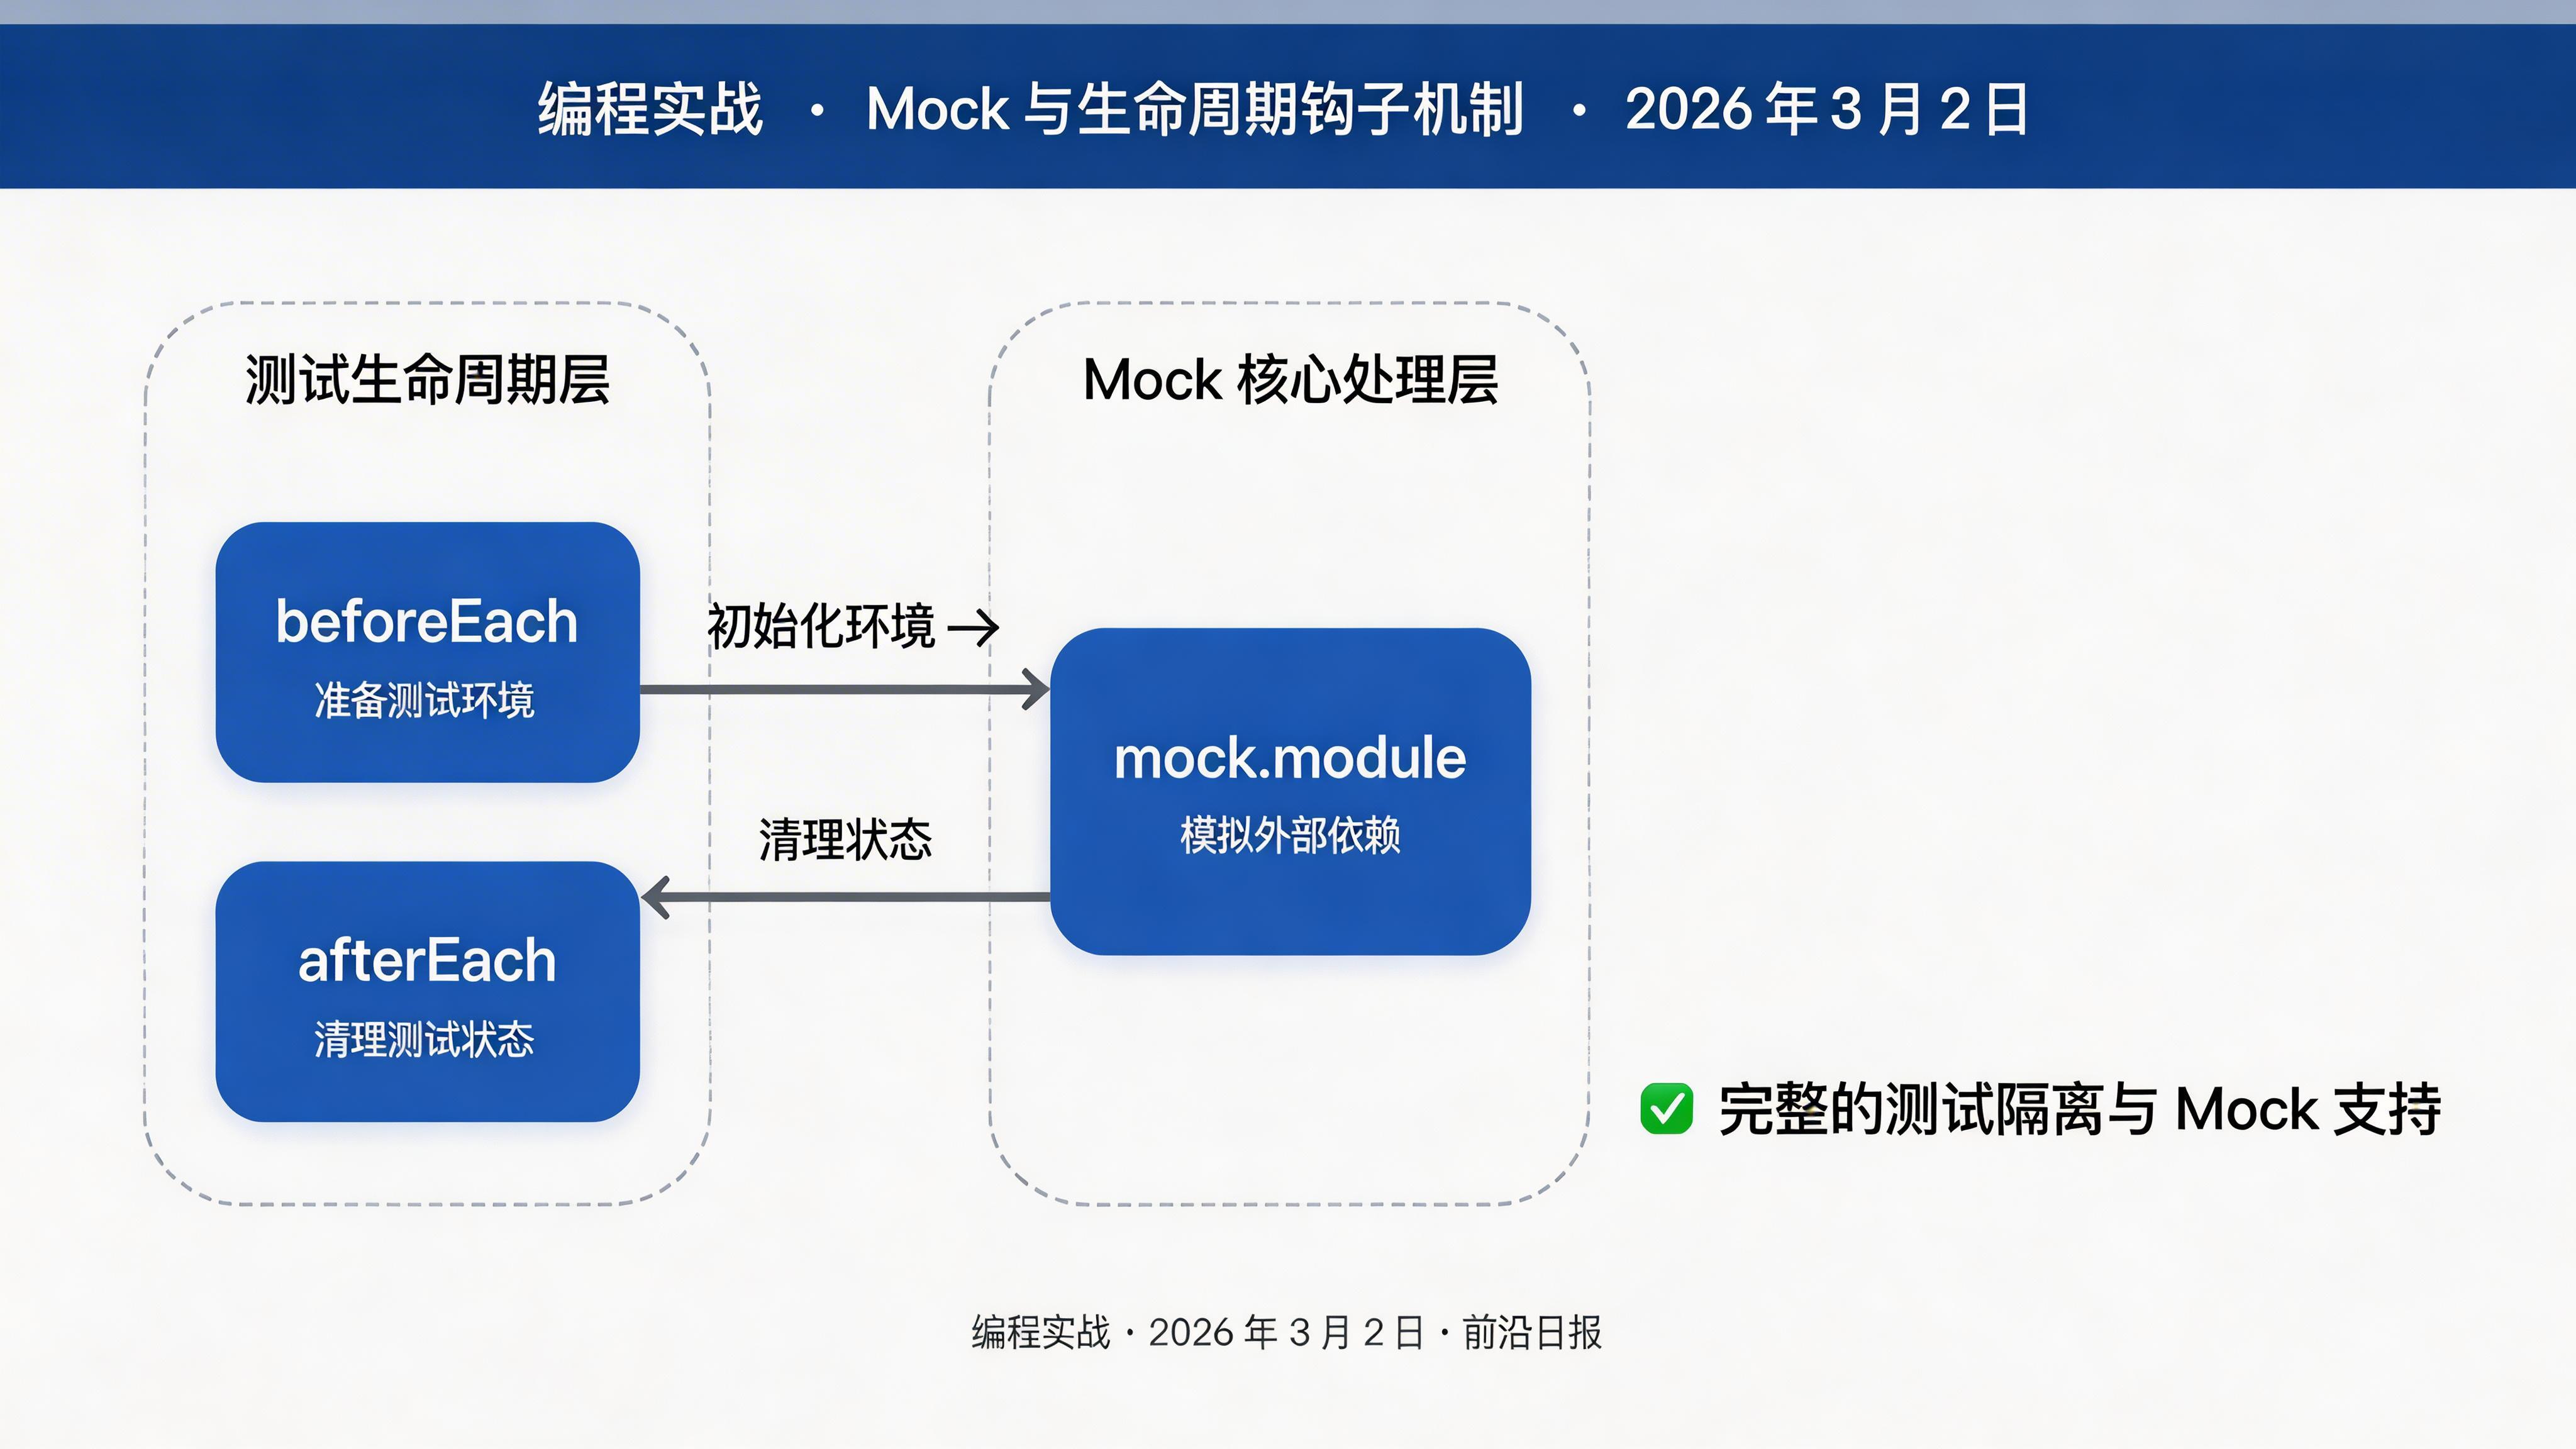
Mock 与生命周期钩子
Bun 提供完整的 Mock 支持和生命周期钩子:
import { test, expect, describe, beforeEach, afterEach, mock } from "bun:test";

describe("API 服务测试", () => {
  // Mock 外部 API
  const fetchMock = mock.fn(() =>
    Promise.resolve({
      ok: true,
      json: () => Promise.resolve({ data: "mocked" })
    })
  );

  // 全局 Mock
  mock.module("undici", () => ({
    fetch: fetchMock
  }));

  // 每个测试前执行
  beforeEach(() => {
    fetchMock.mock.calls = []; // 清空调用记录
    console.log("准备测试环境");
  });

  // 每个测试后执行
  afterEach(() => {
    console.log("清理测试环境");
  });

  test("调用外部 API", async () => {
    const response = await fetchMock("https://api.example.com/data");
    expect(response.ok).toBe(true);
    expect(fetchMock.mock.calls.length).toBe(1);
  });

  // Mock 定时器
  test("定时任务", () => {
    mock.timers.enable();

    const callback = mock.fn();
    setTimeout(callback, 1000);

    mock.timers.tick(1000);
    expect(callback.mock.calls.length).toBe(1);

    mock.timers.disable();
  });
});
6
并发测试与性能优化
Bun 测试支持并发执行,大幅提升大型测试套件速度:
import { test, expect, describe } from "bun:test";

// 标记测试可并发执行
describe("并发测试组", { concurrent: true }, () => {
  test("独立测试 A", async () => {
    await new Promise(r => setTimeout(r, 100));
    expect(1).toBe(1);
  });

  test("独立测试 B", async () => {
    await new Promise(r => setTimeout(r, 100));
    expect(2).toBe(2);
  });

  test("独立测试 C", async () => {
    await new Promise(r => setTimeout(r, 100));
    expect(3).toBe(3);
  });
});

// 跳过特定测试
test.skip("待实现的测试", () => {
  // 暂时跳过
});

// 仅运行此测试(调试用)
test.only("焦点测试", () => {
  // 其他测试会被跳过
});
性能对比命令:
# 串行执行
bun test --no-concurrent

# 并发执行(默认)
bun test --concurrent

# 查看测试耗时
bun test --reporter=verbose --timing
7
CI/CD 集成实战
在 GitHub Actions 中配置 Bun 测试流水线:
# .github/workflows/test.yml
name: Tests

on: [push, pull_request]

jobs:
  test:
    runs-on: ubuntu-latest

    steps:
      - uses: actions/checkout@v4

      - name: Install Bun
        uses: oven-sh/setup-bun@v1
        with:
          bun-version: latest

      - name: Install dependencies
        run: bun install

      - name: Run tests with coverage
        run: bun test --coverage --reporter=junit

      - name: Upload coverage
        uses: codecov/codecov-action@v4
        with:
          files: ./coverage/lcov.info

      - name: Upload test results
        uses: actions/upload-artifact@v4
        if: always()
        with:
          name: test-results
          path: junit.xml
在 bunfig.toml 中配置测试选项:
[test]
# 测试文件匹配模式
root = "test"
pattern = "**/*.test.ts"

# 覆盖率配置
coverage = true
coverage-dir = "./coverage"
coverage-reporters = ["lcov", "text"]

# 超时设置(毫秒)
timeout = 5000

# 并发控制
concurrent = true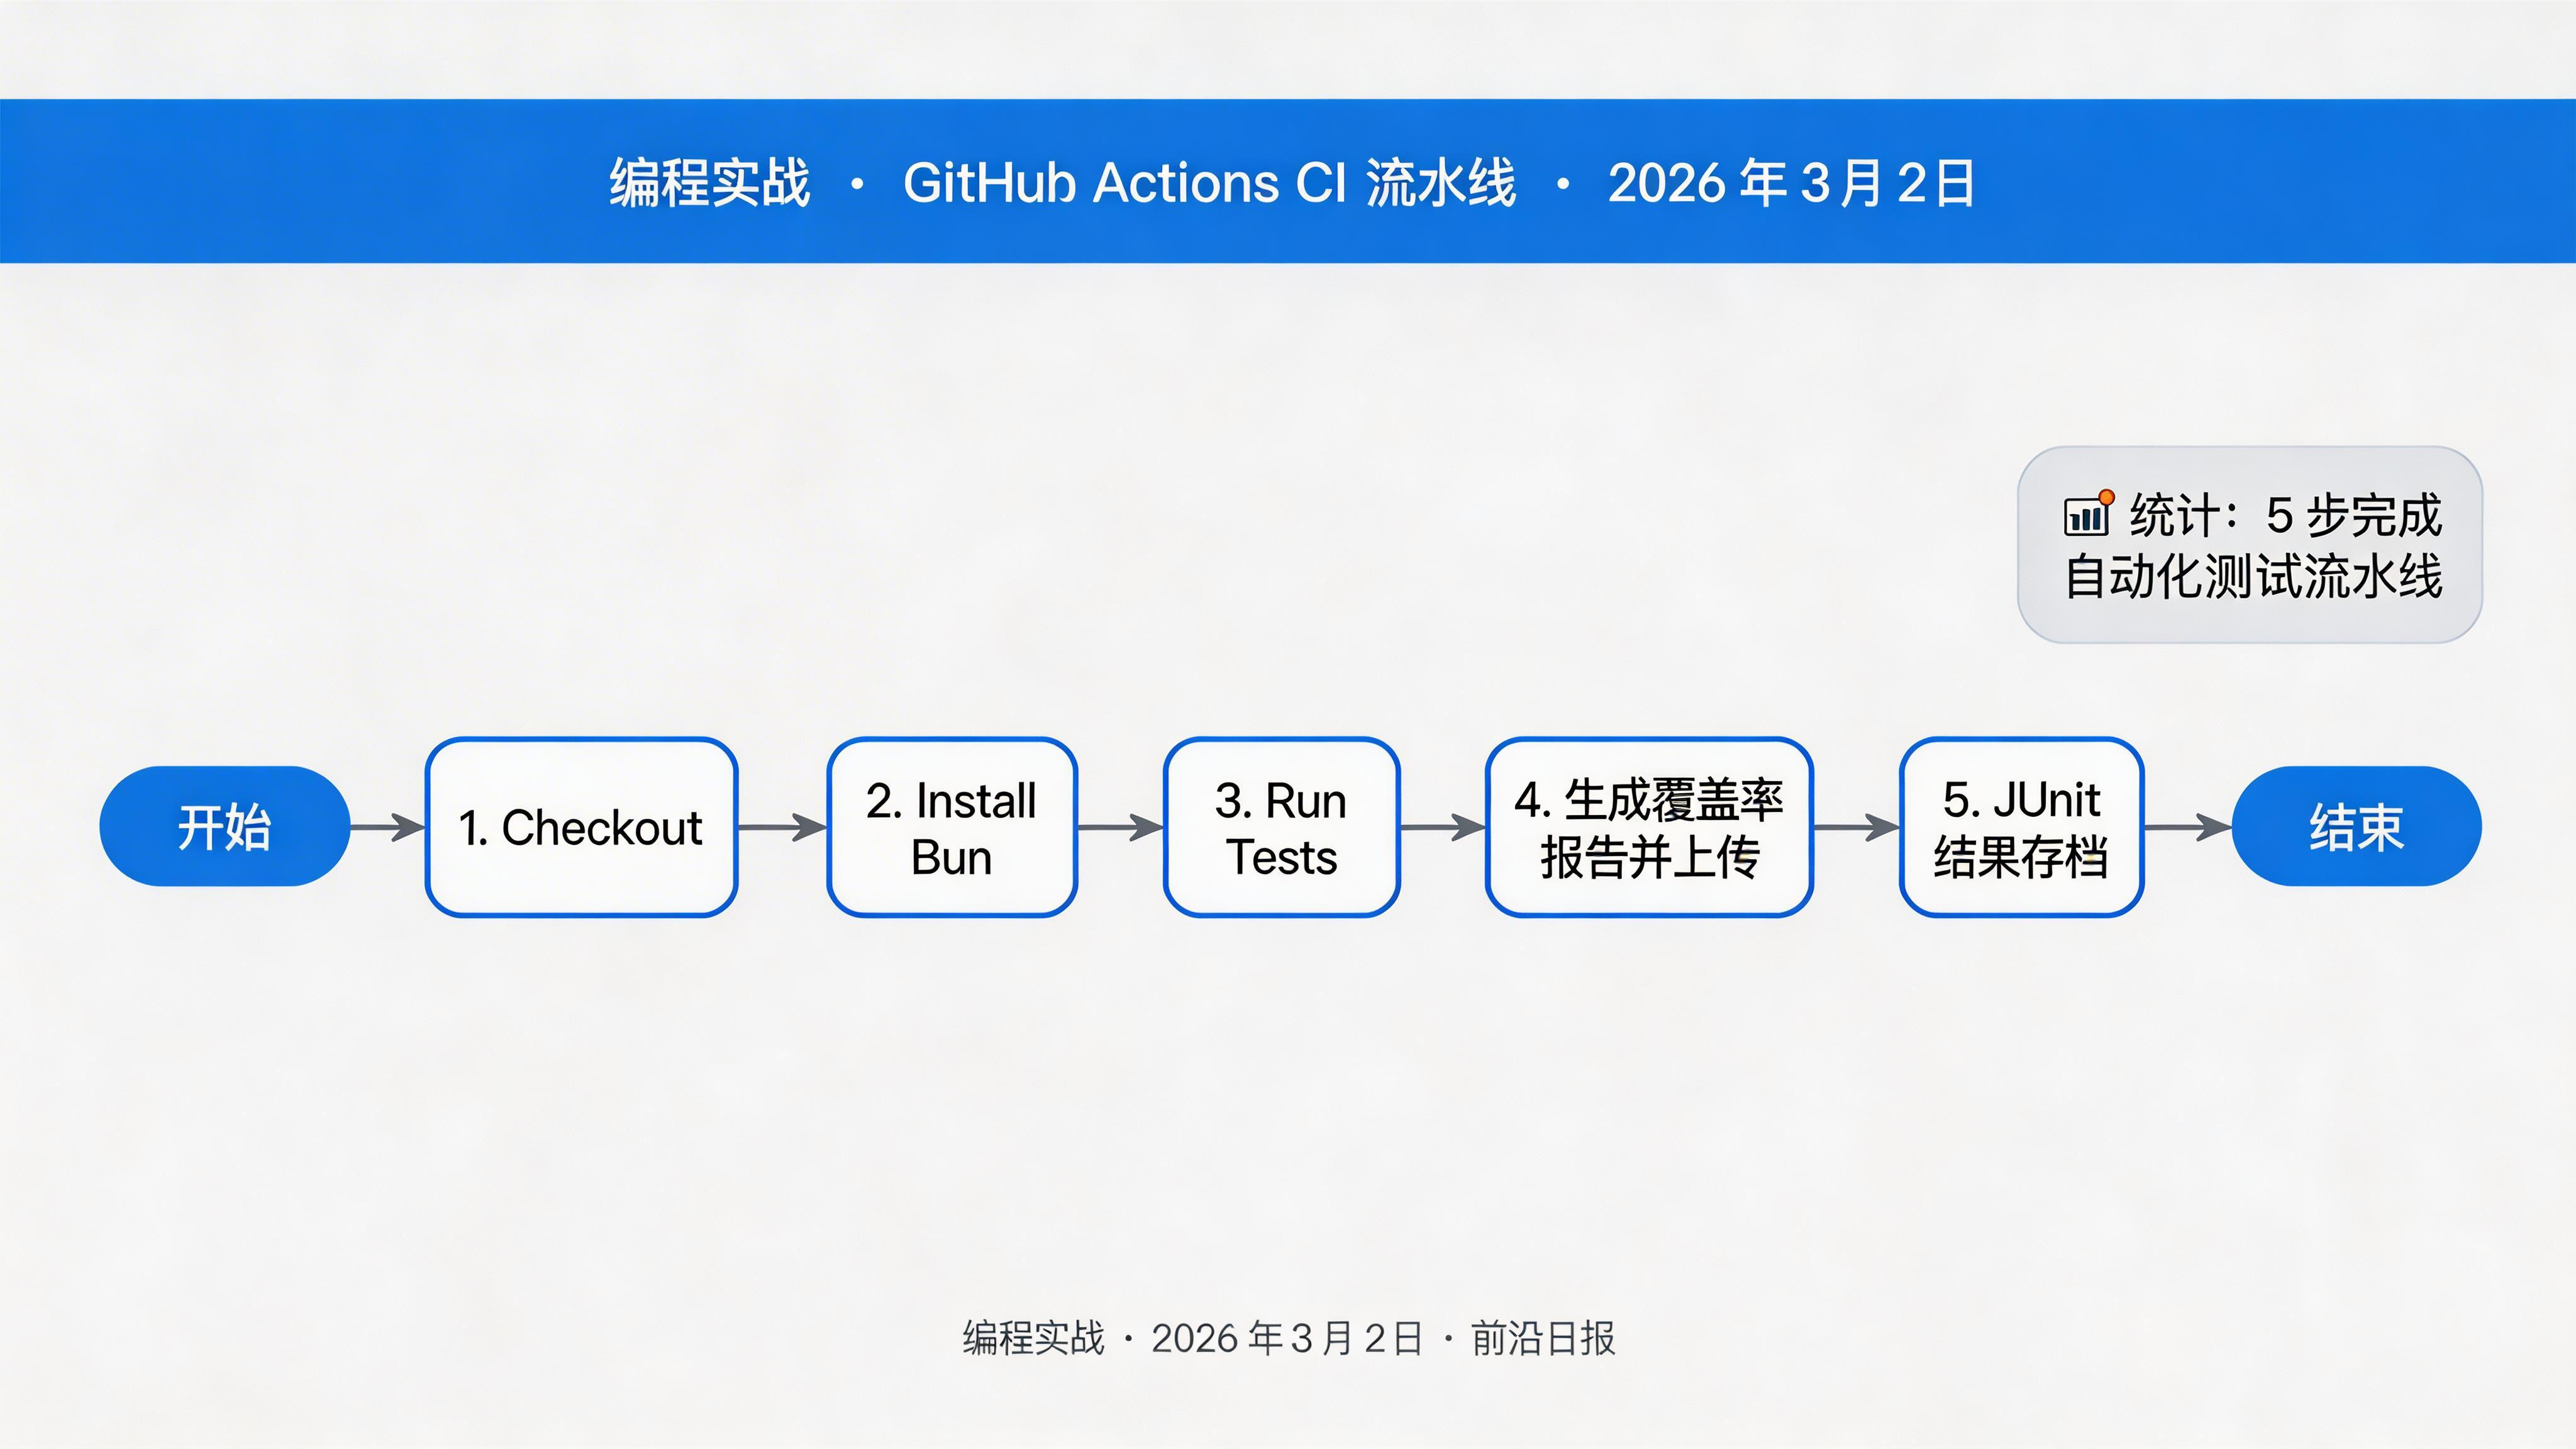
常见问题与解决方案
如何迁移现有的 Jest 测试到 Bun?
Bun 测试 API 与 Jest 高度兼容。大多数情况下只需将
import from '@jest/globals' 改为 import from 'bun:test'。对于复杂场景,使用 mock.module() 替代 jest.mock()。快照测试文件应该提交到 Git 吗?
是的,
__snapshots__/*.snap 文件应该提交。它们是测试的一部分,用于确保输出一致性。但更新快照时要谨慎审查变更。如何处理异步测试超时?
在
bunfig.toml 中调整全局超时,或在单个测试中使用 test('name', fn, { timeout: 10000 }) 设置独立超时。Bun 测试支持浏览器环境吗?
Bun 测试运行在 Node-like 环境。如需浏览器测试,配合 Playwright 或 Vitest 的浏览器模式。
总结
- ✓ Bun 2.0 测试框架零配置启动,原生支持 TypeScript
- ✓ 快照测试工作流与 Jest 兼容,支持交互审查
- ✓ Mock 系统完整,支持函数、模块、定时器模拟
- ✓ 并发测试大幅提升执行速度
- ✓ CI/CD 集成简单,GitHub Actions 原生支持
- ✓ 覆盖率报告开箱即用,支持多种格式输出
下一步:尝试将现有项目的测试迁移到 Bun,体验 10-100 倍的速度提升!