2026 年,AI Agent 已经深度融入开发工作流,但大多数团队仍面临一个痛点:AI 助手无法直接调用内部工具和流水线。你想让 Copilot 自动触发部署、查询构建状态、甚至创建 PR,却需要手动复制粘贴或使用多套系统。
Model Context Protocol(MCP)正是为此而生。作为 2026 年 Anthropic 力推的开放标准,MCP 通过统一的 JSON-RPC 接口,让 AI Agent 能够发现资源、调用工具、执行预定义工作流。
本教程将带你从零搭建 GitHub Actions MCP Server,实现以下能力:
- ✓ 让 GitHub Copilot 直接调用你的自定义 GitHub Actions 工作流
- ✓ 通过 MCP 标准协议暴露 Resources、Tools、Prompts 三类接口
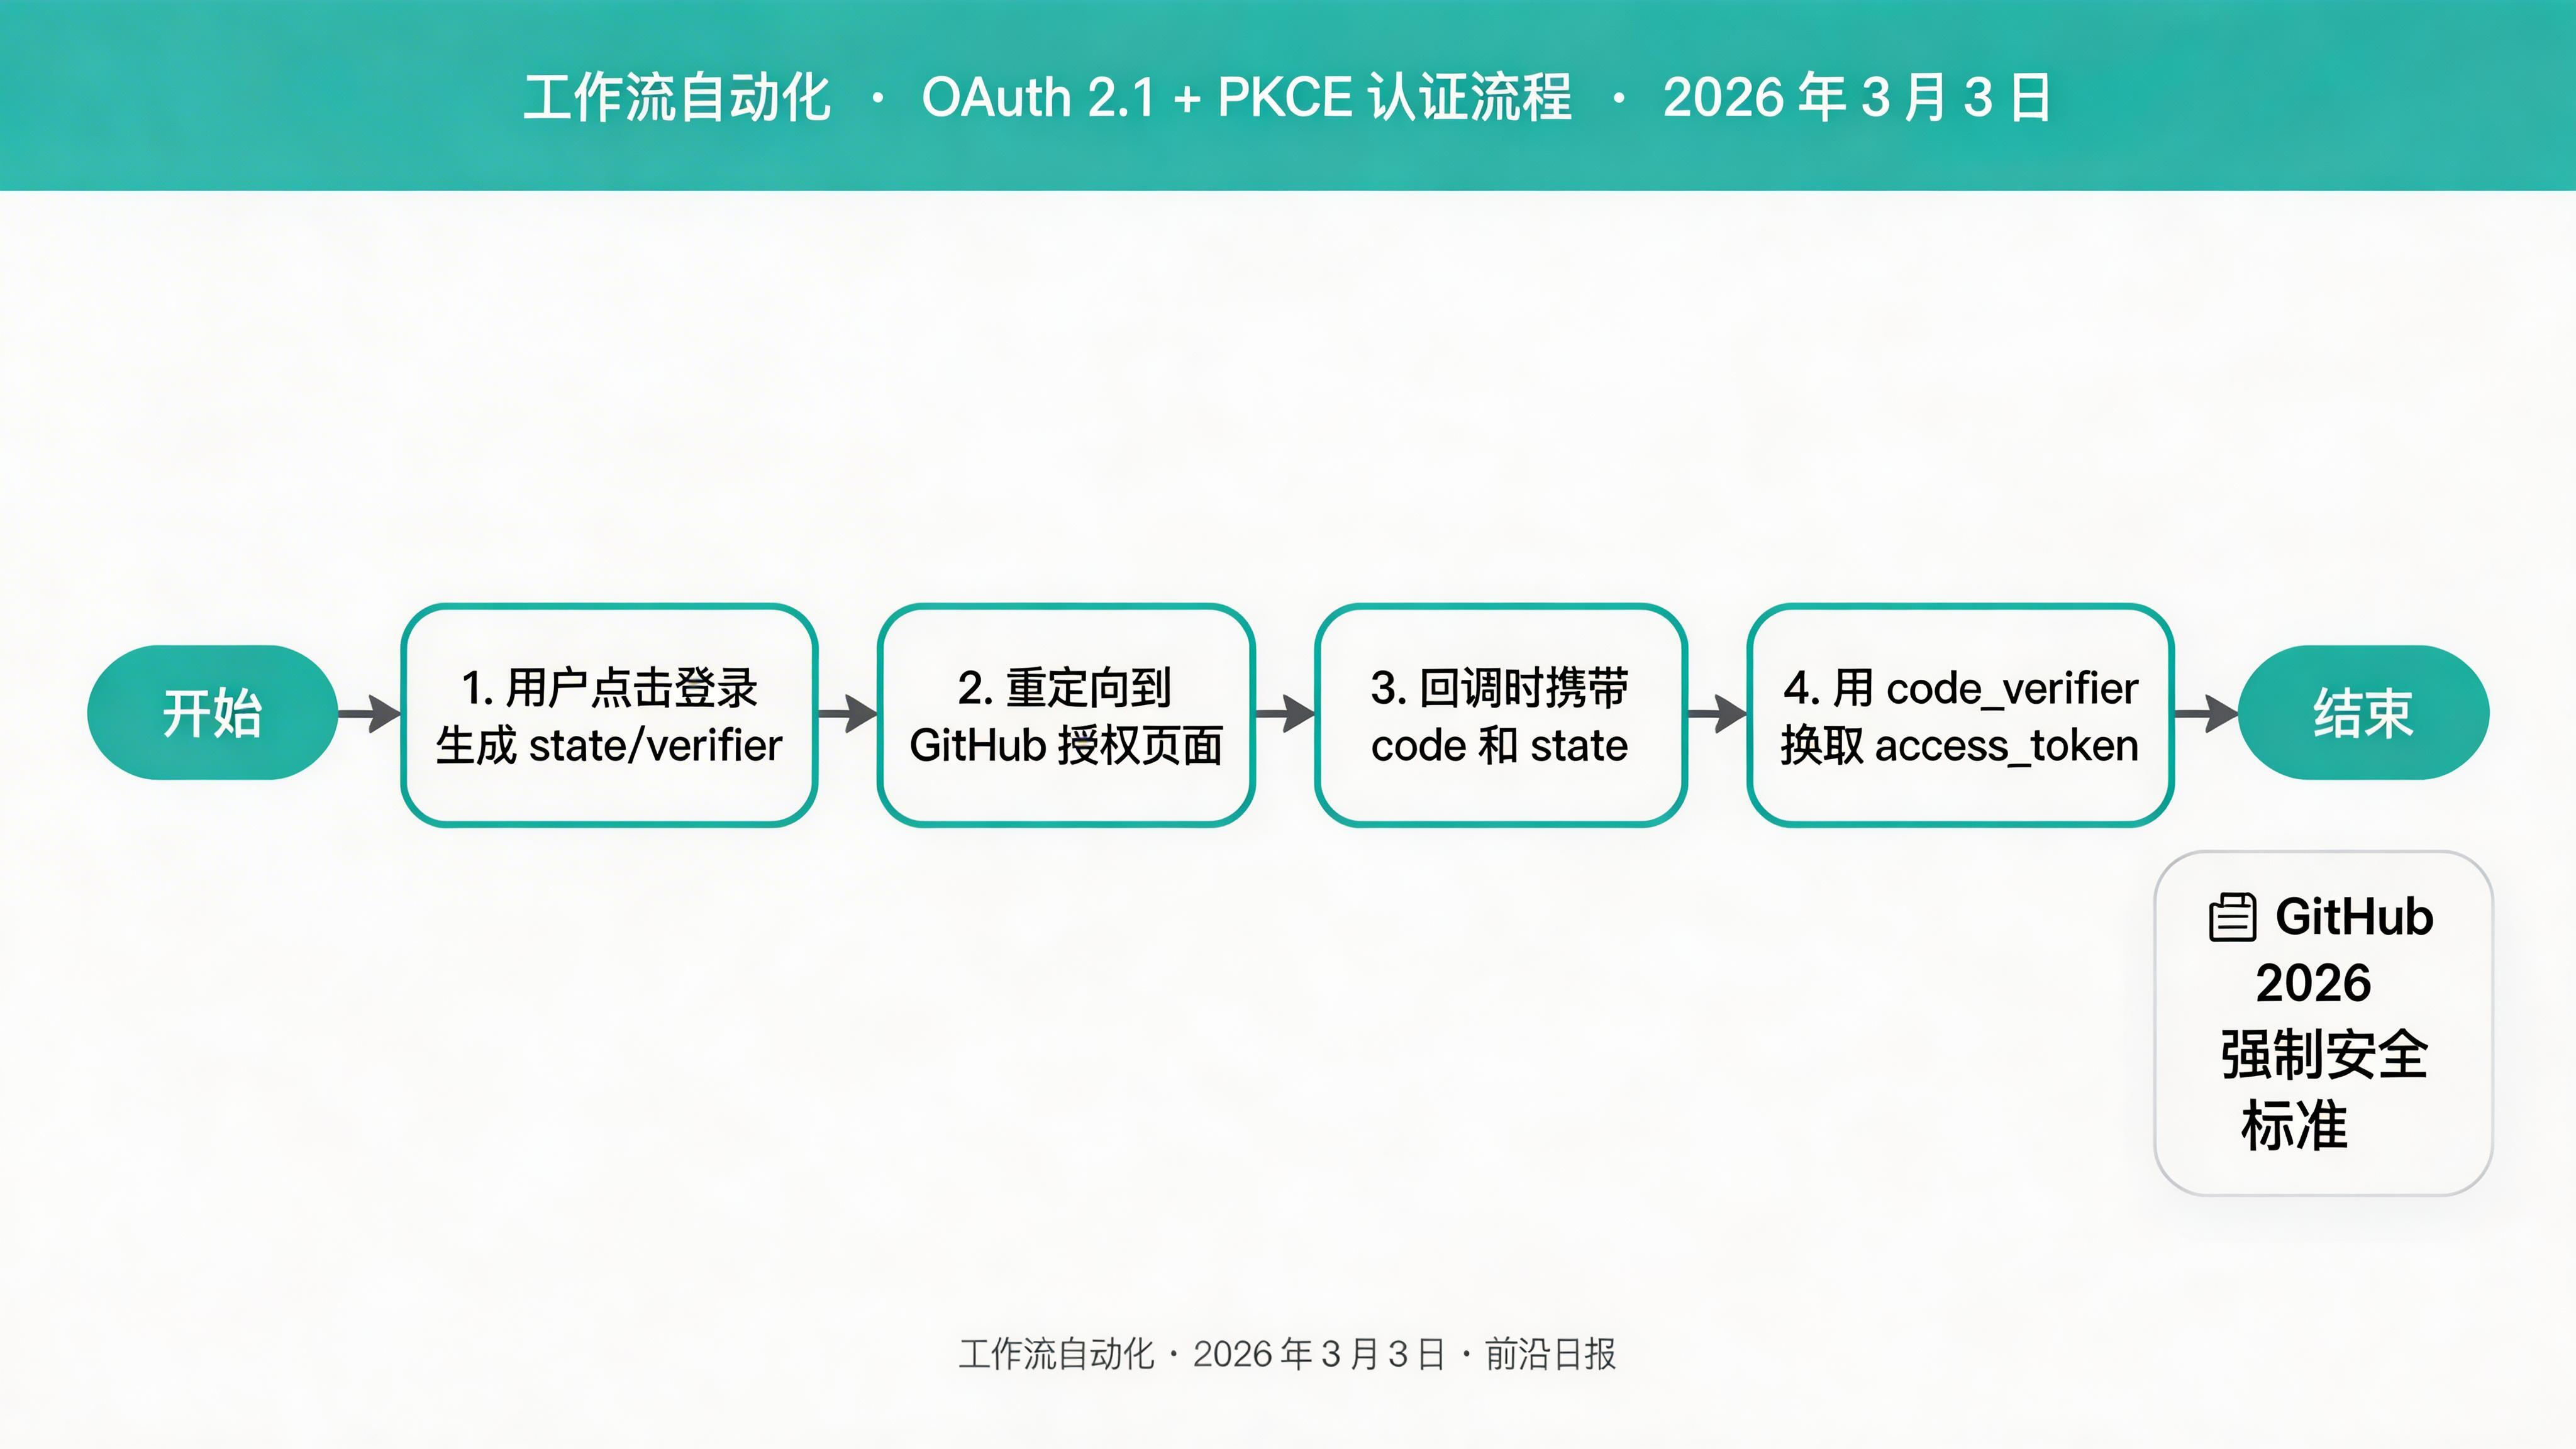
- ✓ 使用 OAuth 2.1 + PKCE 实现企业级认证
- ✓ 构建完整的 CI/CD 流水线,自动发布 MCP Server 到 Registry
核心概念:MCP 架构解析
MCP 采用客户端 - 服务器架构,核心组件如下:

- Resources(资源):提供数据读取能力,如仓库元数据、构建日志
- Tools(工具):可执行的操作,如触发 Workflow、创建 Issue
- Prompts(提示词):预定义的工作流模板,如"代码审查"、"发布检查清单"
传输层支持 stdio(本地进程通信)和 HTTP/SSE(远程服务)两种模式。本教程将实现 HTTP 模式,以支持云端部署。
准备工作:环境与依赖
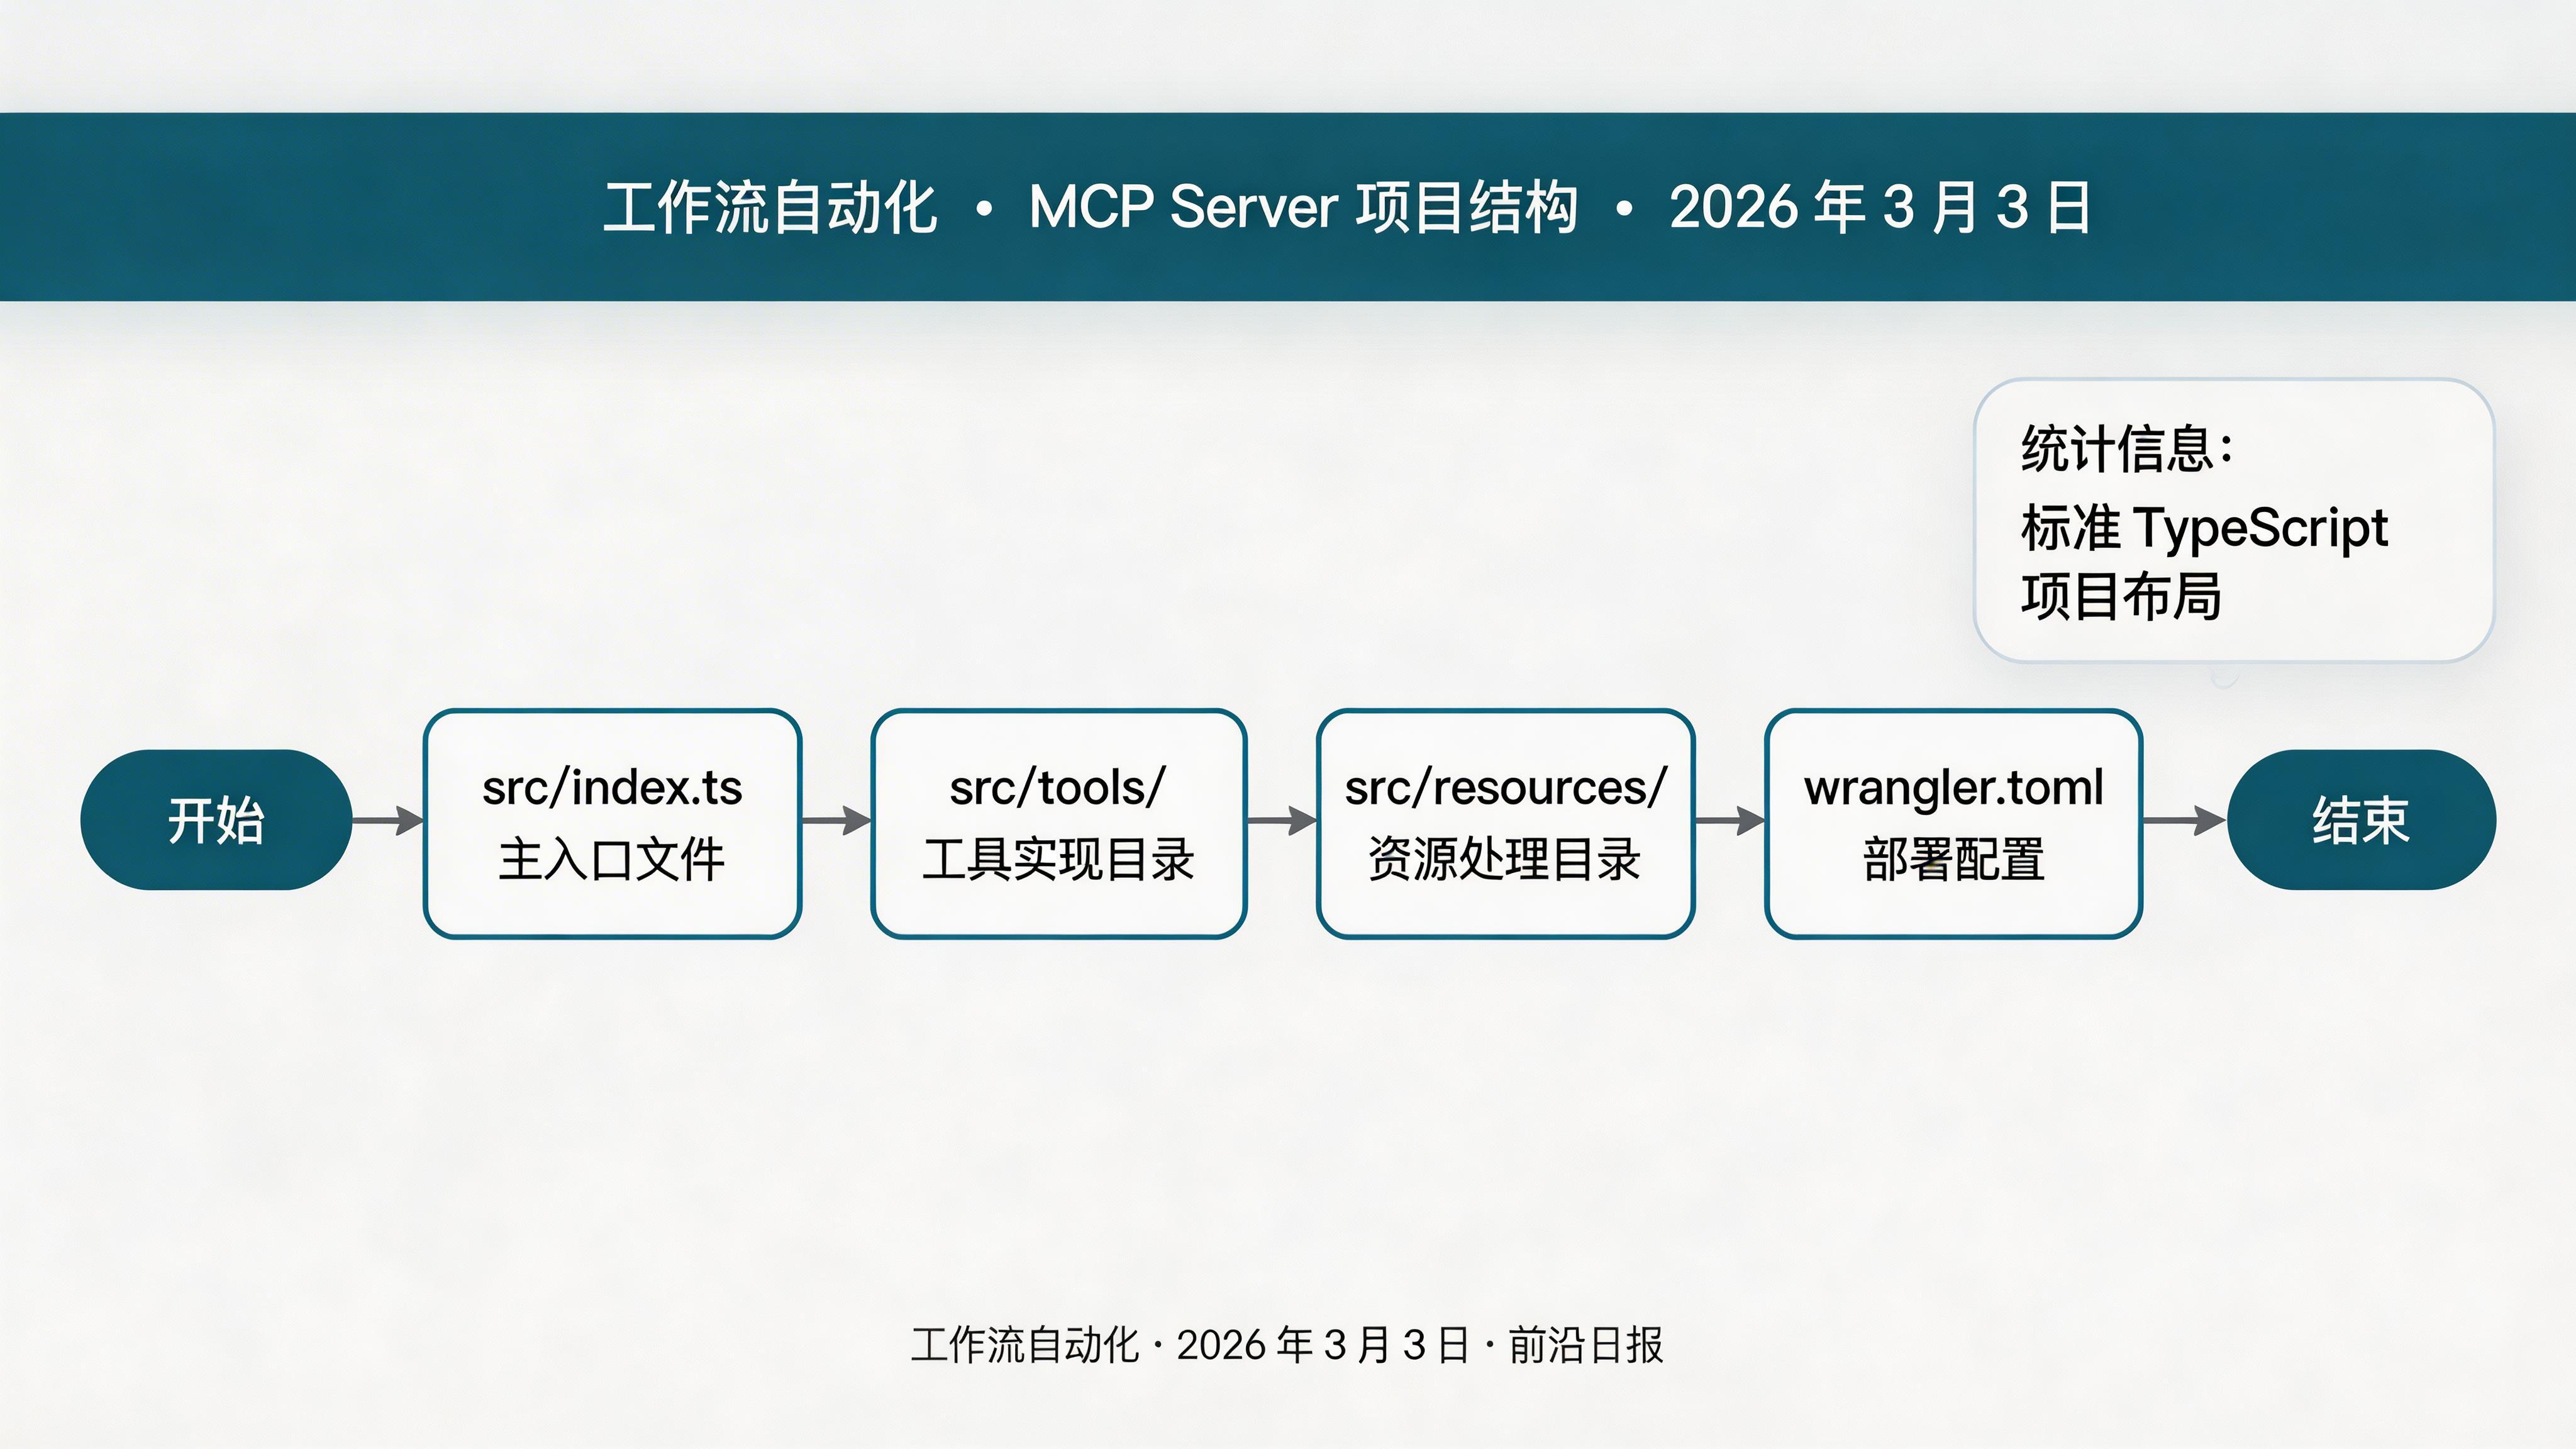
步骤 1:初始化 MCP Server 项目
创建项目结构
mkdir github-actions-mcp-server
cd github-actions-mcp-server
npm init -y
npm install @modelcontextprotocol/sdk express zod
npm install -D typescript @types/node wrangler配置 TypeScript
创建 tsconfig.json:
{
  "compilerOptions": {
    "target": "ES2022",
    "module": "ESNext",
    "moduleResolution": "bundler",
    "outDir": "./dist",
    "rootDir": "./src",
    "strict": true,
    "esModuleInterop": true,
    "skipLibCheck": true
  },
  "include": ["src/**/*"]
}
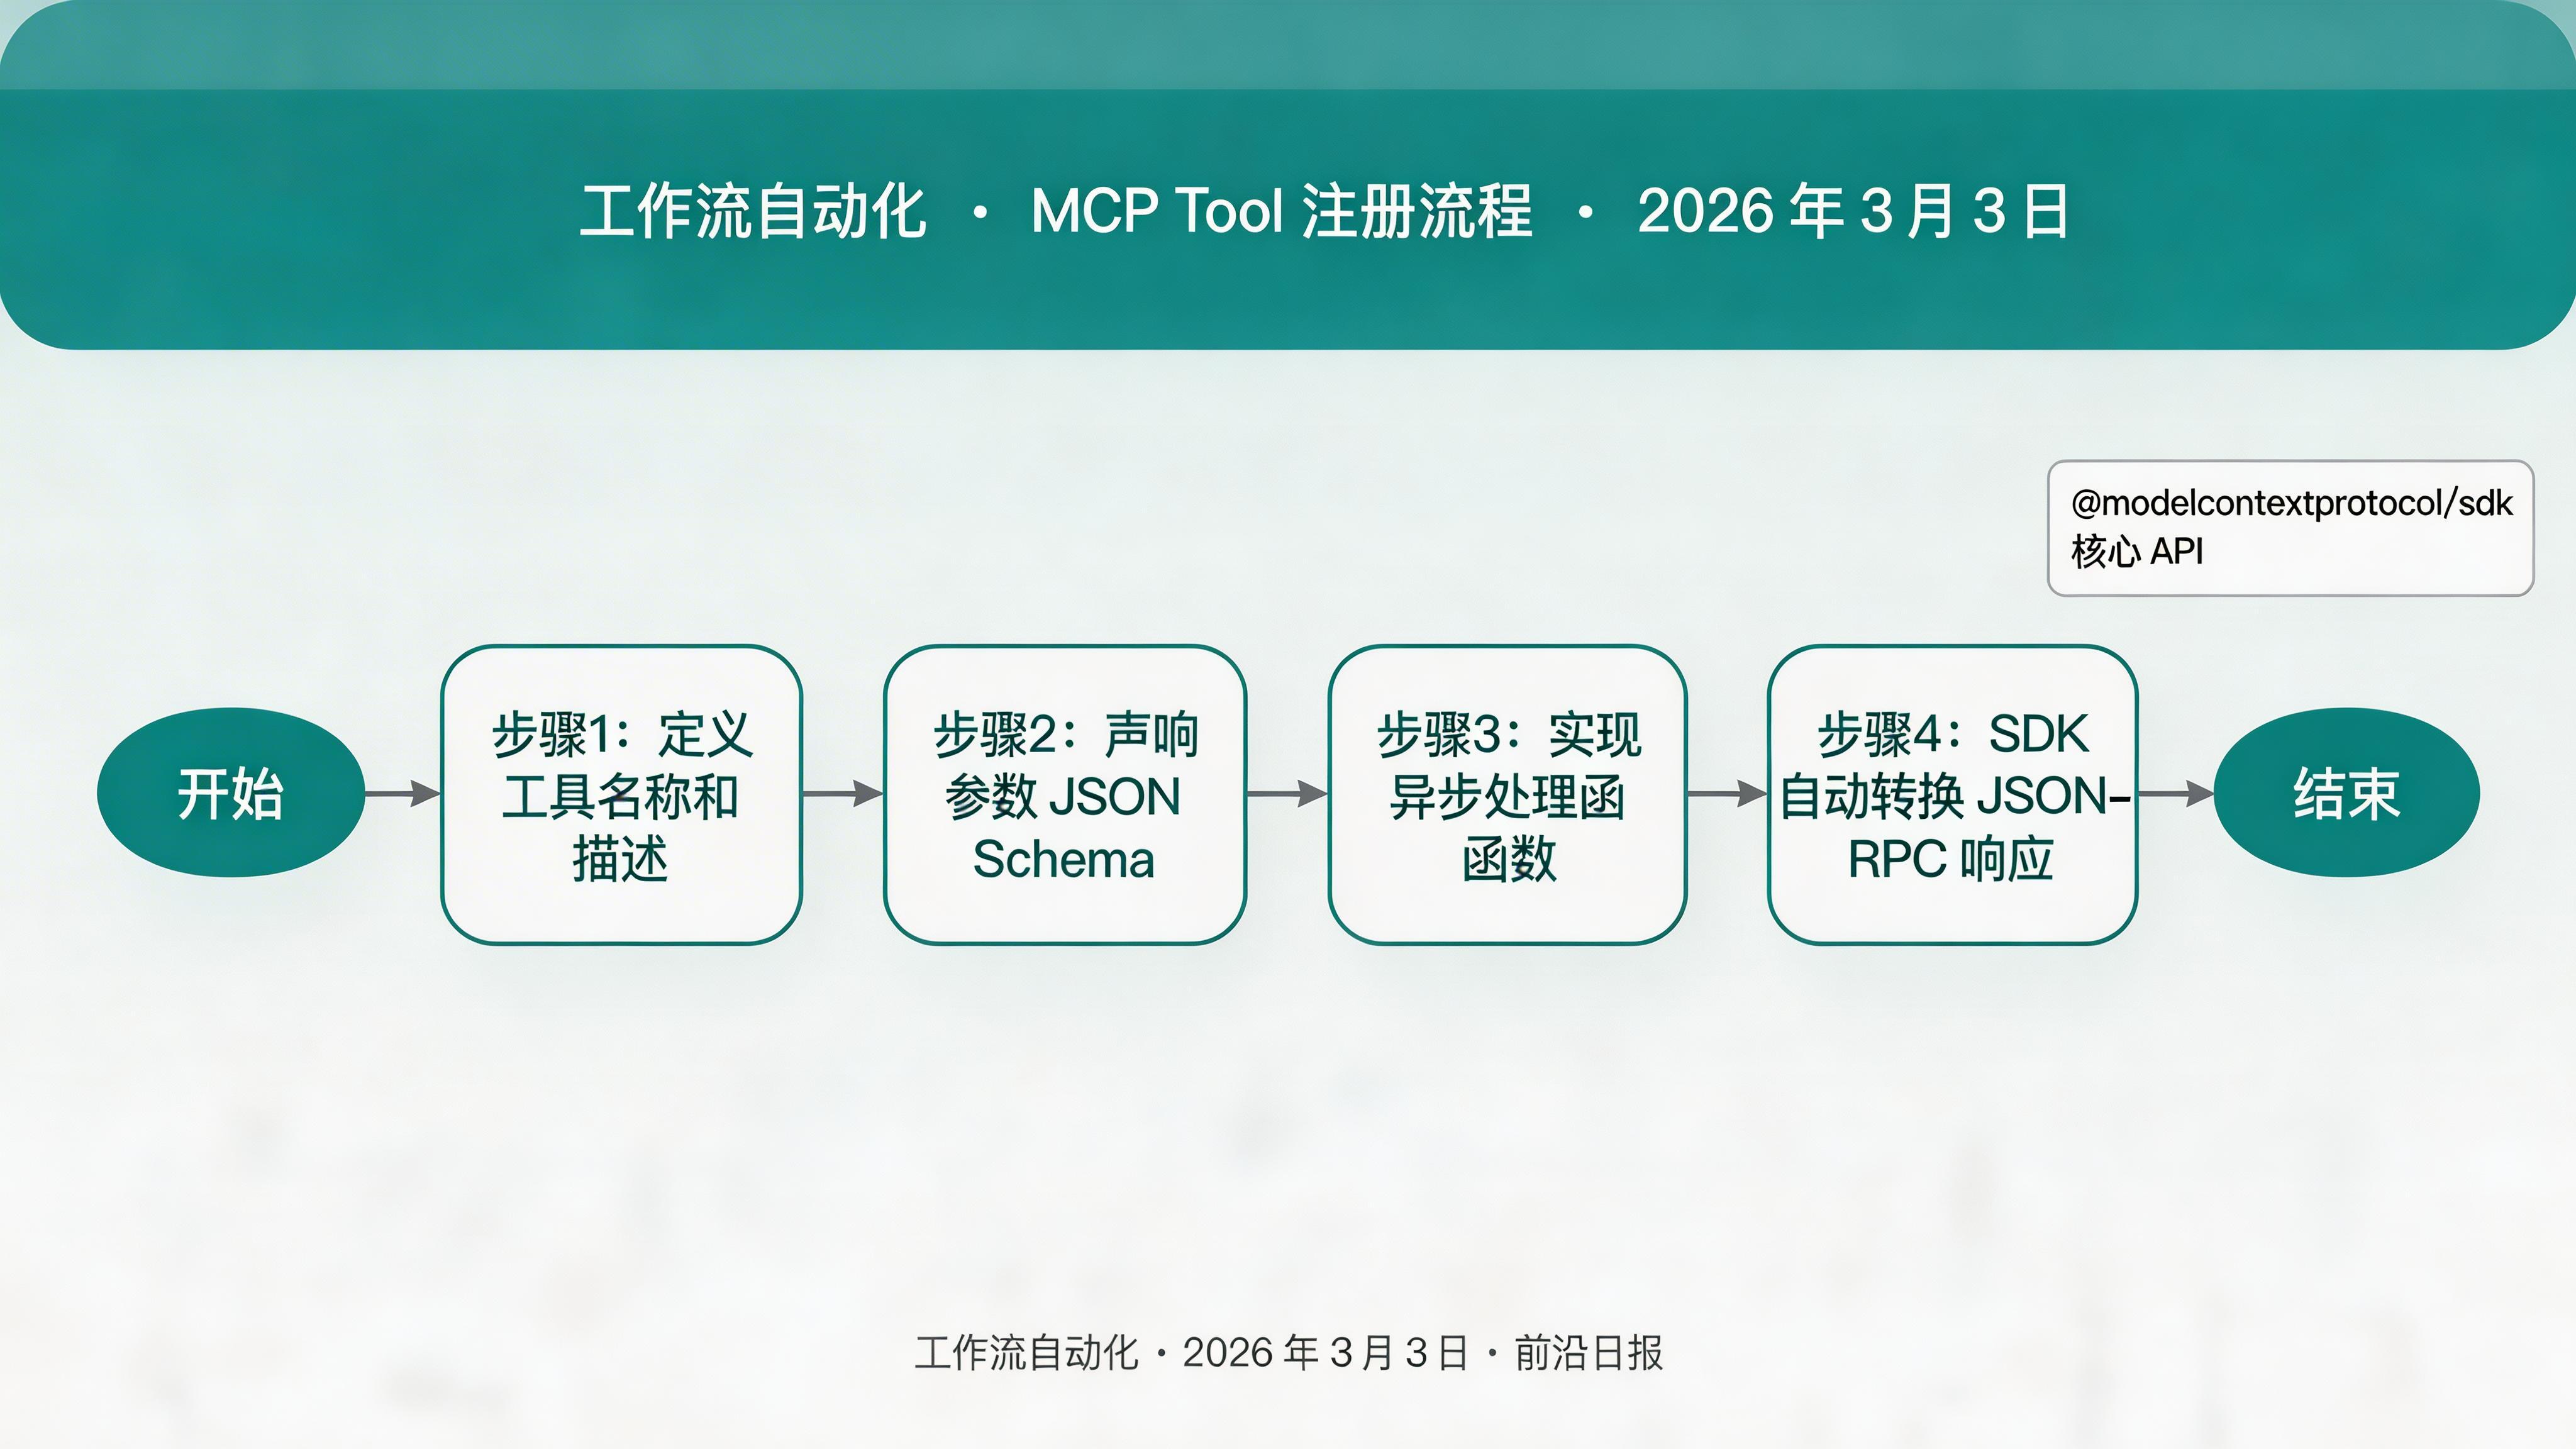
步骤 2:实现 MCP Server 核心逻辑
创建 Server 入口
src/index.ts 实现 MCP 协议处理器:
import { McpServer } from '@modelcontextprotocol/sdk/server/mcp.js';
import { StreamableHTTPServerTransport } from '@modelcontextprotocol/sdk/server/streamableHttp.js';
import express from 'express';

const server = new McpServer({
  name: 'github-actions-mcp',
  version: '1.0.0',
  description: 'GitHub Actions automation tools for AI agents'
});

// 注册 Tools
server.tool(
  'trigger_workflow',
  'Trigger a GitHub Actions workflow run',
  {
    owner: { type: 'string', description: 'Repository owner' },
    repo: { type: 'string', description: 'Repository name' },
    workflow_id: { type: 'string', description: 'Workflow file path or ID' },
    ref: { type: 'string', description: 'Git reference (branch/tag)', default: 'main' },
    inputs: { type: 'object', description: 'Workflow input parameters', optional: true }
  },
  async ({ owner, repo, workflow_id, ref, inputs }) => {
    // 调用 GitHub API 触发 Workflow
    const response = await fetch(
      `https://api.github.com/repos/${owner}/${repo}/actions/workflows/${workflow_id}/dispatches`,
      {
        method: 'POST',
        headers: {
          'Authorization': `Bearer ${process.env.GITHUB_TOKEN}`,
          'Accept': 'application/vnd.github+json'
        },
        body: JSON.stringify({ ref, inputs: inputs || {} })
      }
    );
    return { success: response.ok, run_id: response.headers.get('x-run-id') };
  }
);

// 启动 HTTP 服务器
const app = express();
const transport = new StreamableHTTPServerTransport({ endpoint: '/mcp' });
await server.connect(transport);
app.use('/mcp', transport);
app.listen(3000, () => console.log('MCP Server running on http://localhost:3000/mcp'));注册更多工具
在 src/tools/ 目录下实现常用操作:
// src/tools/list-workflows.ts
server.tool(
  'list_workflows',
  'List all workflows in a repository',
  { owner: { type: 'string' }, repo: { type: 'string' } },
  async ({ owner, repo }) => {
    const res = await fetch(
      `https://api.github.com/repos/${owner}/${repo}/actions/workflows`,
      { headers: { 'Authorization': `Bearer ${process.env.GITHUB_TOKEN}` } }
    );
    return (await res.json()).workflows.map((w: any) => ({
      id: w.id,
      name: w.name,
      path: w.path,
      state: w.state
    }));
  }
);
步骤 3:实现 OAuth 认证
配置 GitHub OAuth App
访问 GitHub Settings → Developer settings → OAuth Apps → New OAuth App:
- Application name:
GitHub Actions MCP Server - Homepage URL:
https://your-domain.com - Authorization callback URL:
https://your-domain.com/callback
记录 Client ID 和 Client Secret。
实现 OAuth 流程
// src/auth.ts
import express from 'express';
const app = express();

const GITHUB_CLIENT_ID = process.env.GITHUB_CLIENT_ID!;
const GITHUB_CLIENT_SECRET = process.env.GITHUB_CLIENT_SECRET!;

app.get('/auth', (req, res) => {
  const state = crypto.randomBytes(16).toString('hex');
  res.cookie('oauth_state', state, { httpOnly: true });
  const url = new URL('https://github.com/login/oauth/authorize');
  url.searchParams.set('client_id', GITHUB_CLIENT_ID);
  url.searchParams.set('redirect_uri', 'https://your-domain.com/callback');
  url.searchParams.set('state', state);
  url.searchParams.set('scope', 'repo workflow');
  res.redirect(url.toString());
});

app.get('/callback', async (req, res) => {
  const { code, state } = req.query;
  if (state !== req.cookies.oauth_state) {
    return res.status(400).send('Invalid state');
  }
  const tokenRes = await fetch('https://github.com/login/oauth/access_token', {
    method: 'POST',
    headers: { 'Content-Type': 'application/json', 'Accept': 'application/json' },
    body: JSON.stringify({
      client_id: GITHUB_CLIENT_ID,
      client_secret: GITHUB_CLIENT_SECRET,
      code,
      redirect_uri: 'https://your-domain.com/callback'
    })
  });
  const { access_token } = await tokenRes.json();
  // 存储 token 到 session
  res.redirect('/success');
});
code_challenge 和 code_verifier。
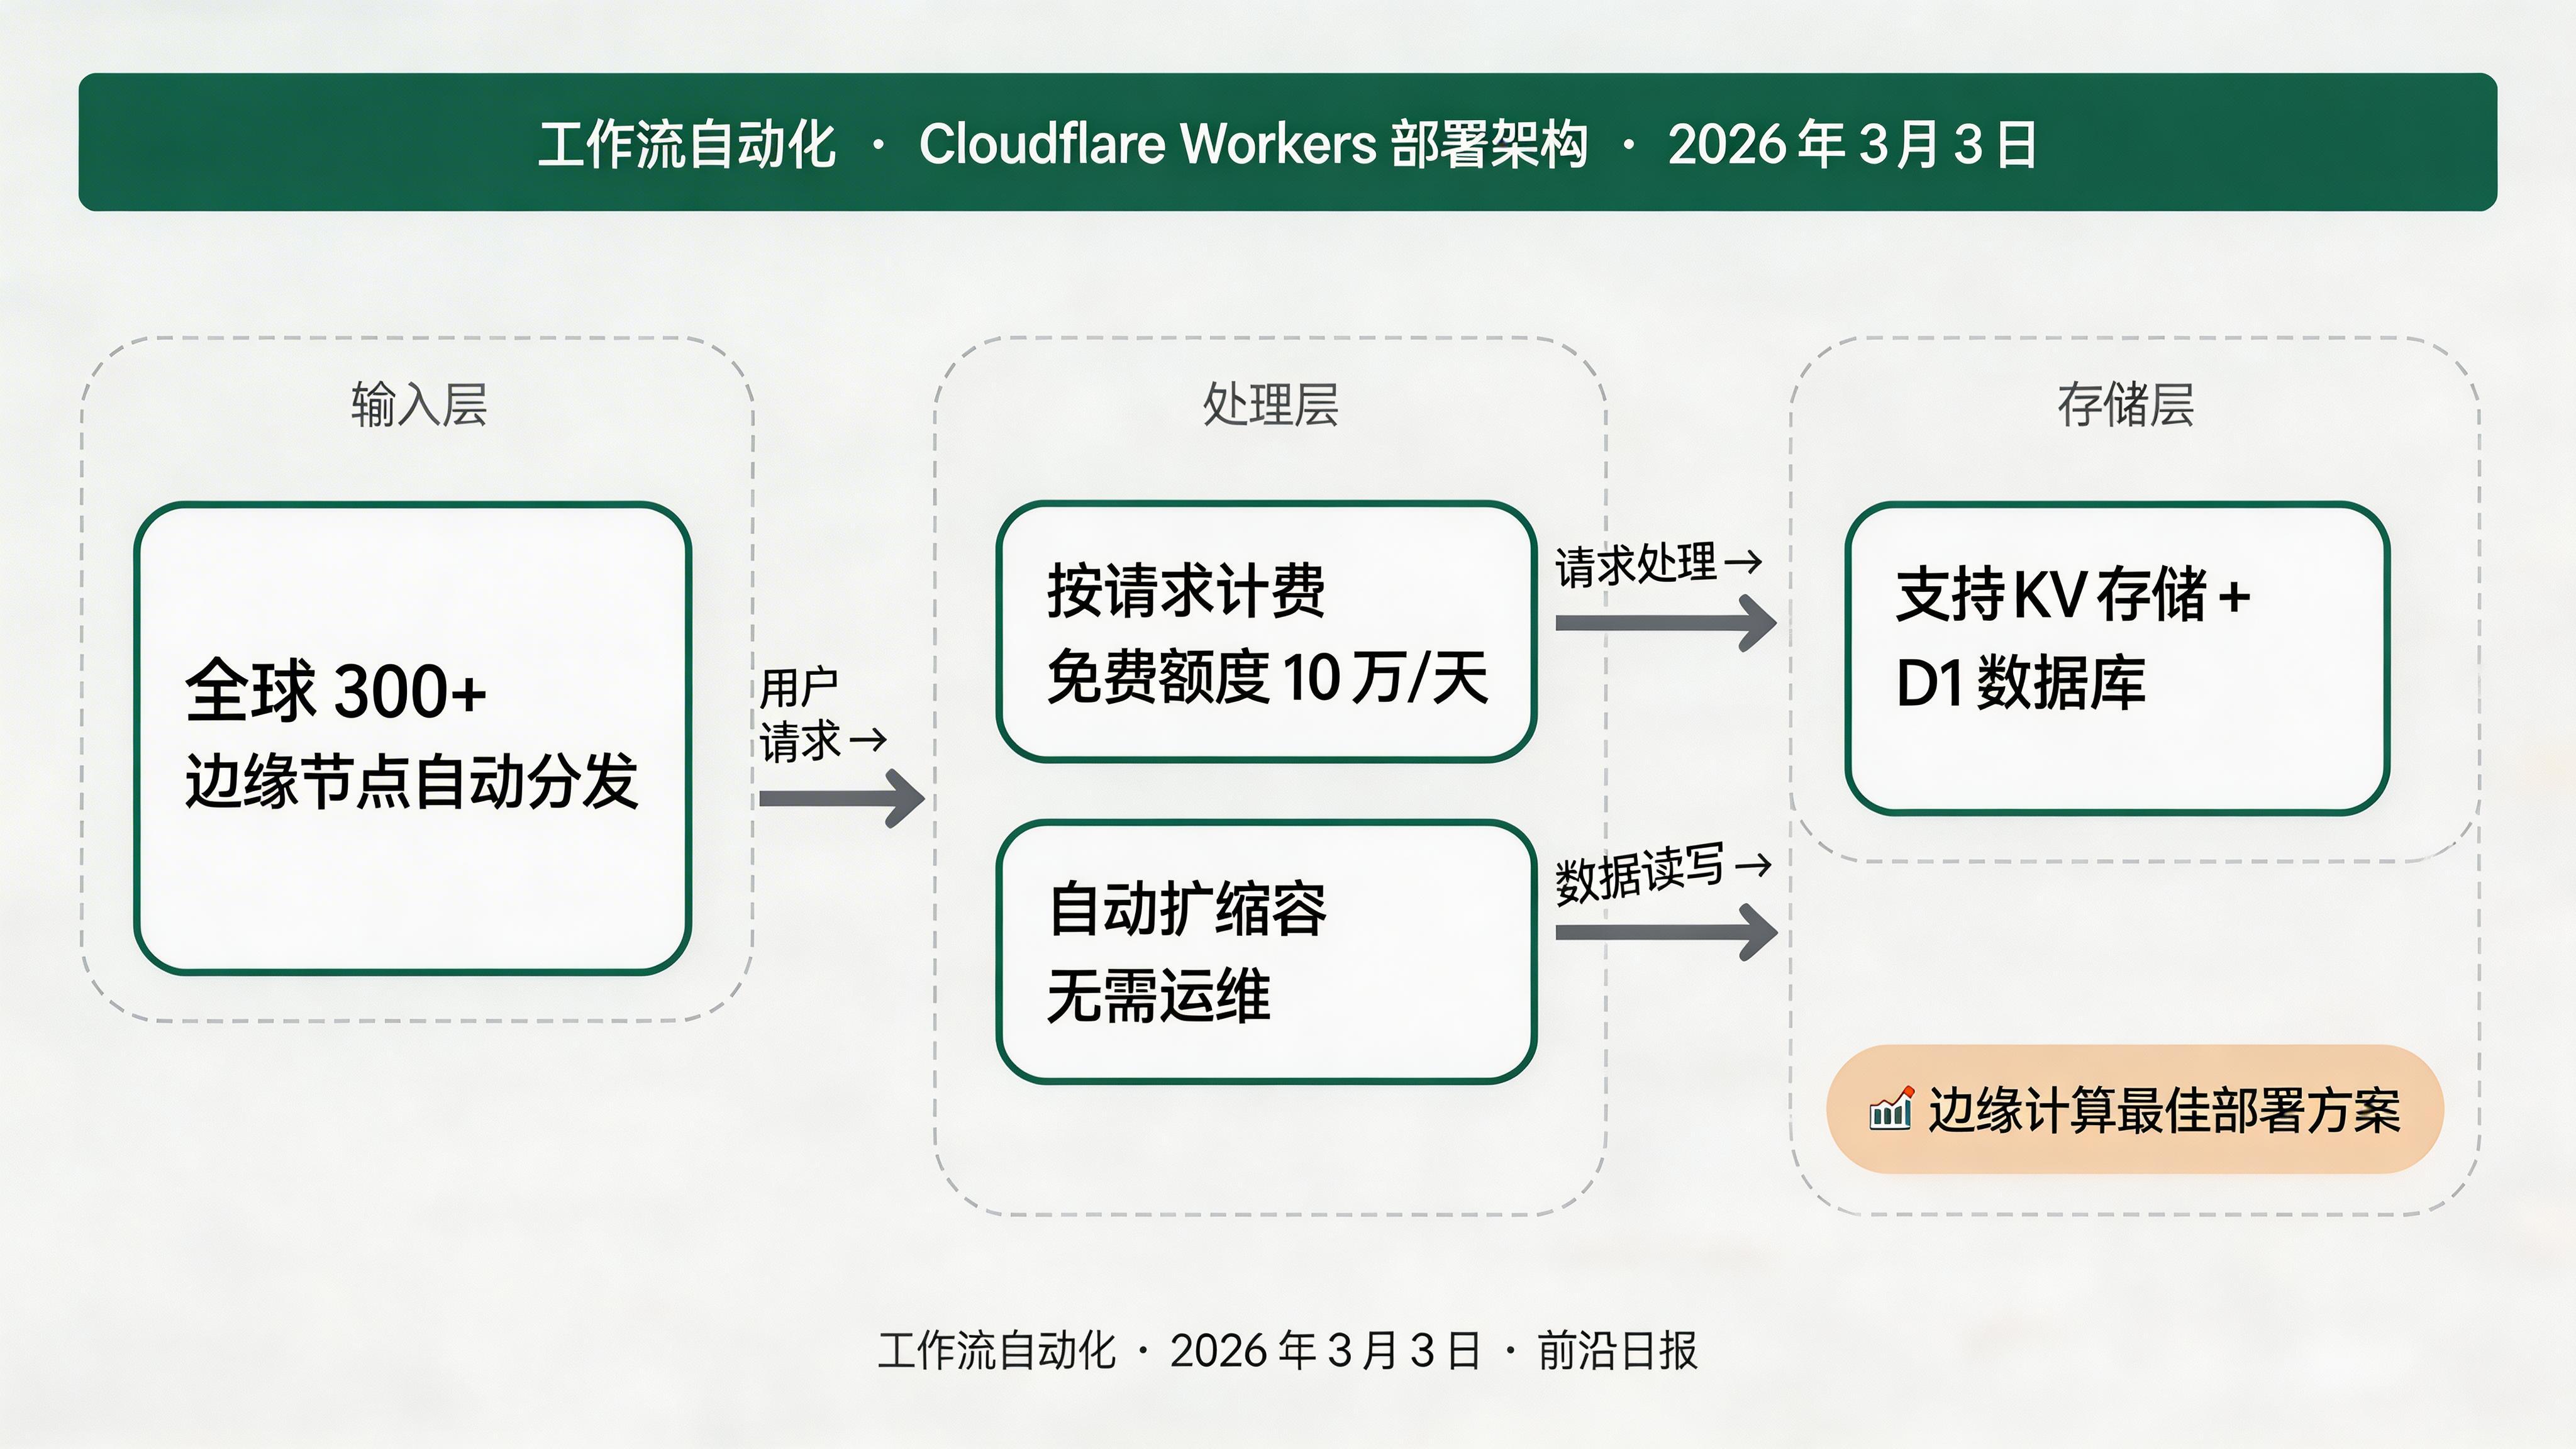
步骤 4:部署到 Cloudflare Workers
配置 Wrangler
创建 wrangler.toml:
name = "github-actions-mcp"
main = "src/index.ts"
compatibility_date = "2026-03-03"
compatibility_flags = ["nodejs_compat"]

[vars]
GITHUB_TOKEN = "your_github_token"

# 可选:绑定 KV 存储用于 Session
[[kv_namespaces]]
binding = "SESSION_STORE"
id = "your-kv-namespace-id"适配 Workers 运行时
Cloudflare Workers 不支持 Express,需要改用原生 fetch 处理:
// src/index.ts (Workers 版本)
import { McpServer } from '@modelcontextprotocol/sdk/server/mcp.js';
import { StreamableHTTPServerTransport } from '@modelcontextprotocol/sdk/server/streamableHttp.js';

export default {
  async fetch(request, env): Promise {
    const url = new URL(request.url);
    if (url.pathname === '/mcp') {
      const transport = new StreamableHTTPServerTransport();
      const server = new McpServer({ /* ... */ });
      await server.connect(transport);
      return transport.handleRequest(request);
    }
    return new Response('Not Found', { status: 404 });
  }
}; 部署命令
npx wrangler deploy部署成功后,MCP Server 地址为 https://github-actions-mcp.your-subdomain.workers.dev/mcp
步骤 5:配置 MCP Registry 自动发布
创建发布工作流
.github/workflows/publish-mcp.yml:
name: Publish to MCP Registry

on:
  push:
    tags: ["v*"]

jobs:
  publish:
    runs-on: ubuntu-latest
    permissions:
      id-token: write
    steps:
      - name: Checkout code
        uses: actions/checkout@v5

      - name: Set up Node.js
        uses: actions/setup-node@v5
        with:
          node-version: "lts/*"

      - name: Install dependencies
        run: npm ci

      - name: Build
        run: npm run build

      - name: Publish to MCP Registry
        run: |
          npm install -g @modelcontextprotocol/publisher
          mcp publisher login dns --domain your-domain.com --private-key ${{ secrets.MCP_PRIVATE_KEY }}
mcp publisher publish添加密钥
在 GitHub 仓库 Settings → Secrets and variables → Actions 中添加:
MCP_PRIVATE_KEY:Ed25519 私钥(用于 DNS 认证)GITHUB_TOKEN:PAT, scope 为repo和workflow
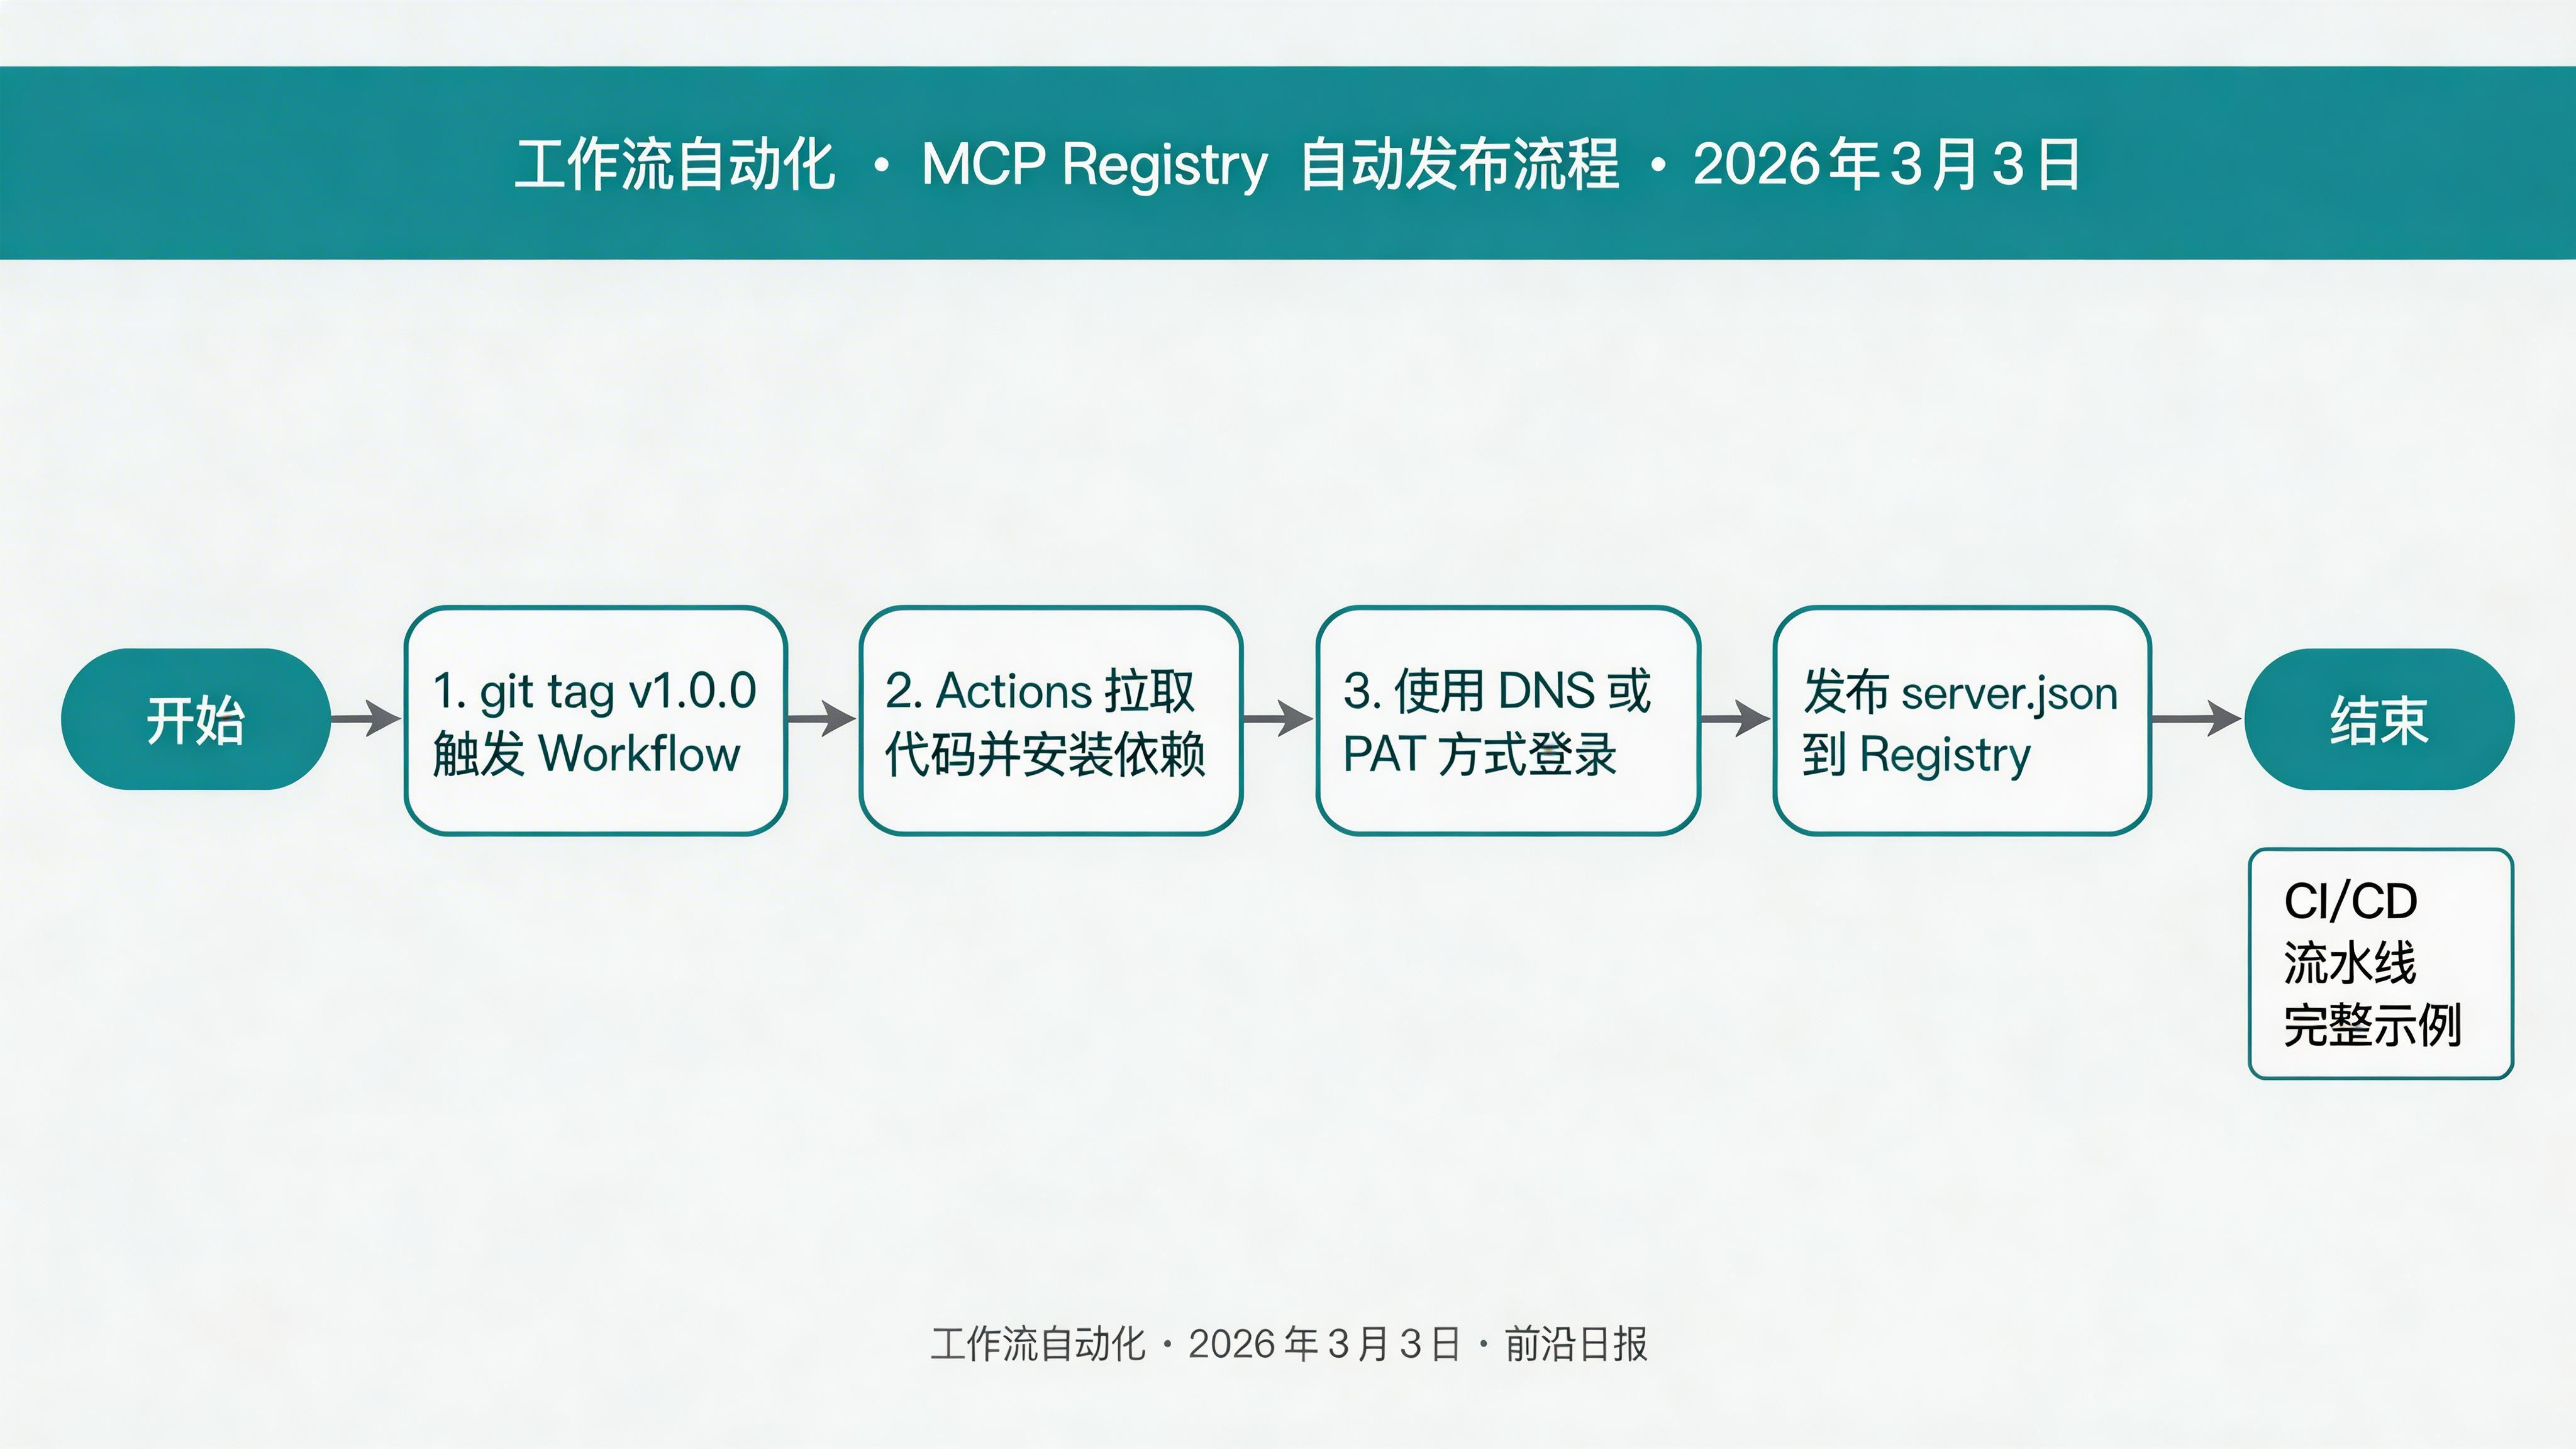
触发发布
git tag v1.0.0
git push origin v1.0.0
Workflow 将自动运行,发布到 MCP Registry。
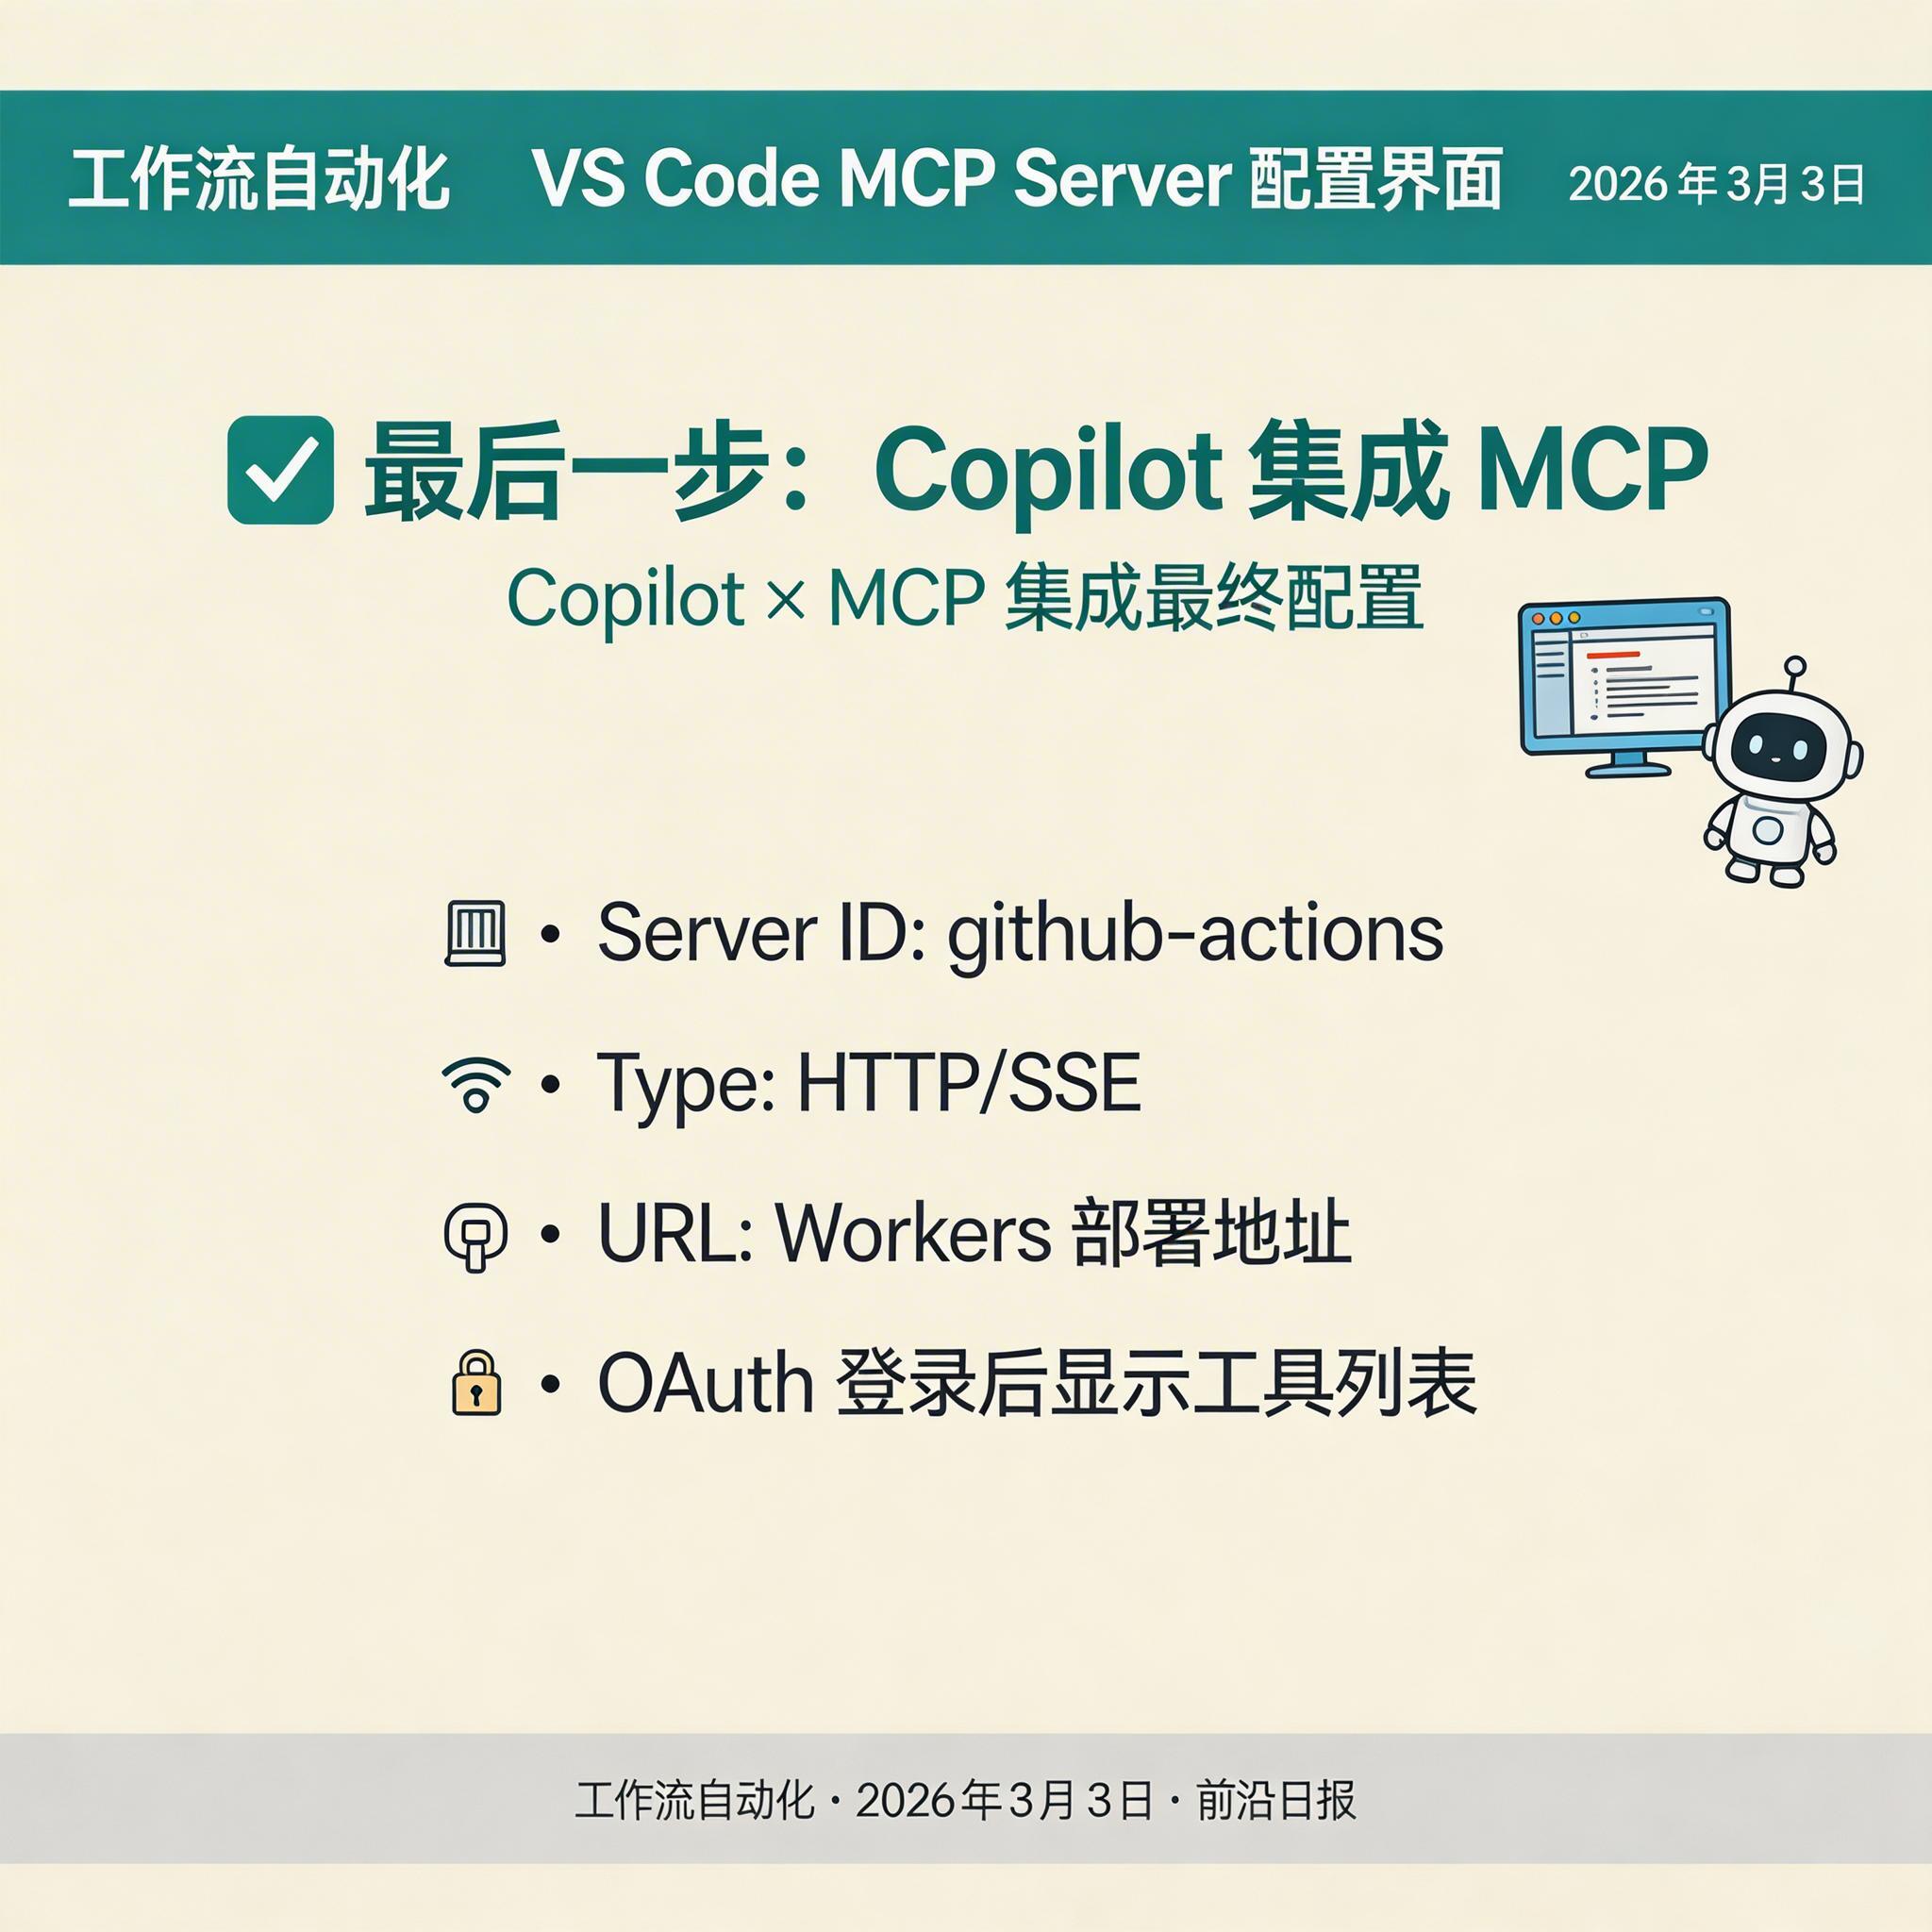
步骤 6:在 VS Code 中配置 MCP Client
添加远程 MCP Server
VS Code 设置 → Features → Copilot → MCP Servers → Add Server:
- Server ID:
github-actions - Type:
HTTP/SSE - URL:
https://github-actions-mcp.your-subdomain.workers.dev/mcp
验证连接
在 Copilot Chat 中输入:
/github list workflows for owner=myorg repo=myapp如果返回工作流列表,说明 MCP Server 正常工作。
常见问题 FAQ
Q: 如何调试 MCP Server?
本地运行 npx wrangler dev 启动开发服务器,日志会输出所有请求。生产环境可在 Wrangler 配置 observability 绑定 Logs。
Q: GitHub API 限流如何处理?
使用 PAT 认证可将限流提升至 5000 次/小时。对于高频调用,考虑在 Server 端实现响应缓存(如使用 Cloudflare KV)。
Q: 能否同时支持多个 GitHub 组织?
可以。在 OAuth 时请求 read:org scope,并在 Tool 调用时动态使用用户 Token 而非固定 Token。
Q: MCP Registry 发布失败怎么办?
检查 DNS 认证配置,确保域名 TXT 记录正确。也可改用 GitHub PAT 认证方式。
总结
- ✓ MCP 是 2026 年 AI Agent 工具链的标准协议,支持 Resources/Tools/Prompts 三类接口
- ✓ 使用 @modelcontextprotocol/sdk 可快速搭建 MCP Server,支持 stdio 和 HTTP 两种传输模式
- ✓ OAuth 2.1 + PKCE 是企业级认证的必要条件,GitHub 已强制要求
- ✓ Cloudflare Workers 提供免费、低延迟的边缘部署方案
- ✓ MCP Registry 配合 GitHub Actions 可实现自动发布流水线