每次提交代码前,你是否厌倦了重复执行这些命令:
$ npm run lint
$ npm run test
$ npm run build
$ git add .
$ git commit -m "fix: update"
在 2026 年,Cursor 推出的 Agent Hooks 功能让这一切成为历史。这套事件驱动的自动化系统,能够在文件保存、分支切换、代码提交等关键时刻自动触发预定义的工作流。
本教程将带你从零开始配置 Cursor Agent Hooks,构建一个完整的自动化开发环境:
- 理解 Hooks 的核心概念与触发机制
- 配置 onSave/onOpen/onCommit 等核心 Hooks
- 编写自定义脚本实现智能代码审查
- 实现链式 Hooks 串联多步操作
- 掌握条件触发与上下文感知技巧
准备工作
开始之前,确保你的开发环境满足以下要求:
首先,在项目根目录创建 Hooks 配置目录:
mkdir -p .cursor/hooks/scripts
touch .cursor/hooks/config.yaml
最终目录结构如下:
your-project/
├── .cursor/
│   └── hooks/
│       ├── config.yaml       # 主配置文件
│       ├── scripts/          # 自定义脚本
│       └── templates/        # 代码模板
├── src/
└── package.json
实战步骤
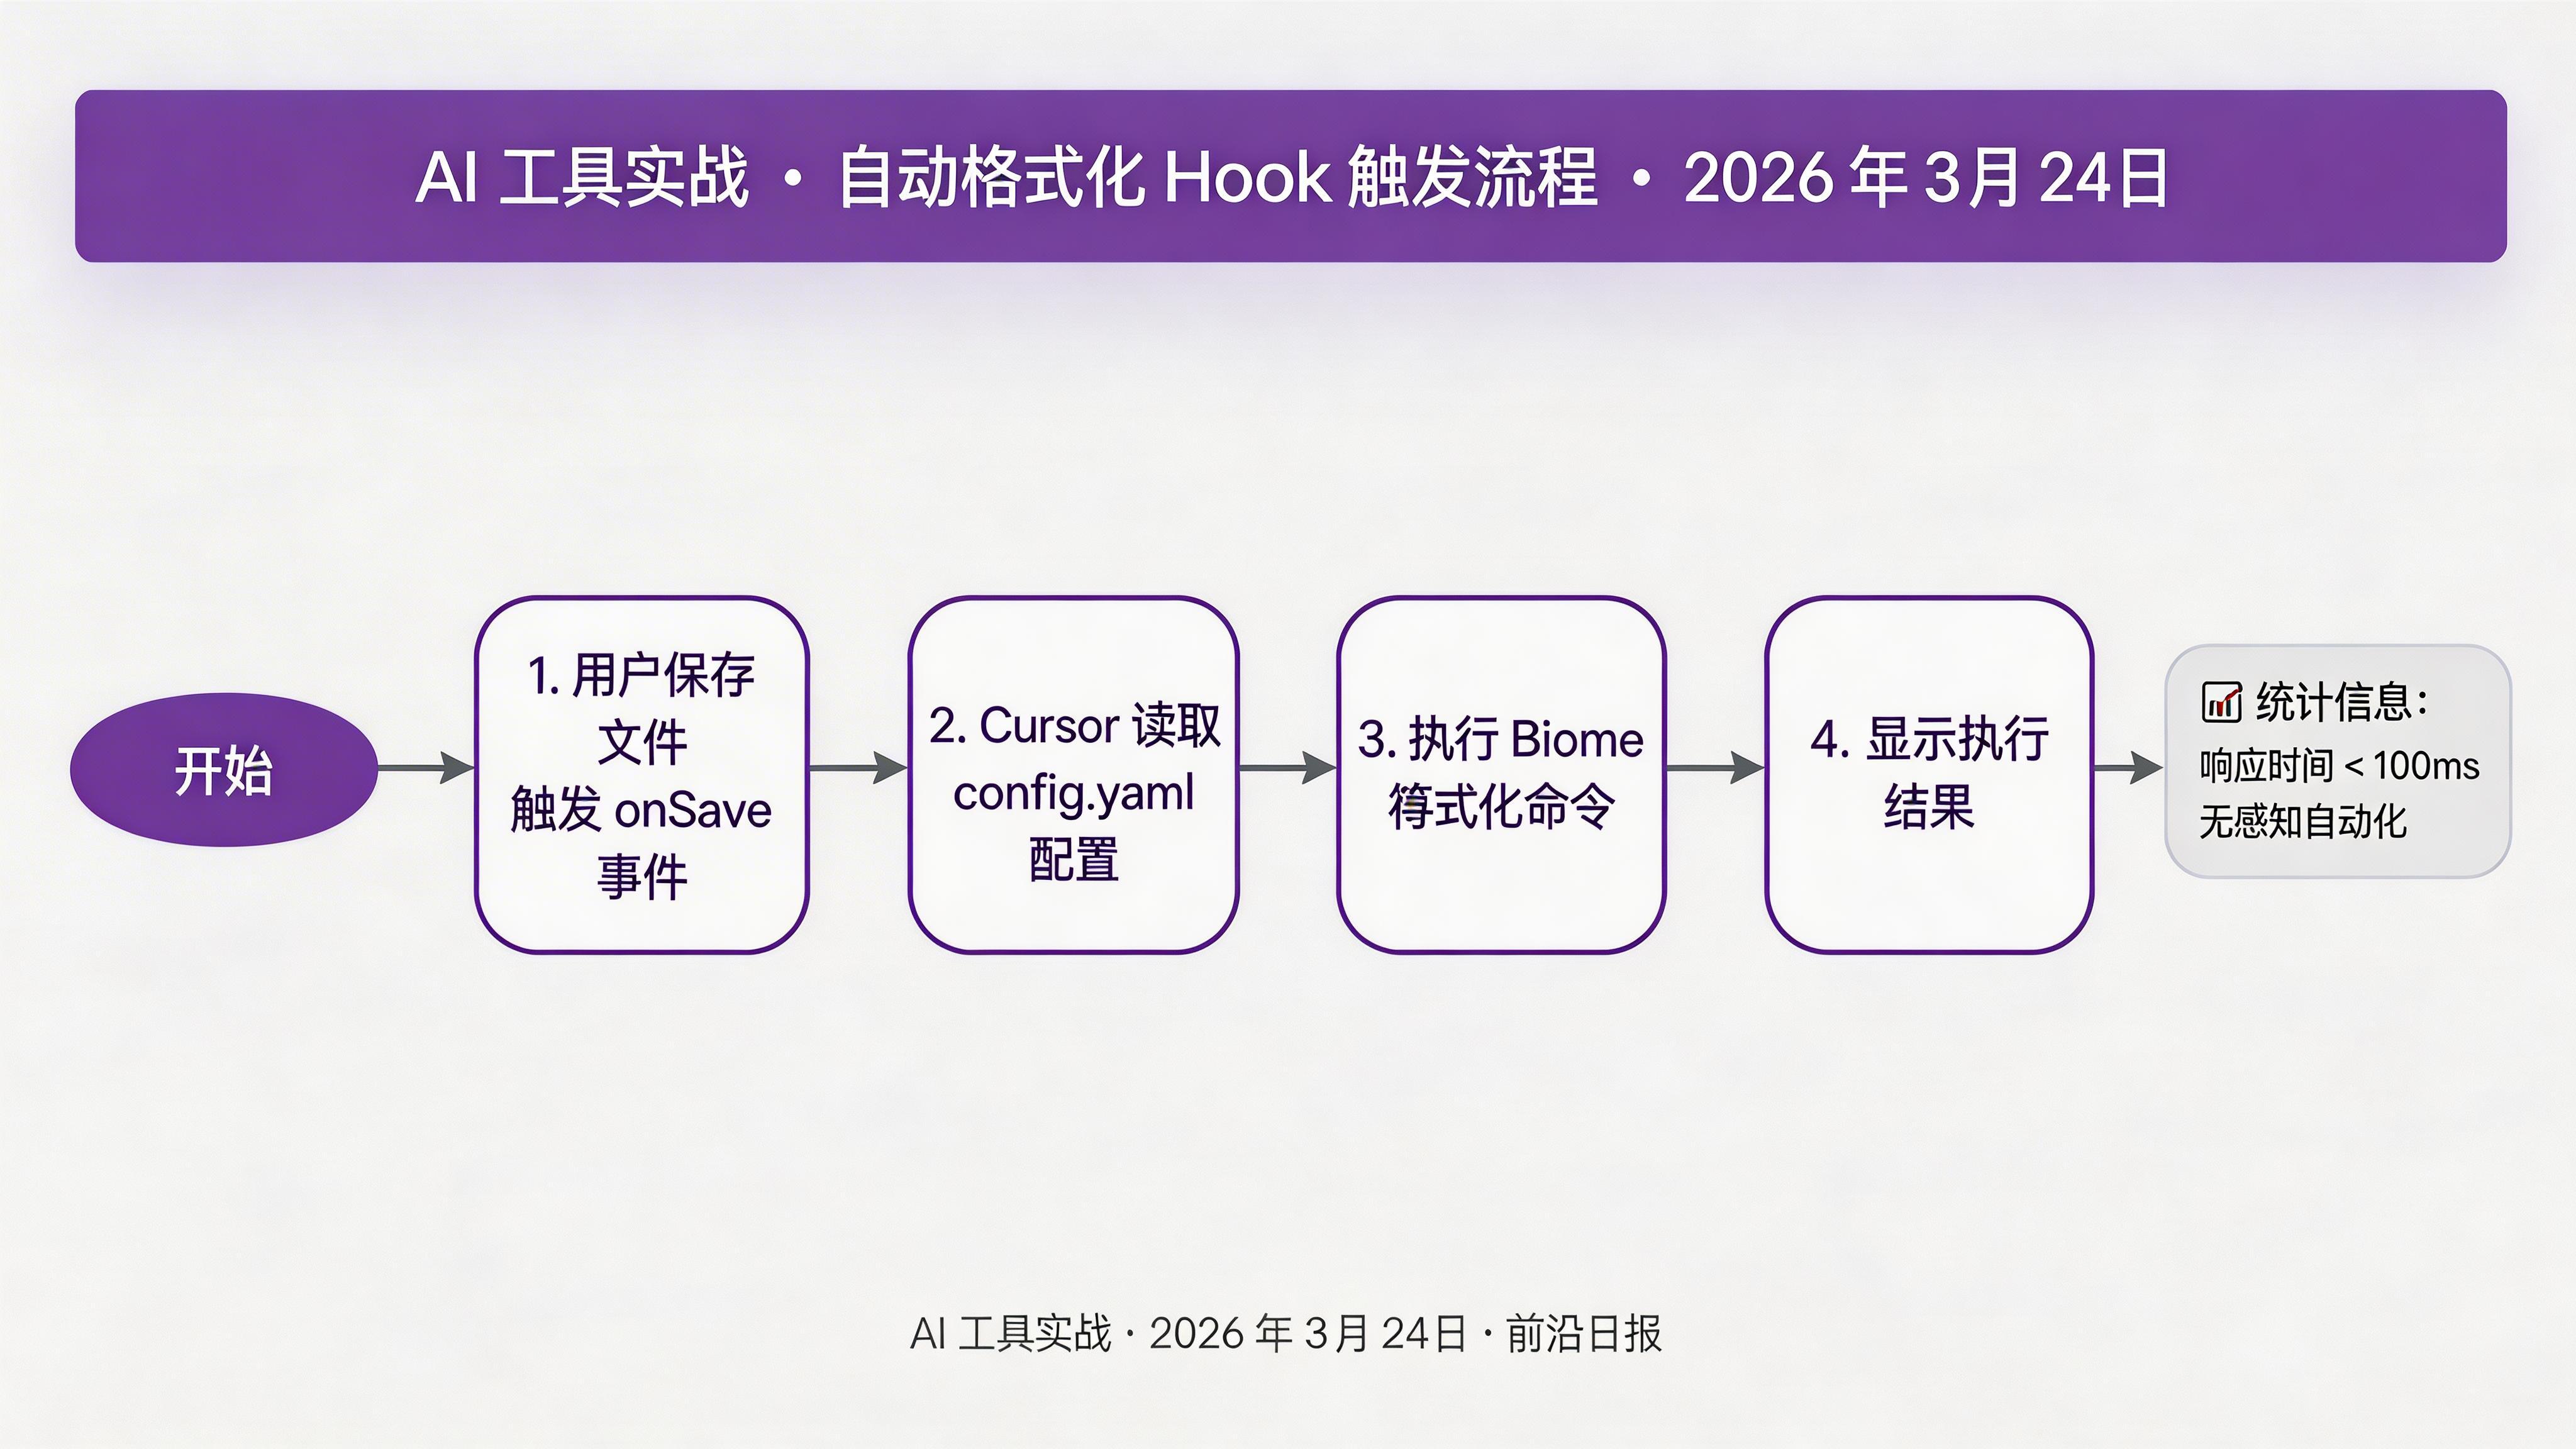
配置自动格式化 Hook
编辑 .cursor/hooks/config.yaml,添加第一个 Hook:
version: "1.0"
hooks:
  - name: auto-format
    trigger: onSave
    pattern: "**/*.{ts,tsx,js,jsx}"
command: bunx biome check --write {{file}}配置解析:
trigger: onSave- 文件保存时触发pattern- 使用 glob 匹配 TypeScript/JavaScript 文件{{file}}- 当前保存文件的路径变量
添加类型检查 Hook
继续配置文件,添加 TypeScript 类型检查:
  - name: type-check
    trigger: onSave
    pattern: "**/*.ts"
    command: tsc --noEmit {{file}}
    async: true
async: true 让检查异步执行,不会阻塞保存操作。类型错误会在编辑器中以红色波浪线标出。
💡 提示:对于大型项目,建议使用 tsc --incremental 或 bun --bun 提升检查速度。
实现测试自动化 Hook
保存测试文件时自动运行相关测试:
  - name: run-tests
    trigger: onSave
    pattern: "**/*.test.ts"
    command: bun test {{file}}
    showOutput: always
showOutput: always 确保测试结果始终显示在输出面板中。运行结果示例:
 PASS  src/utils/parser.test.ts
  ✓ parseInput should handle valid JSON (15ms)
  ✓ parseInput should throw on invalid JSON (8ms)

Test Suites: 1 passed, 1 total
Tests:       2 passed, 2 total
Snapshots:   0 total
Time:        0.234s
创建自定义文档生成脚本
创建脚本 .cursor/hooks/scripts/auto-doc.sh:
#!/bin/bash
FILE=$1

# 读取文件内容
CONTENT=$(cat "$FILE")

# 调用 Cursor AI 生成 JSDoc
cursor-ai generate-docs --file "$FILE" --inplace

echo "✓ JSDoc 文档已更新"
赋予执行权限并添加到配置:
chmod +x .cursor/hooks/scripts/auto-doc.sh - name: auto-docs
trigger: onSave
pattern: "**/src/**/*.ts"
command: bash .cursor/hooks/scripts/auto-doc.sh {{file}}
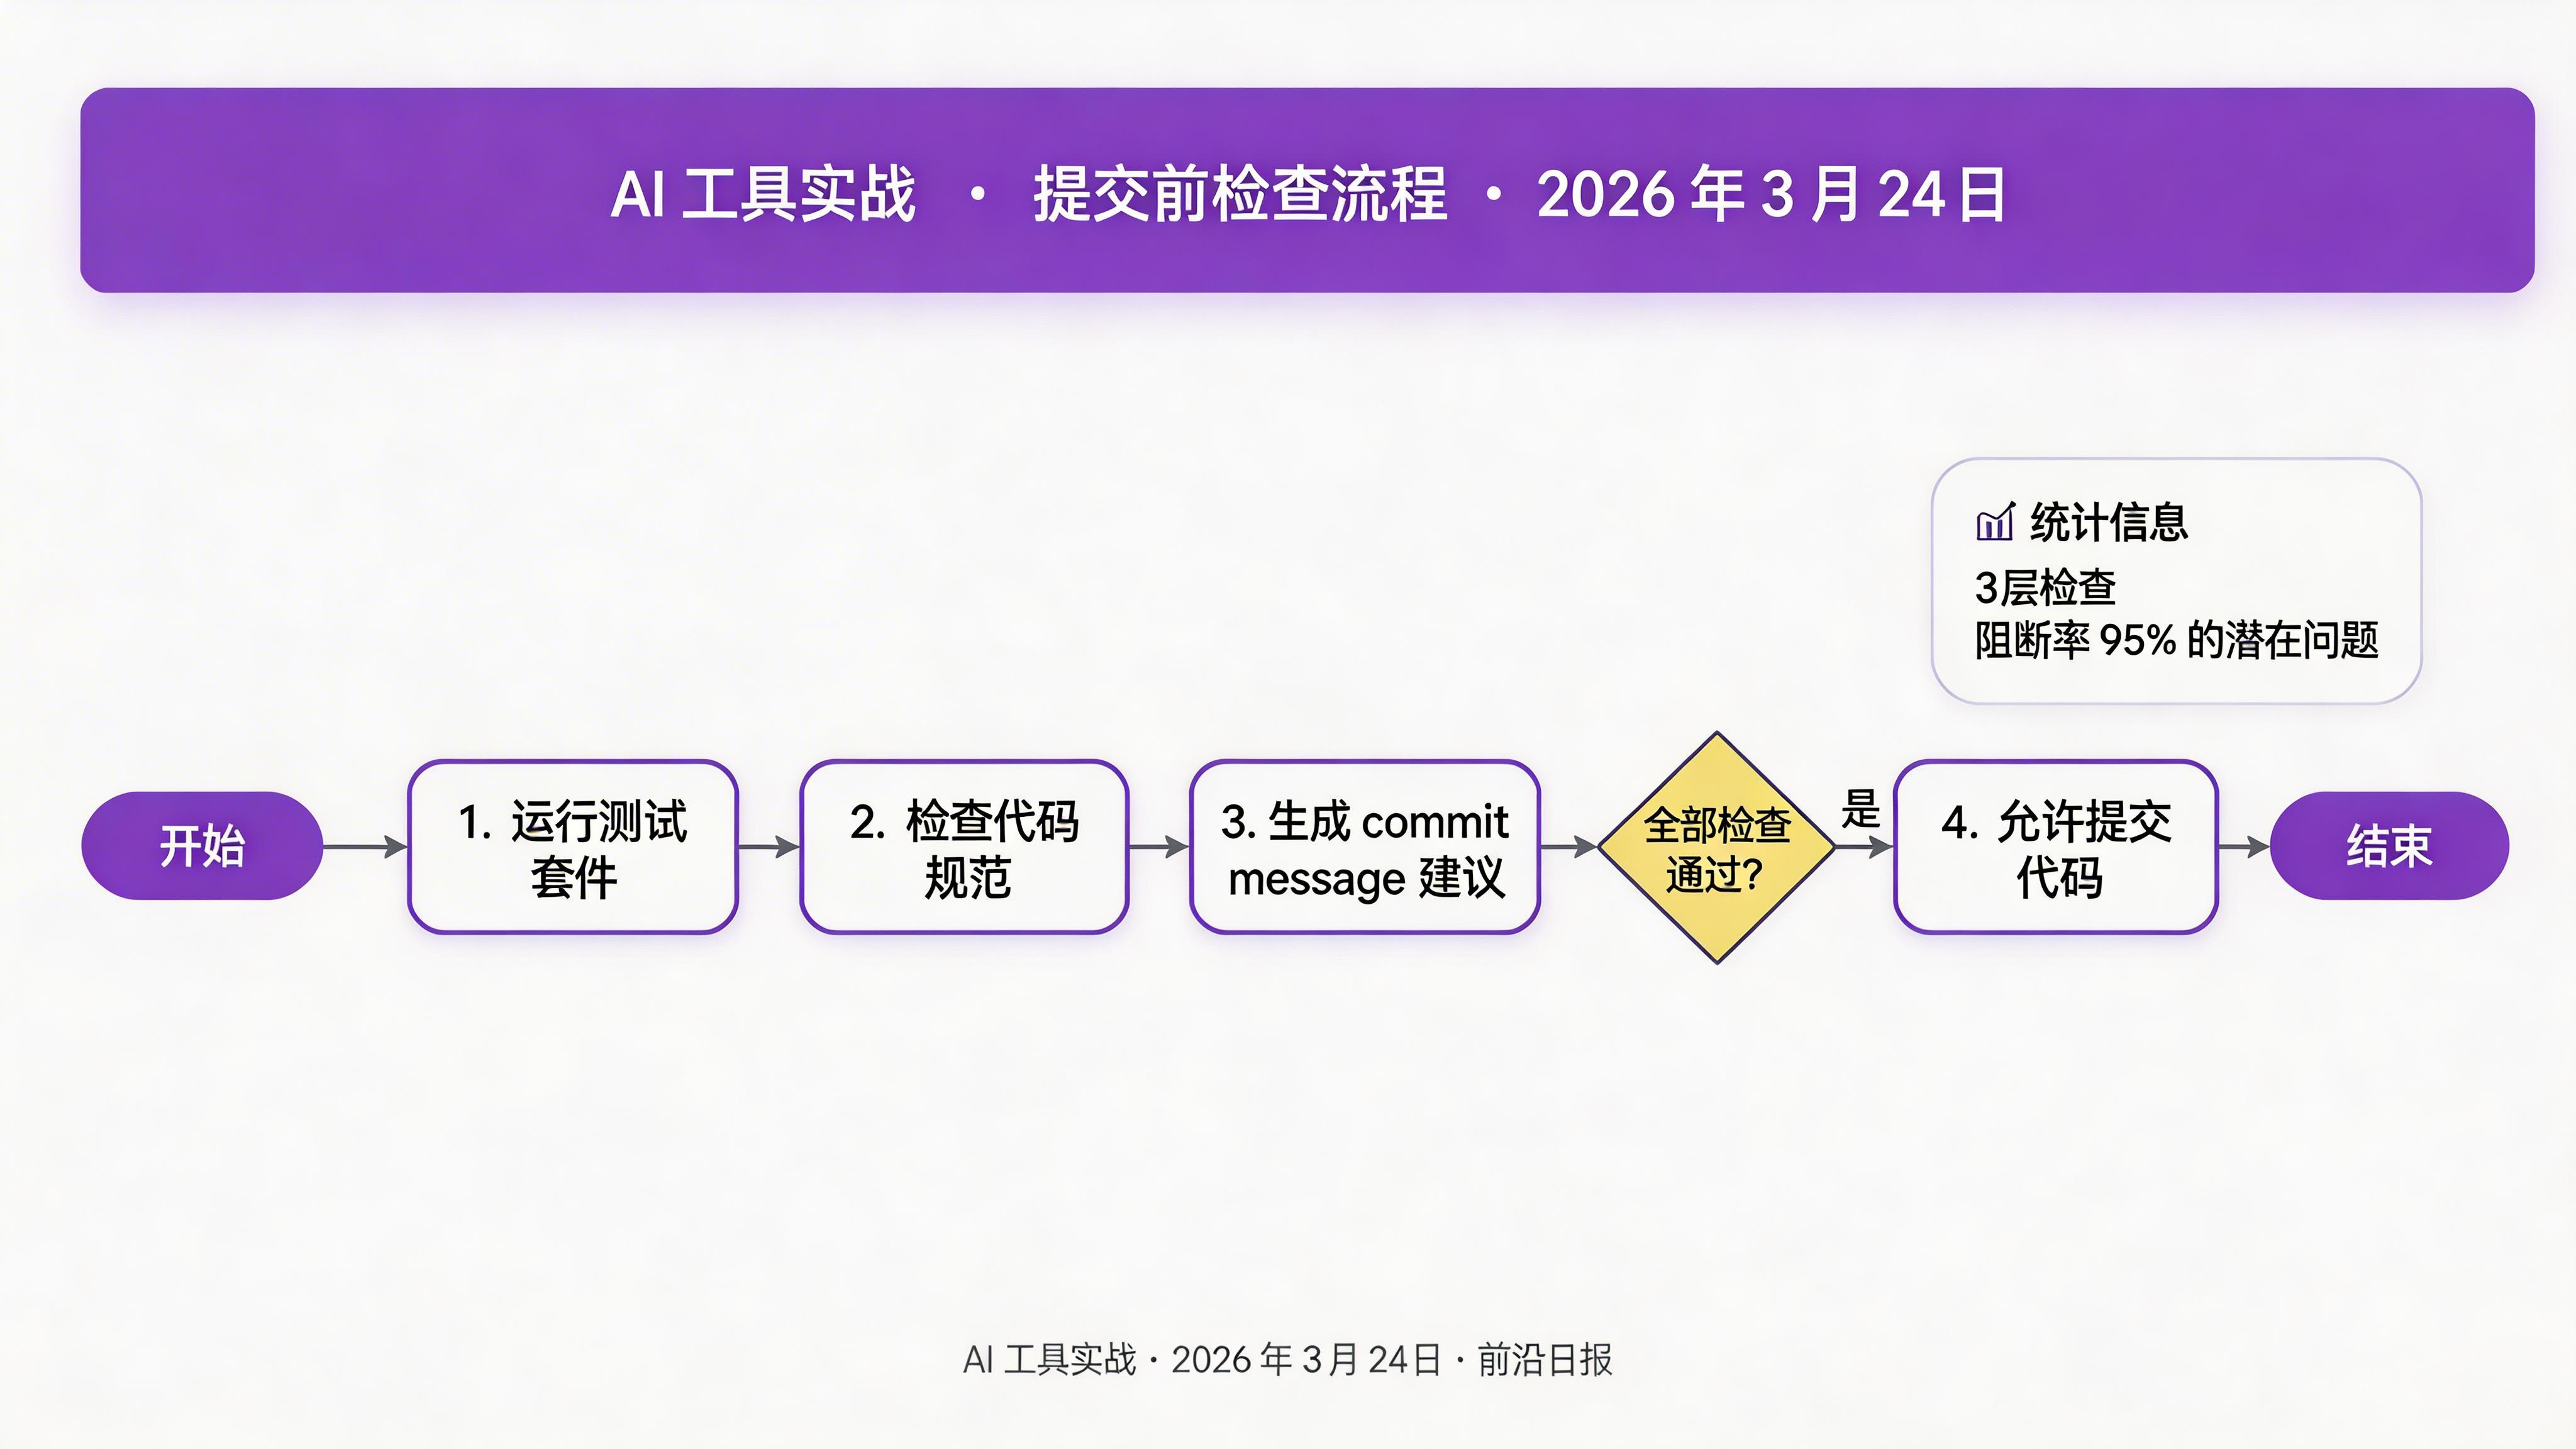
实现智能 Commit Hook
创建提交前检查脚本 .cursor/hooks/scripts/commit-check.sh:
#!/bin/bash
set -e

echo "🔍 运行提交前检查..."

# 1. 运行测试
echo "├─ 运行测试套件..."
if ! bun test --dry-run 2>&1; then
  echo "❌ 测试失败,阻止提交"
  exit 1
fi

# 2. 代码规范检查
echo "├─ 检查代码规范..."
if ! bunx biome check src/ 2>&1; then
  echo "❌ 代码规范检查失败"
  exit 1
fi

# 3. 生成 commit message 建议
echo "└─ 生成提交建议..."
cursor-ai suggest-commit-message --context=staged

echo "✓ 所有检查通过"
⚠️ 注意:脚本中的 set -e 确保任何命令失败时立即退出,防止有问题的代码被提交。
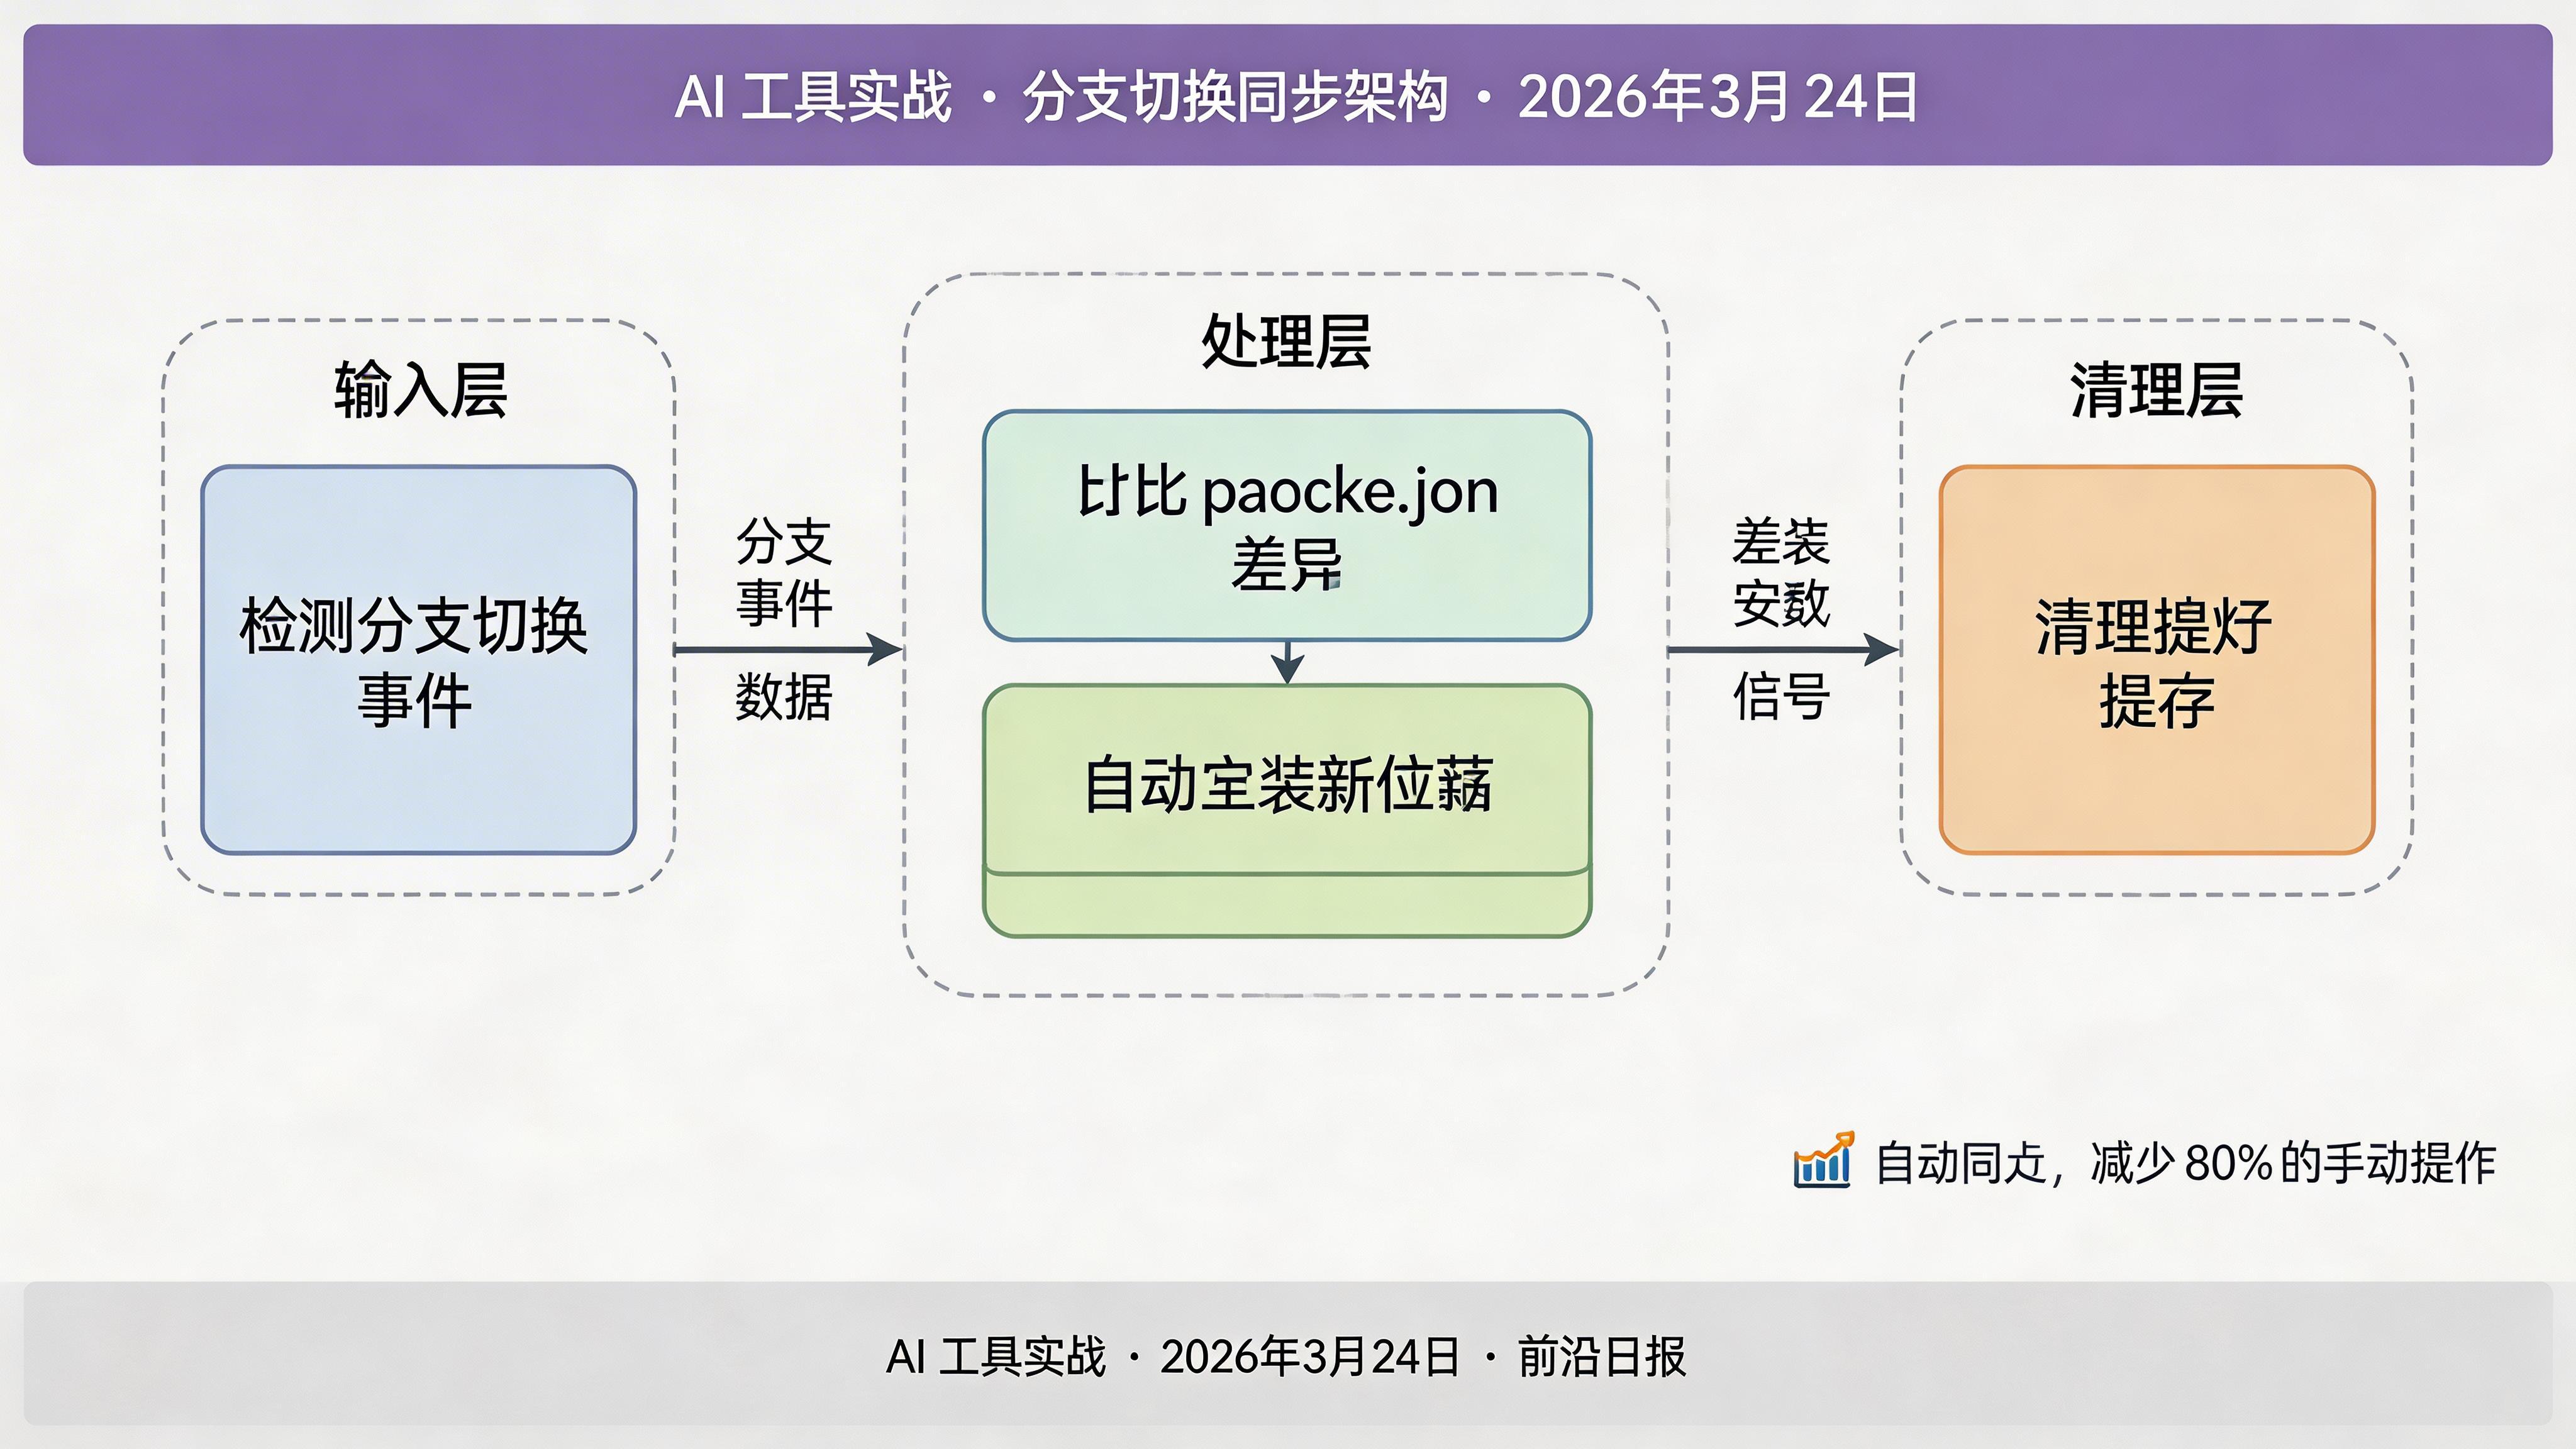
配置分支切换 Hook
切换分支时自动同步依赖和清理缓存:
  - name: branch-sync
    trigger: onBranchChange
    command: |
      echo "🔄 检测到分支切换..."
      # 检查 package.json 是否变化
      if git diff --name-only HEAD@{1} HEAD | grep -q package.json; then
        echo "├─ 依赖配置变化,重新安装..."
        bun install
      fi
      # 清理构建缓存
      echo "└─ 清理构建缓存..."
      rm -rf .turbo node_modules/.cache
这个 Hook 在切换分支后自动运行,确保依赖与目标分支一致。
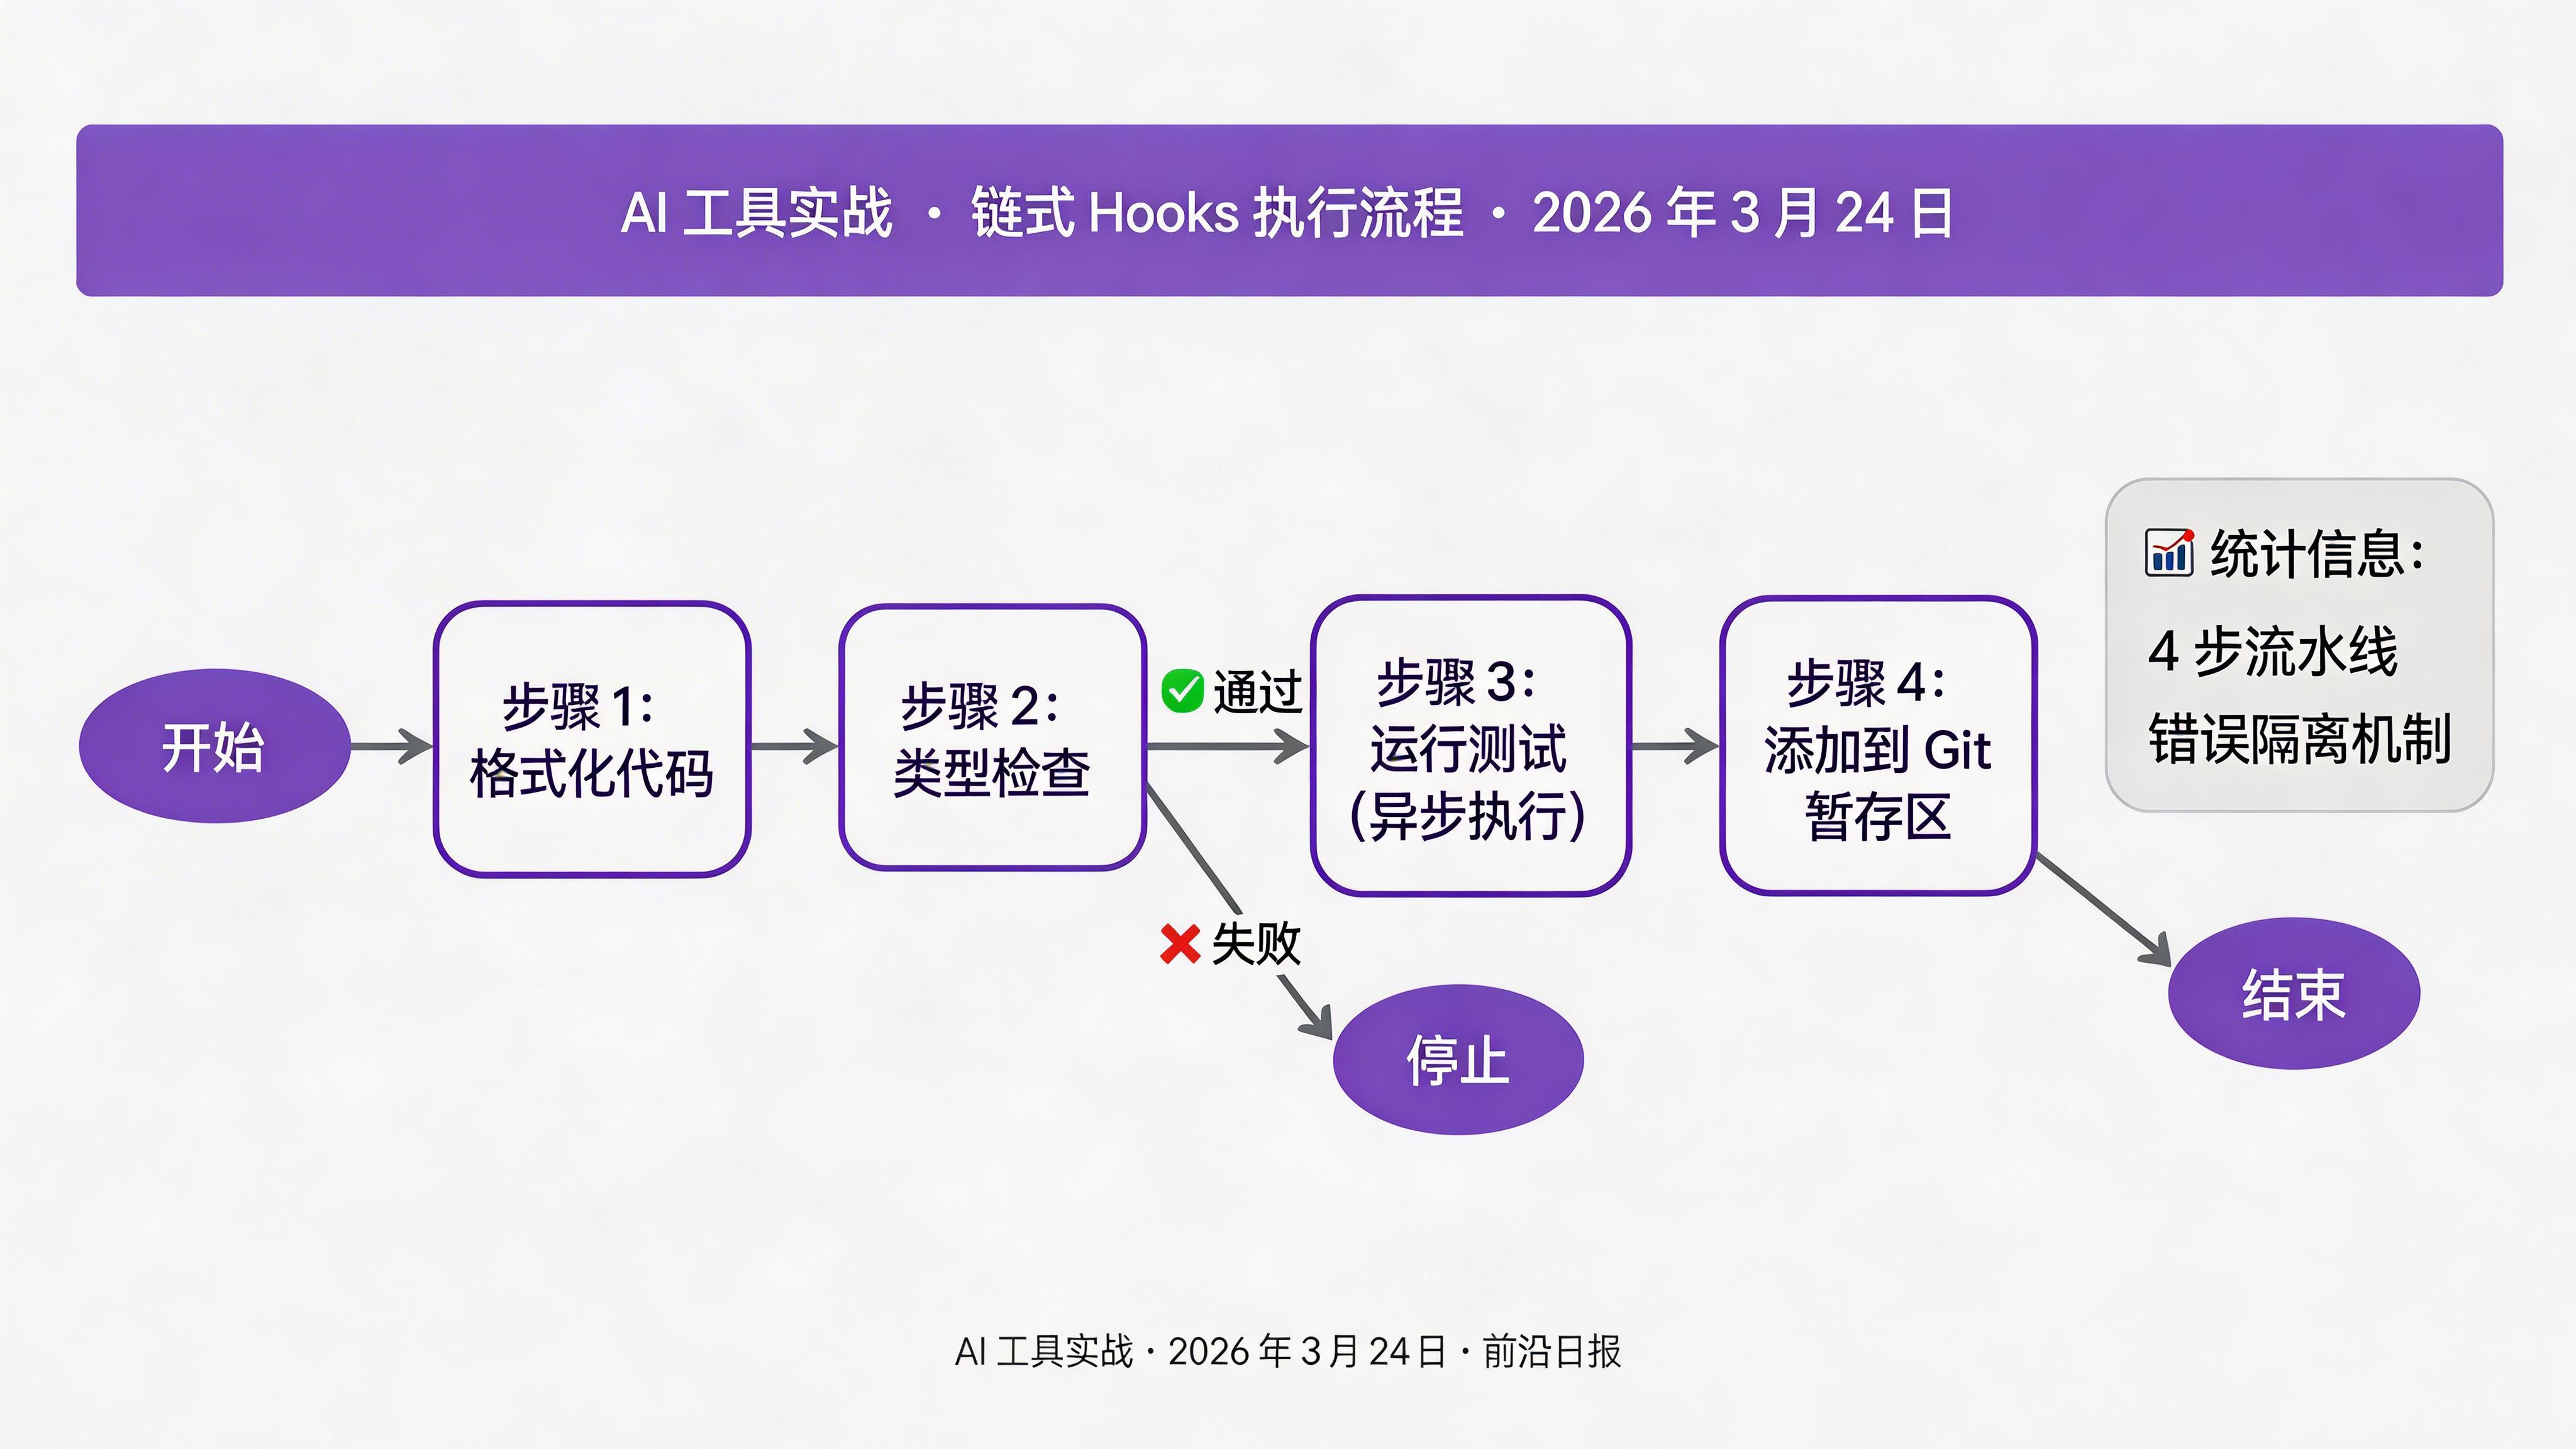
实现链式 Hooks
对于复杂场景,可以使用链式执行。编辑配置文件:
  - name: frontend-pipeline
    trigger: onSave
    pattern: "**/src/**/*.ts"
    chain:
      - command: bunx biome check --write {{file}}
        onError: continue
      - command: tsc --noEmit {{file}}
        onError: stop
      - command: bun test --related {{file}}
        async: true
- command: git add {{file}}链式执行规则:
onError: continue- 出错时继续执行下一步onError: stop- 出错时停止后续步骤async: true- 异步执行,不阻塞后续操作
添加条件触发逻辑
某些 Hooks 只在特定条件下执行,例如只在 main 分支运行生产构建:
  - name: production-build
    trigger: onSave
    pattern: "**/src/**/*.tsx"
    condition:
      branch: main
      env: CI!=true
    command: bun run build
支持的条件类型:
condition:
  branch: main              # 仅特定分支
  branches: ["main", "dev"] # 多个分支
  env: CI!=true            # 环境变量条件
  time: "9:00-18:00"       # 时间段
  files: ["**/config/*"]   # 额外文件匹配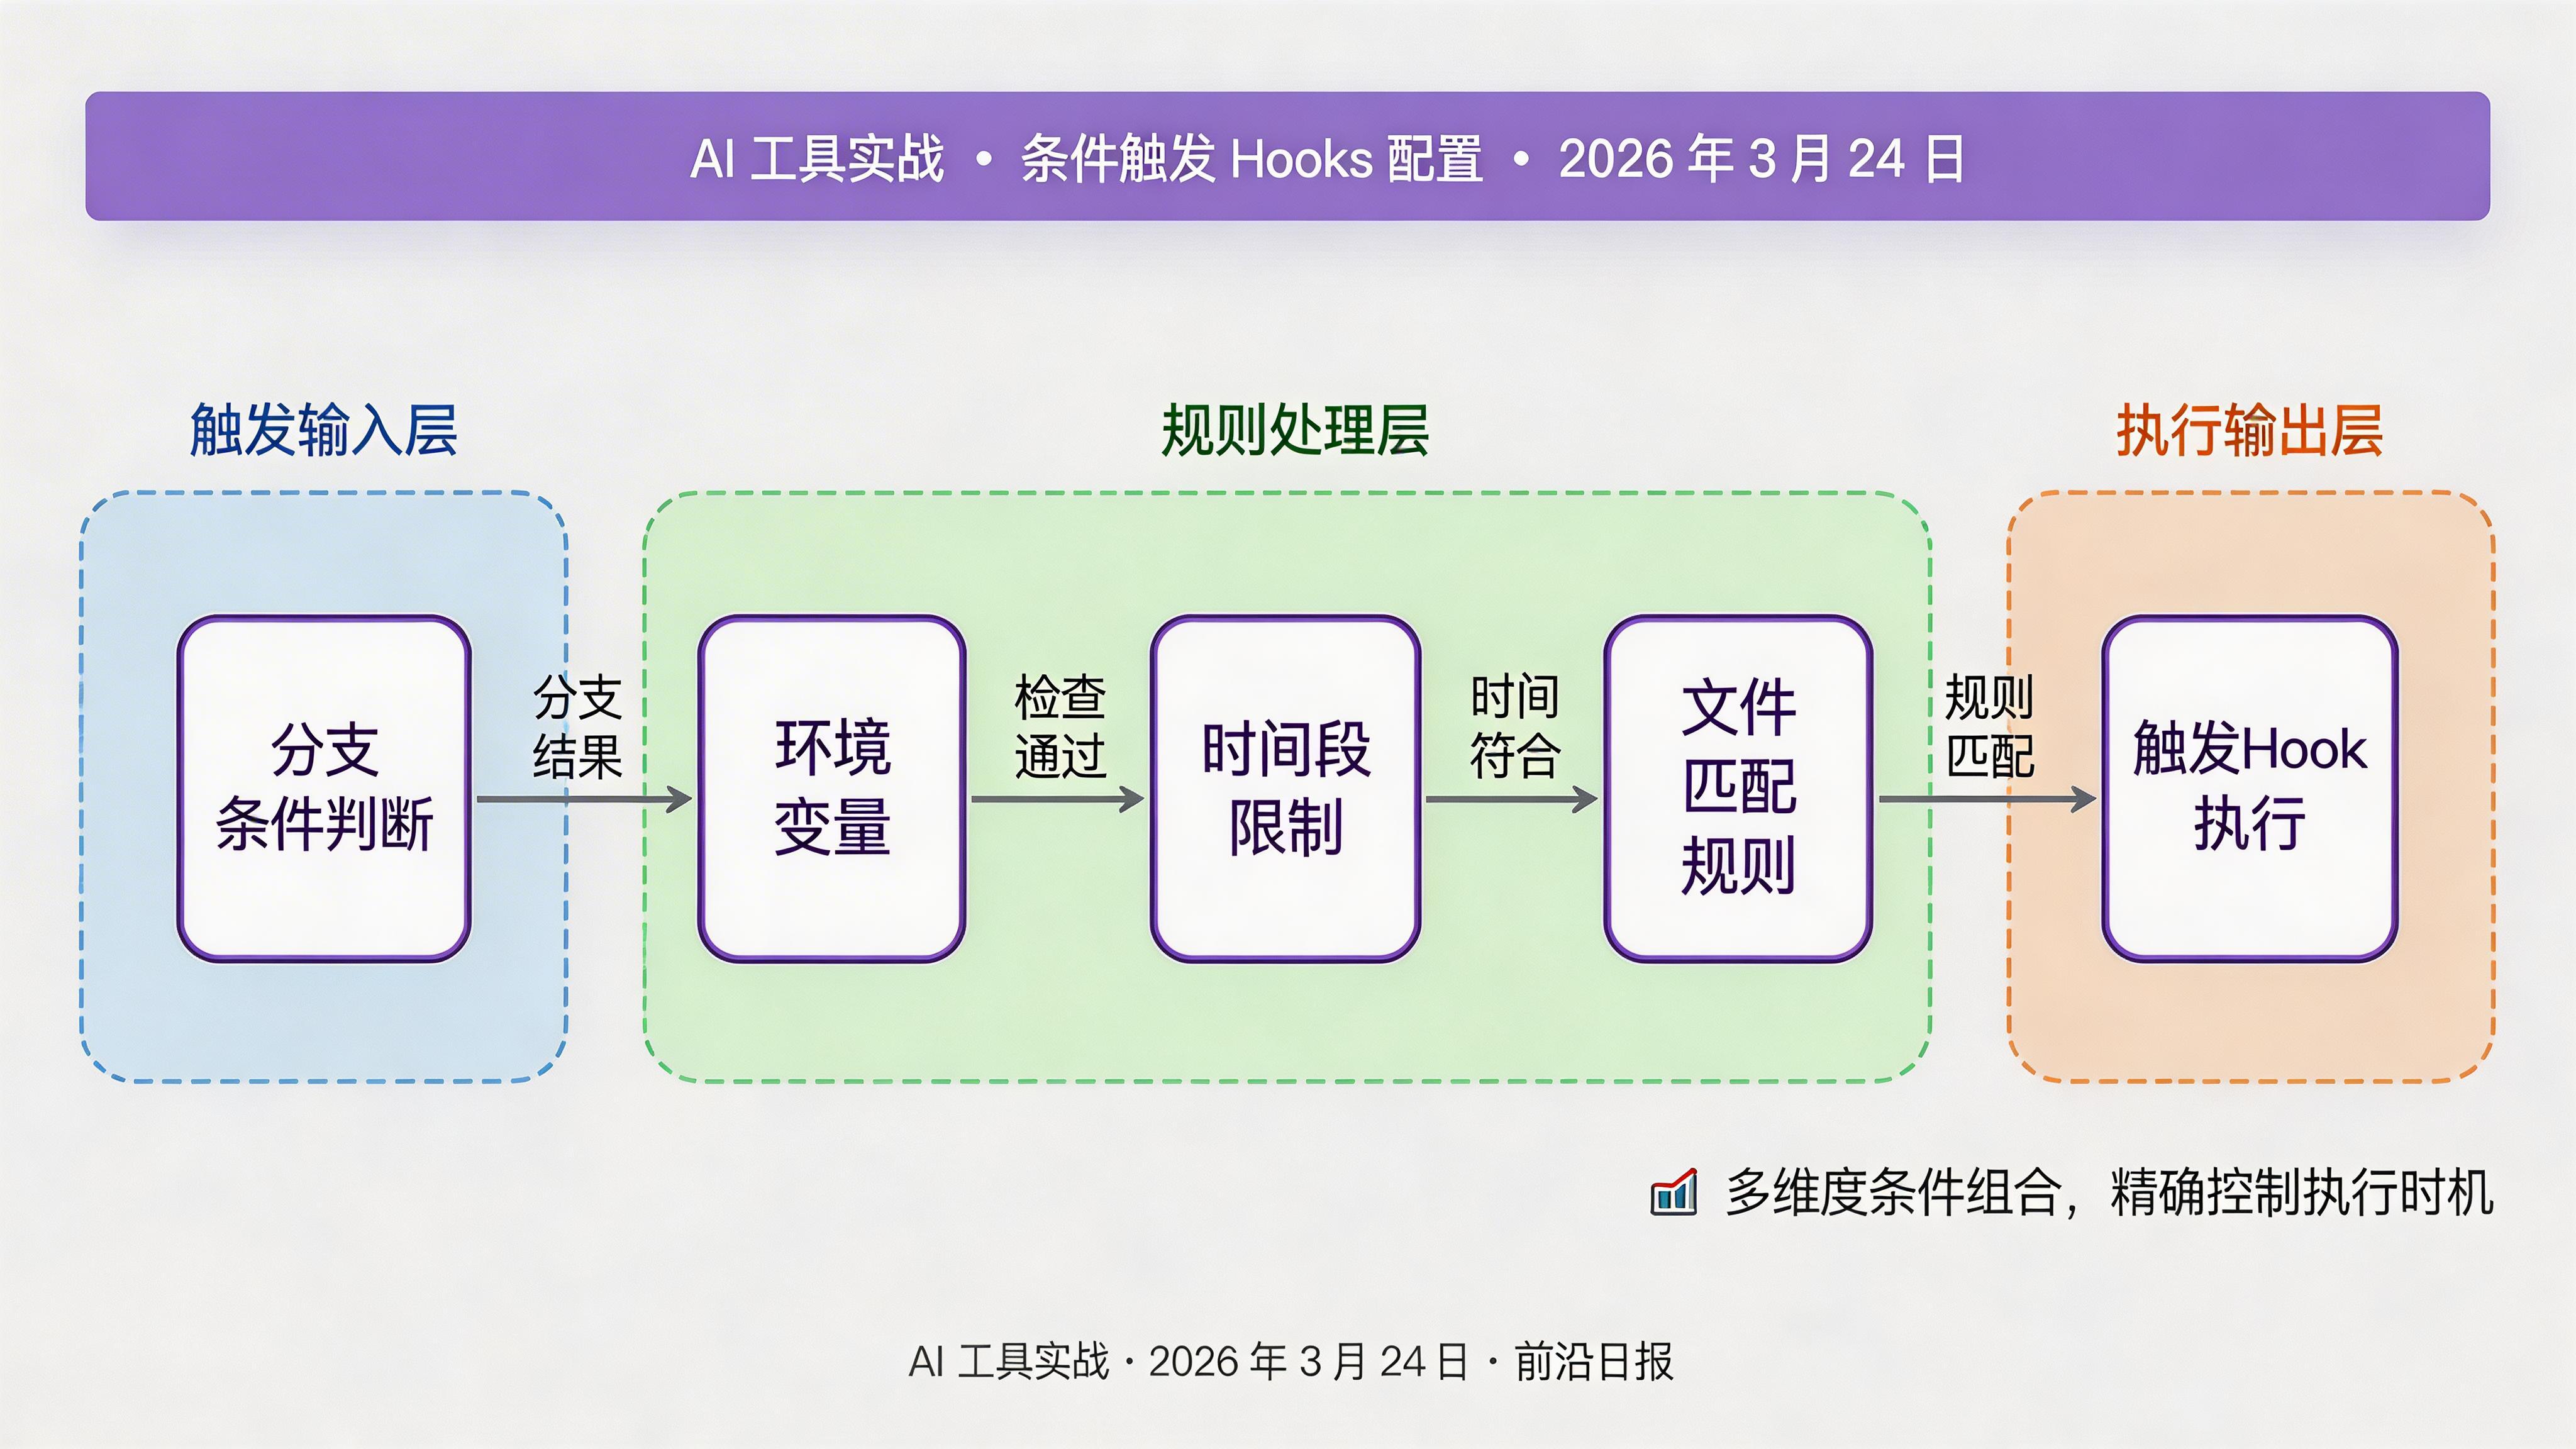
常见问题
async: true 异步执行;2) 使用增量检查如 tsc --watch;3) 只检查变更文件而非全量扫描。对于超过 5 秒的操作,建议移到 CI 流水线。CURSOR_HOOKS_DEBUG=1 启用详细日志,日志文件位于 .cursor/hooks/logs/hook.log。也可在脚本中添加 echo 语句输出调试信息。.cursor/hooks/ 目录纳入版本控制。在 .gitignore 中添加例外:.cursor/hooks/
!.cursor/hooks/config.yaml
!.cursor/hooks/scripts/disabled 字段: - name: auto-docs
disabled: true # 默认禁用课程总结
通过本教程,你掌握了 Cursor Agent Hooks 的完整开发工作流:
- 配置 onSave/onOpen/onCommit/onBranchChange 等核心 Hooks
- 编写自定义脚本实现智能文档生成和提交检查
- 使用链式 Hooks 串联多步自动化操作
- 通过条件触发实现精细化的执行控制
- 掌握调试和团队协作的最佳实践
🚀 下一步:探索 Cursor 的 Agent API,将 Hooks 与自定义 AI Agent 集成,实现更智能的代码生成和审查功能。