想象一下,你正在构建一个企业级知识库系统:用户提出一个问题,系统需要自动判断是搜索内部文档、查询数据库还是调用外部 API。传统的单一查询引擎无法应对这种复杂场景,而硬编码路由逻辑又缺乏灵活性。
LlamaIndex 1.0 带来的 Workflows 1.0 框架正是为了解决这类问题而生。这是一个轻量级但功能强大的 Agent 编排框架,支持事件驱动的执行流、异步优先架构、 typed workflow state 和资源注入,让你能够构建既灵活又可控的智能数据应用。
本教程你将学到什么
准备工作:环境搭建
在开始之前,确保你已经安装了以下依赖:
# 安装 LlamaIndex 核心包
pip install llama-index llama-index-workflows

# 安装 OpenAI 支持(或其他 LLM 提供商)
pip install llama-index-llms-openai

# 安装可观测性工具(可选)
pip install llama-index-instrumentation
配置环境变量:
export OPENAI_API_KEY="your-openai-api-key"
export LLAMA_INDEX_TELEMETRY="disable"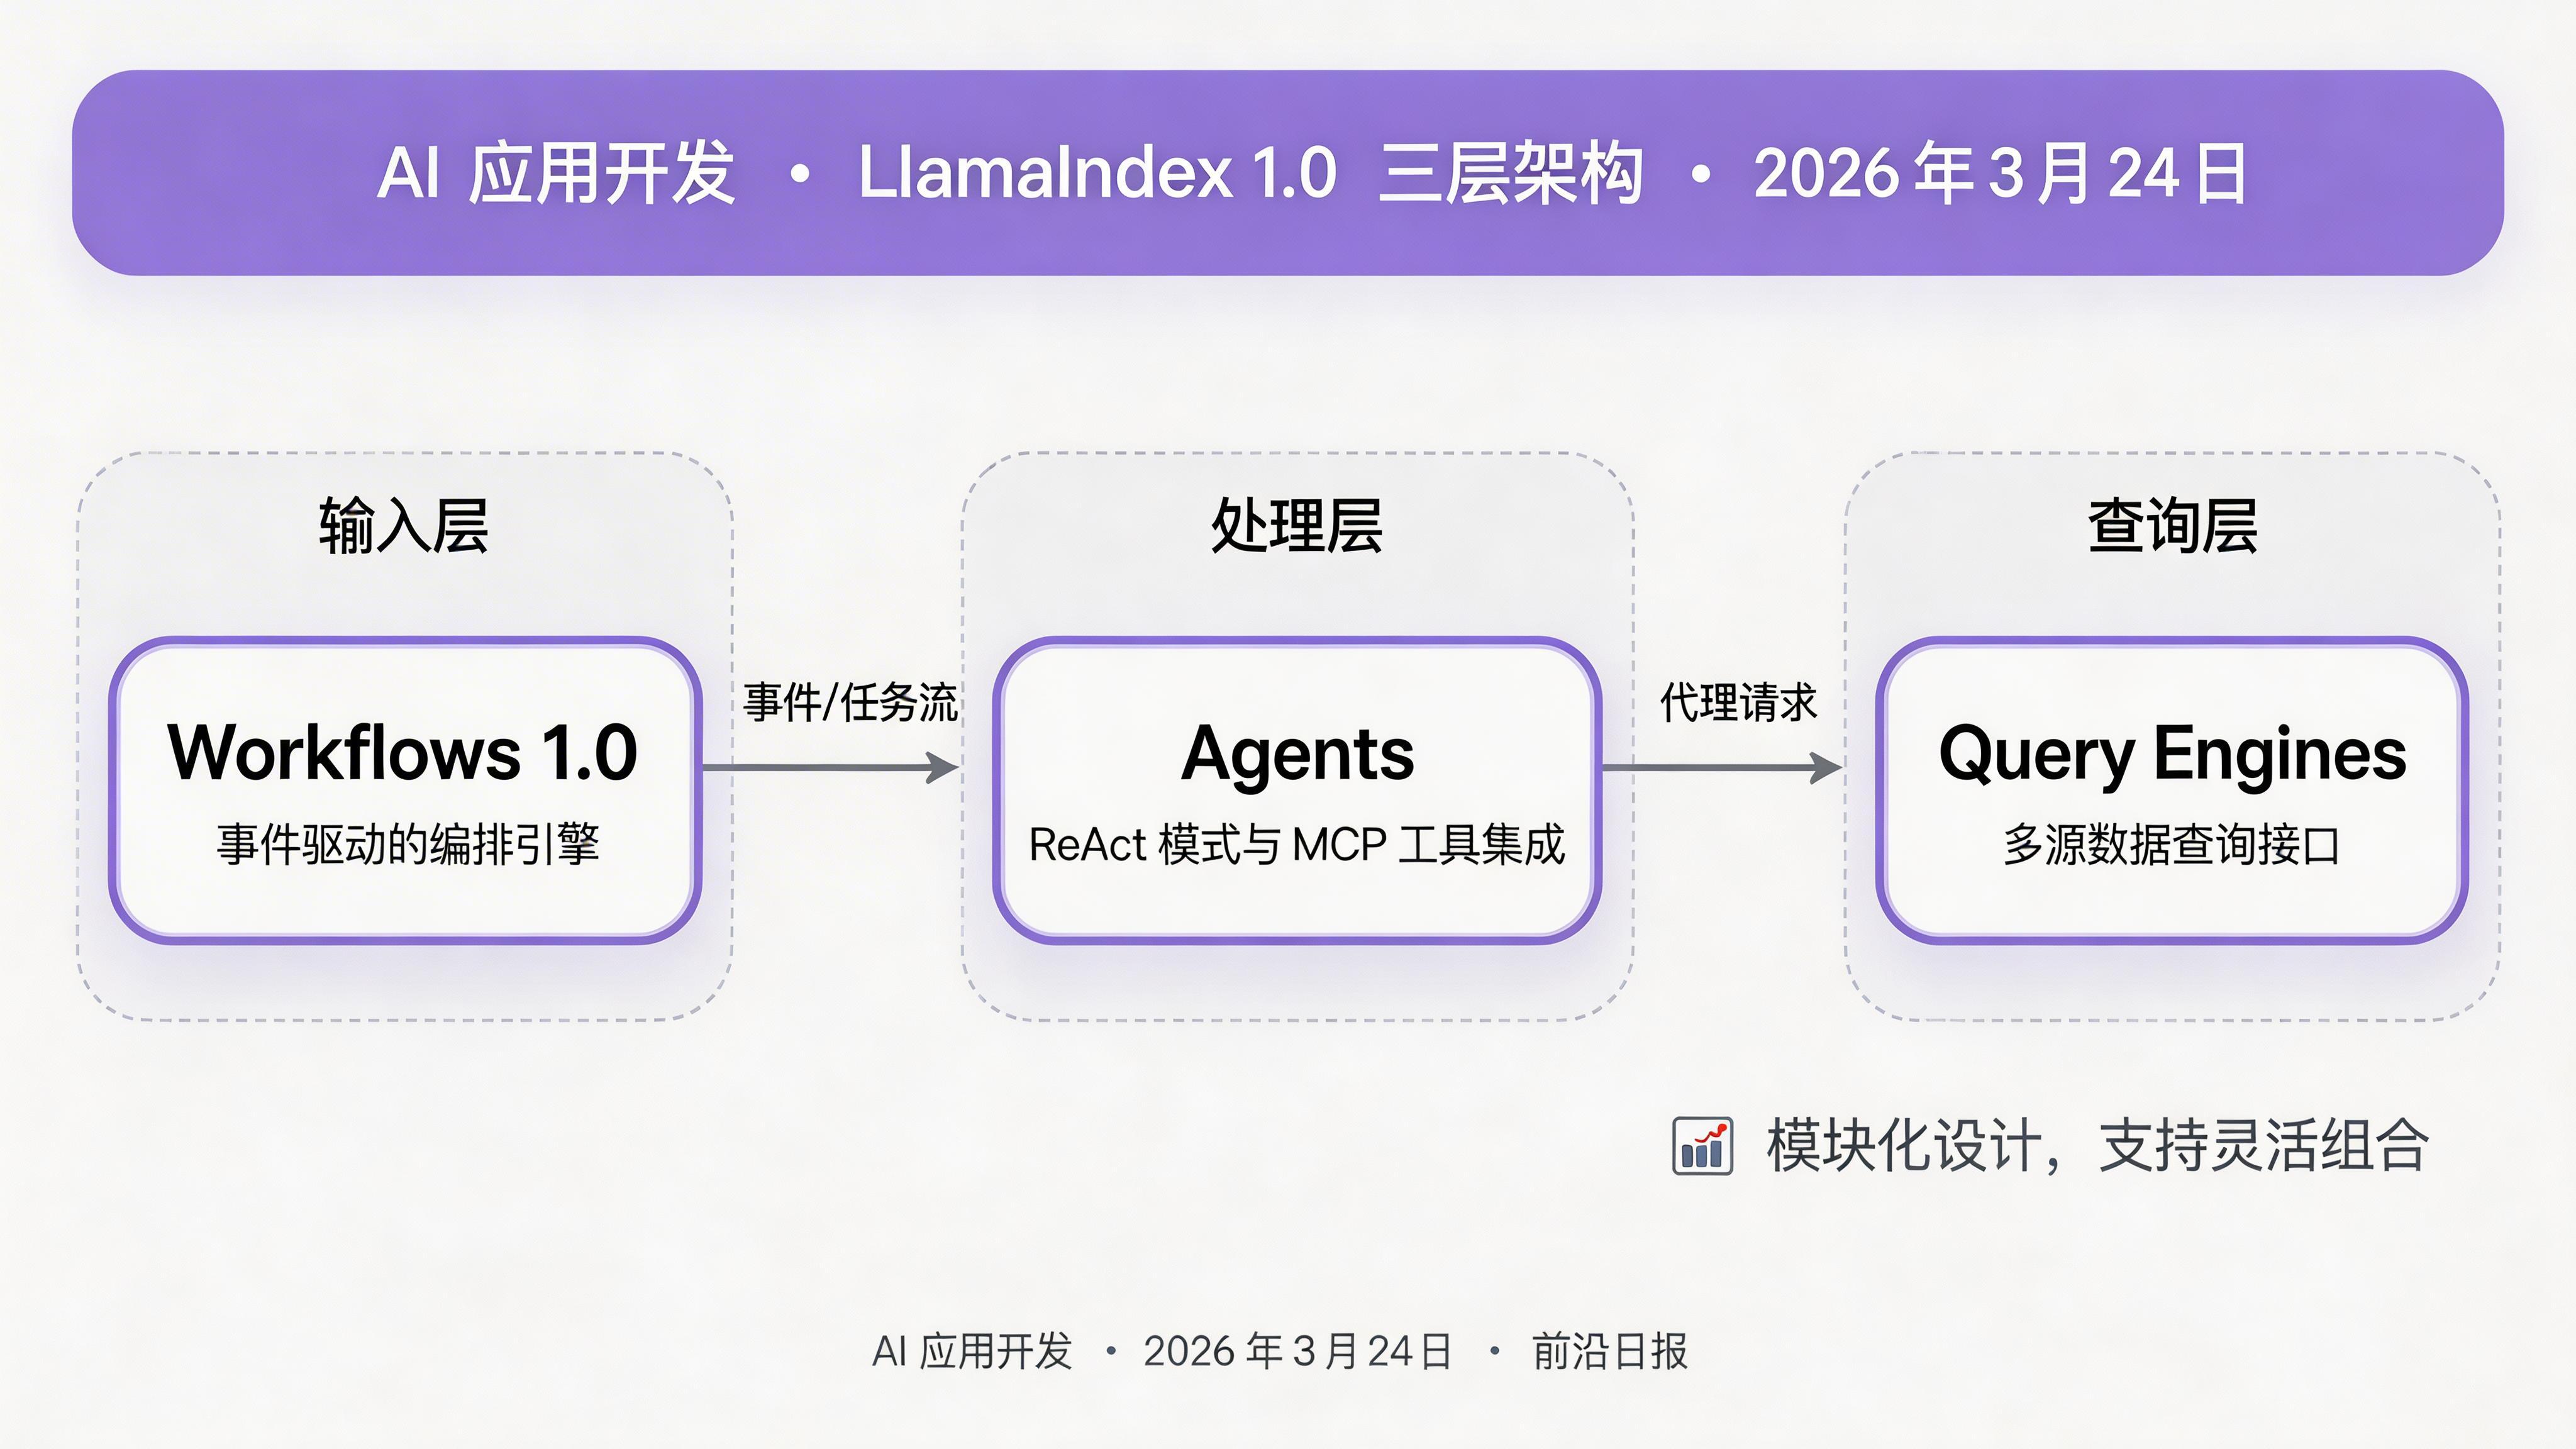
核心概念解析
1. Workflows 1.0:事件驱动的编排引擎
LlamaIndex 1.0 的 Workflows 框架采用了事件驱动的架构模式。每个 Workflow 由多个 Step 组成,Step 之间通过 Event 连接,支持分支、循环、并行执行和状态管理。
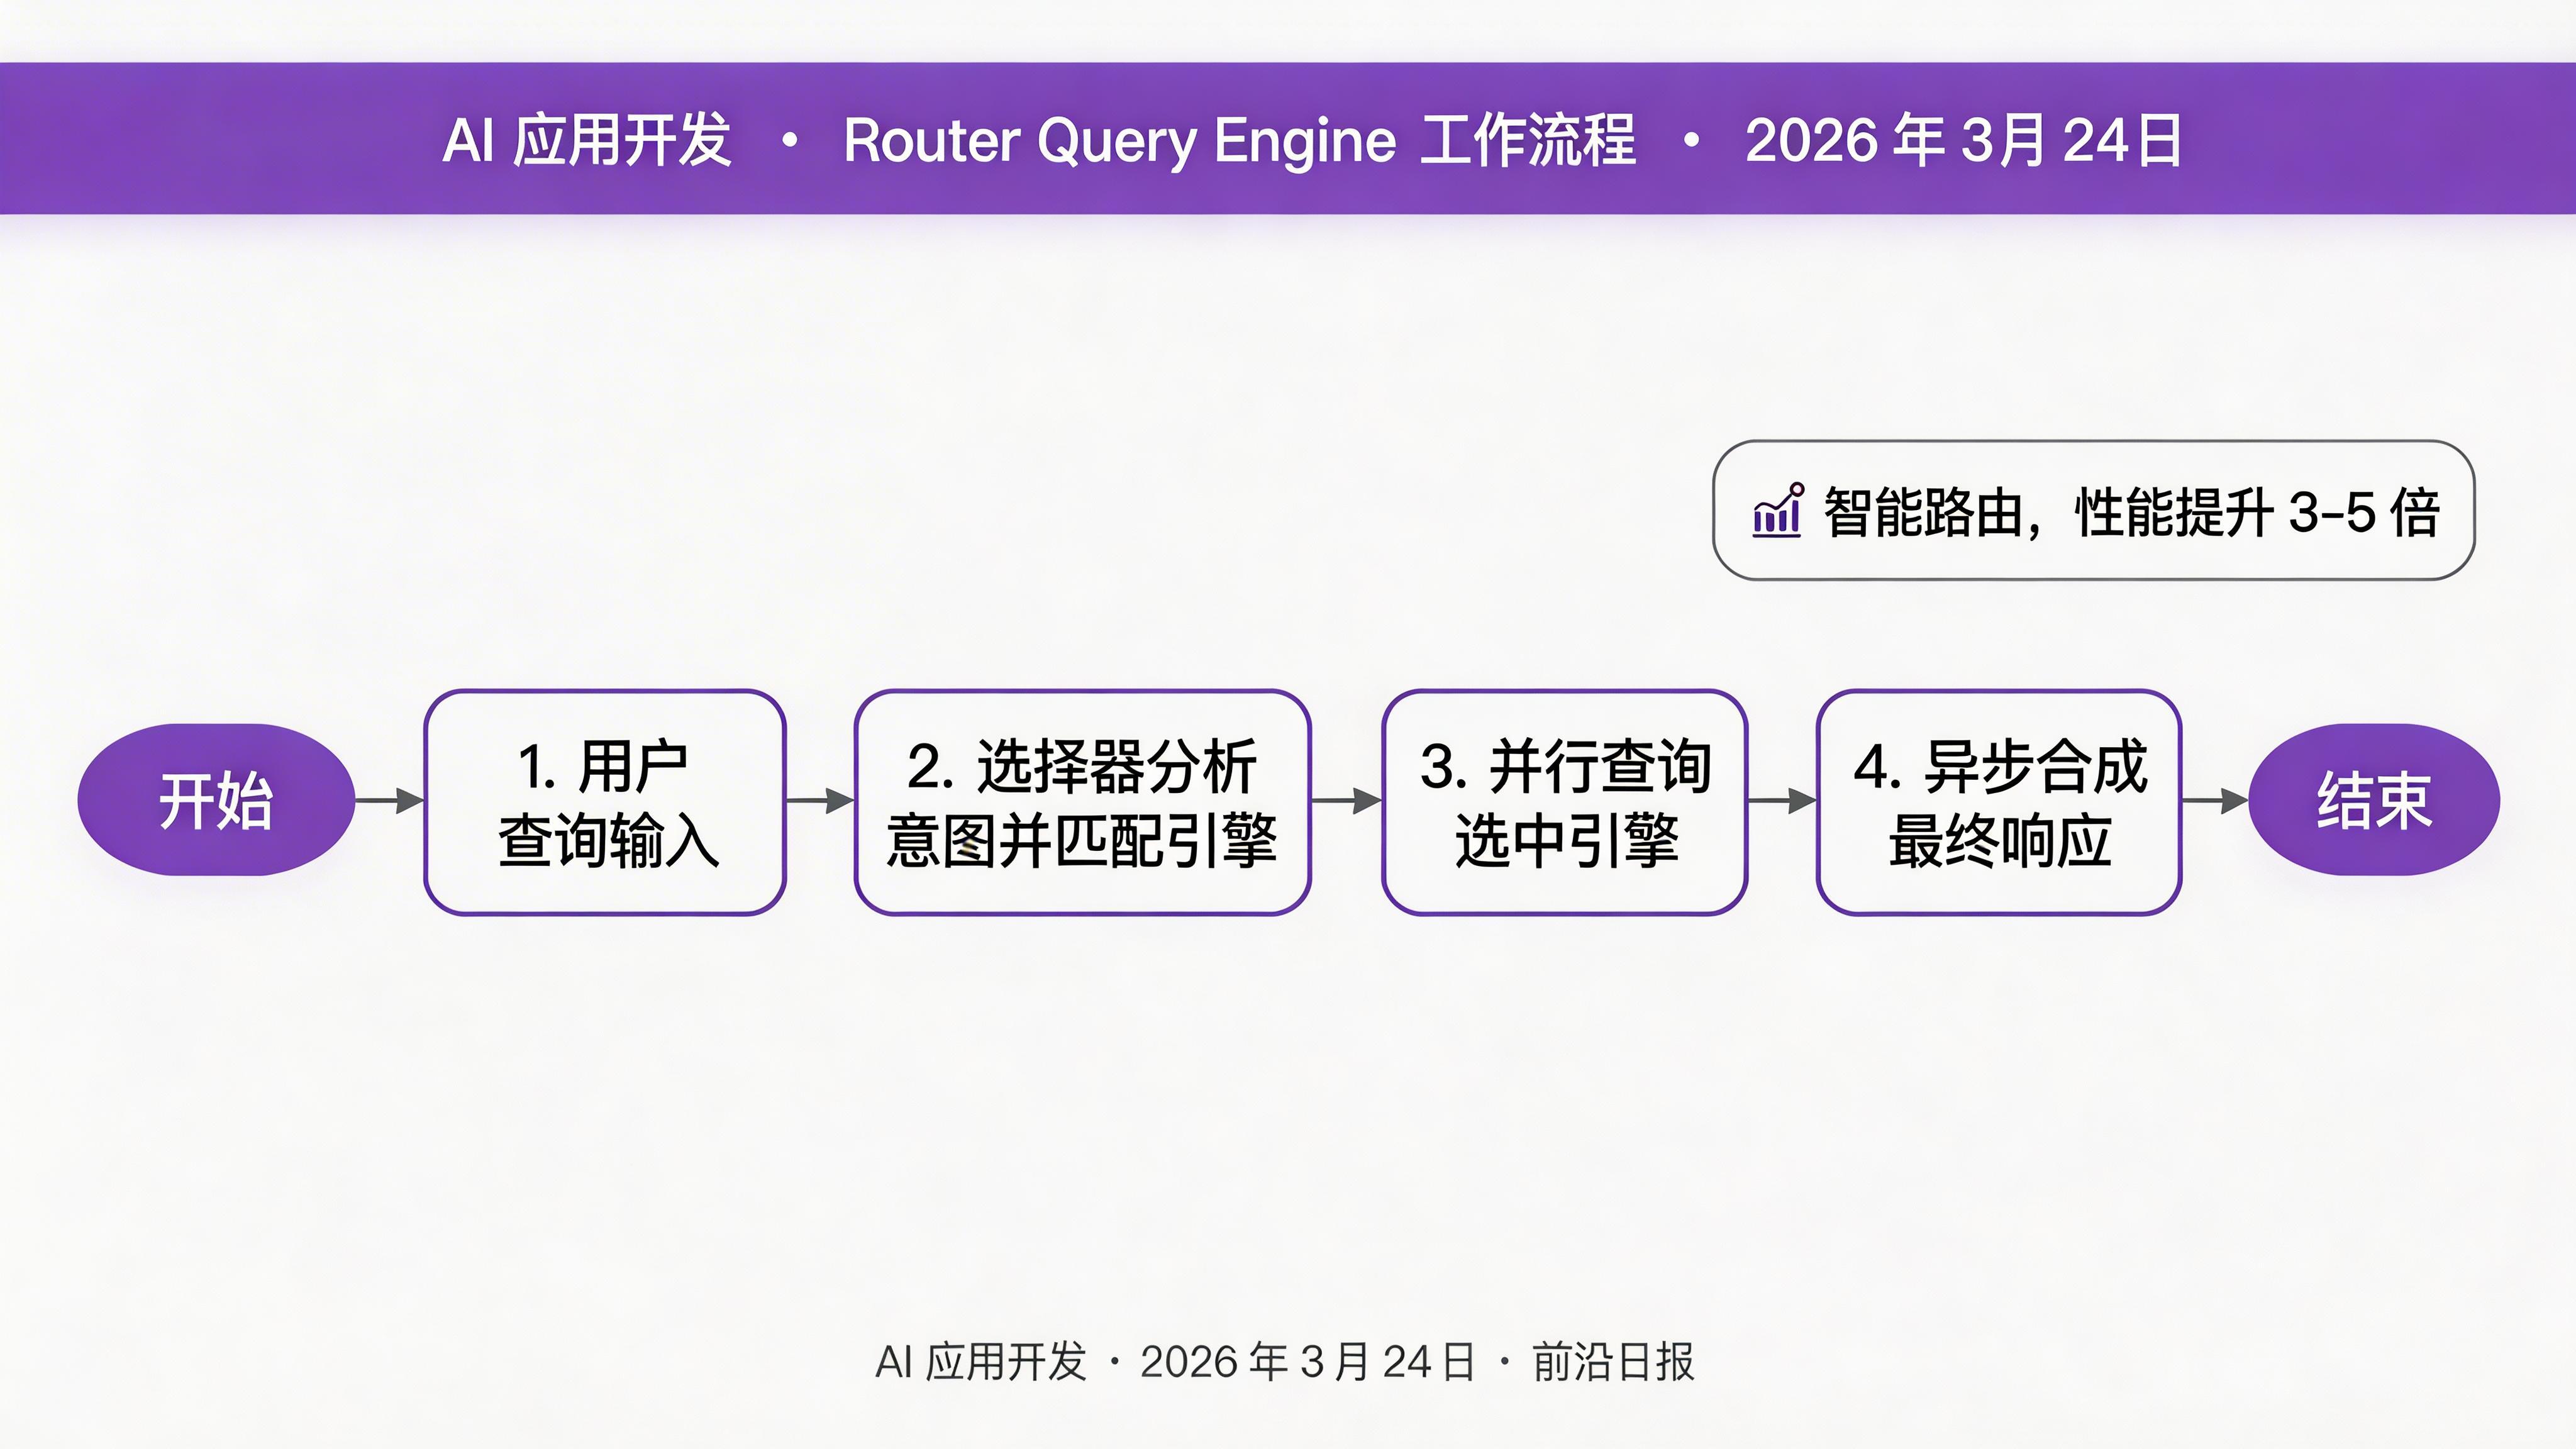
2. Router Query Engine:智能查询路由
Router Query Engine 能够根据输入查询自动选择最合适的查询引擎。它支持多选引擎和异步响应合成,是构建多源数据应用的核心组件。
实战步骤 1:定义事件类
首先,我们需要定义工作流中使用的事件类型。事件是 Step 之间传递数据的载体:
from llama_index.core.workflow import (
    Workflow, step, Context, StartEvent, StopEvent
)
from dataclasses import dataclass
from typing import List, Any

# 查询引擎选择事件
@dataclass
class QueryEngineSelectionEvent:
    selected_engines: List[Any]
    query: str

# 响应生成事件
@dataclass
class ResponseGenerationEvent:
    responses: List[Any]

# 响应合成事件
@dataclass
class ResponseSynthesisEvent:
    final_response: str
每个事件类都携带特定类型的数据,确保工作流的状态流转是类型安全的。
实战步骤 2:构建 RouterQueryEngineWorkflow
接下来,我们实现核心的工作流类,包含三个关键步骤:
class RouterQueryEngineWorkflow(Workflow):
@step
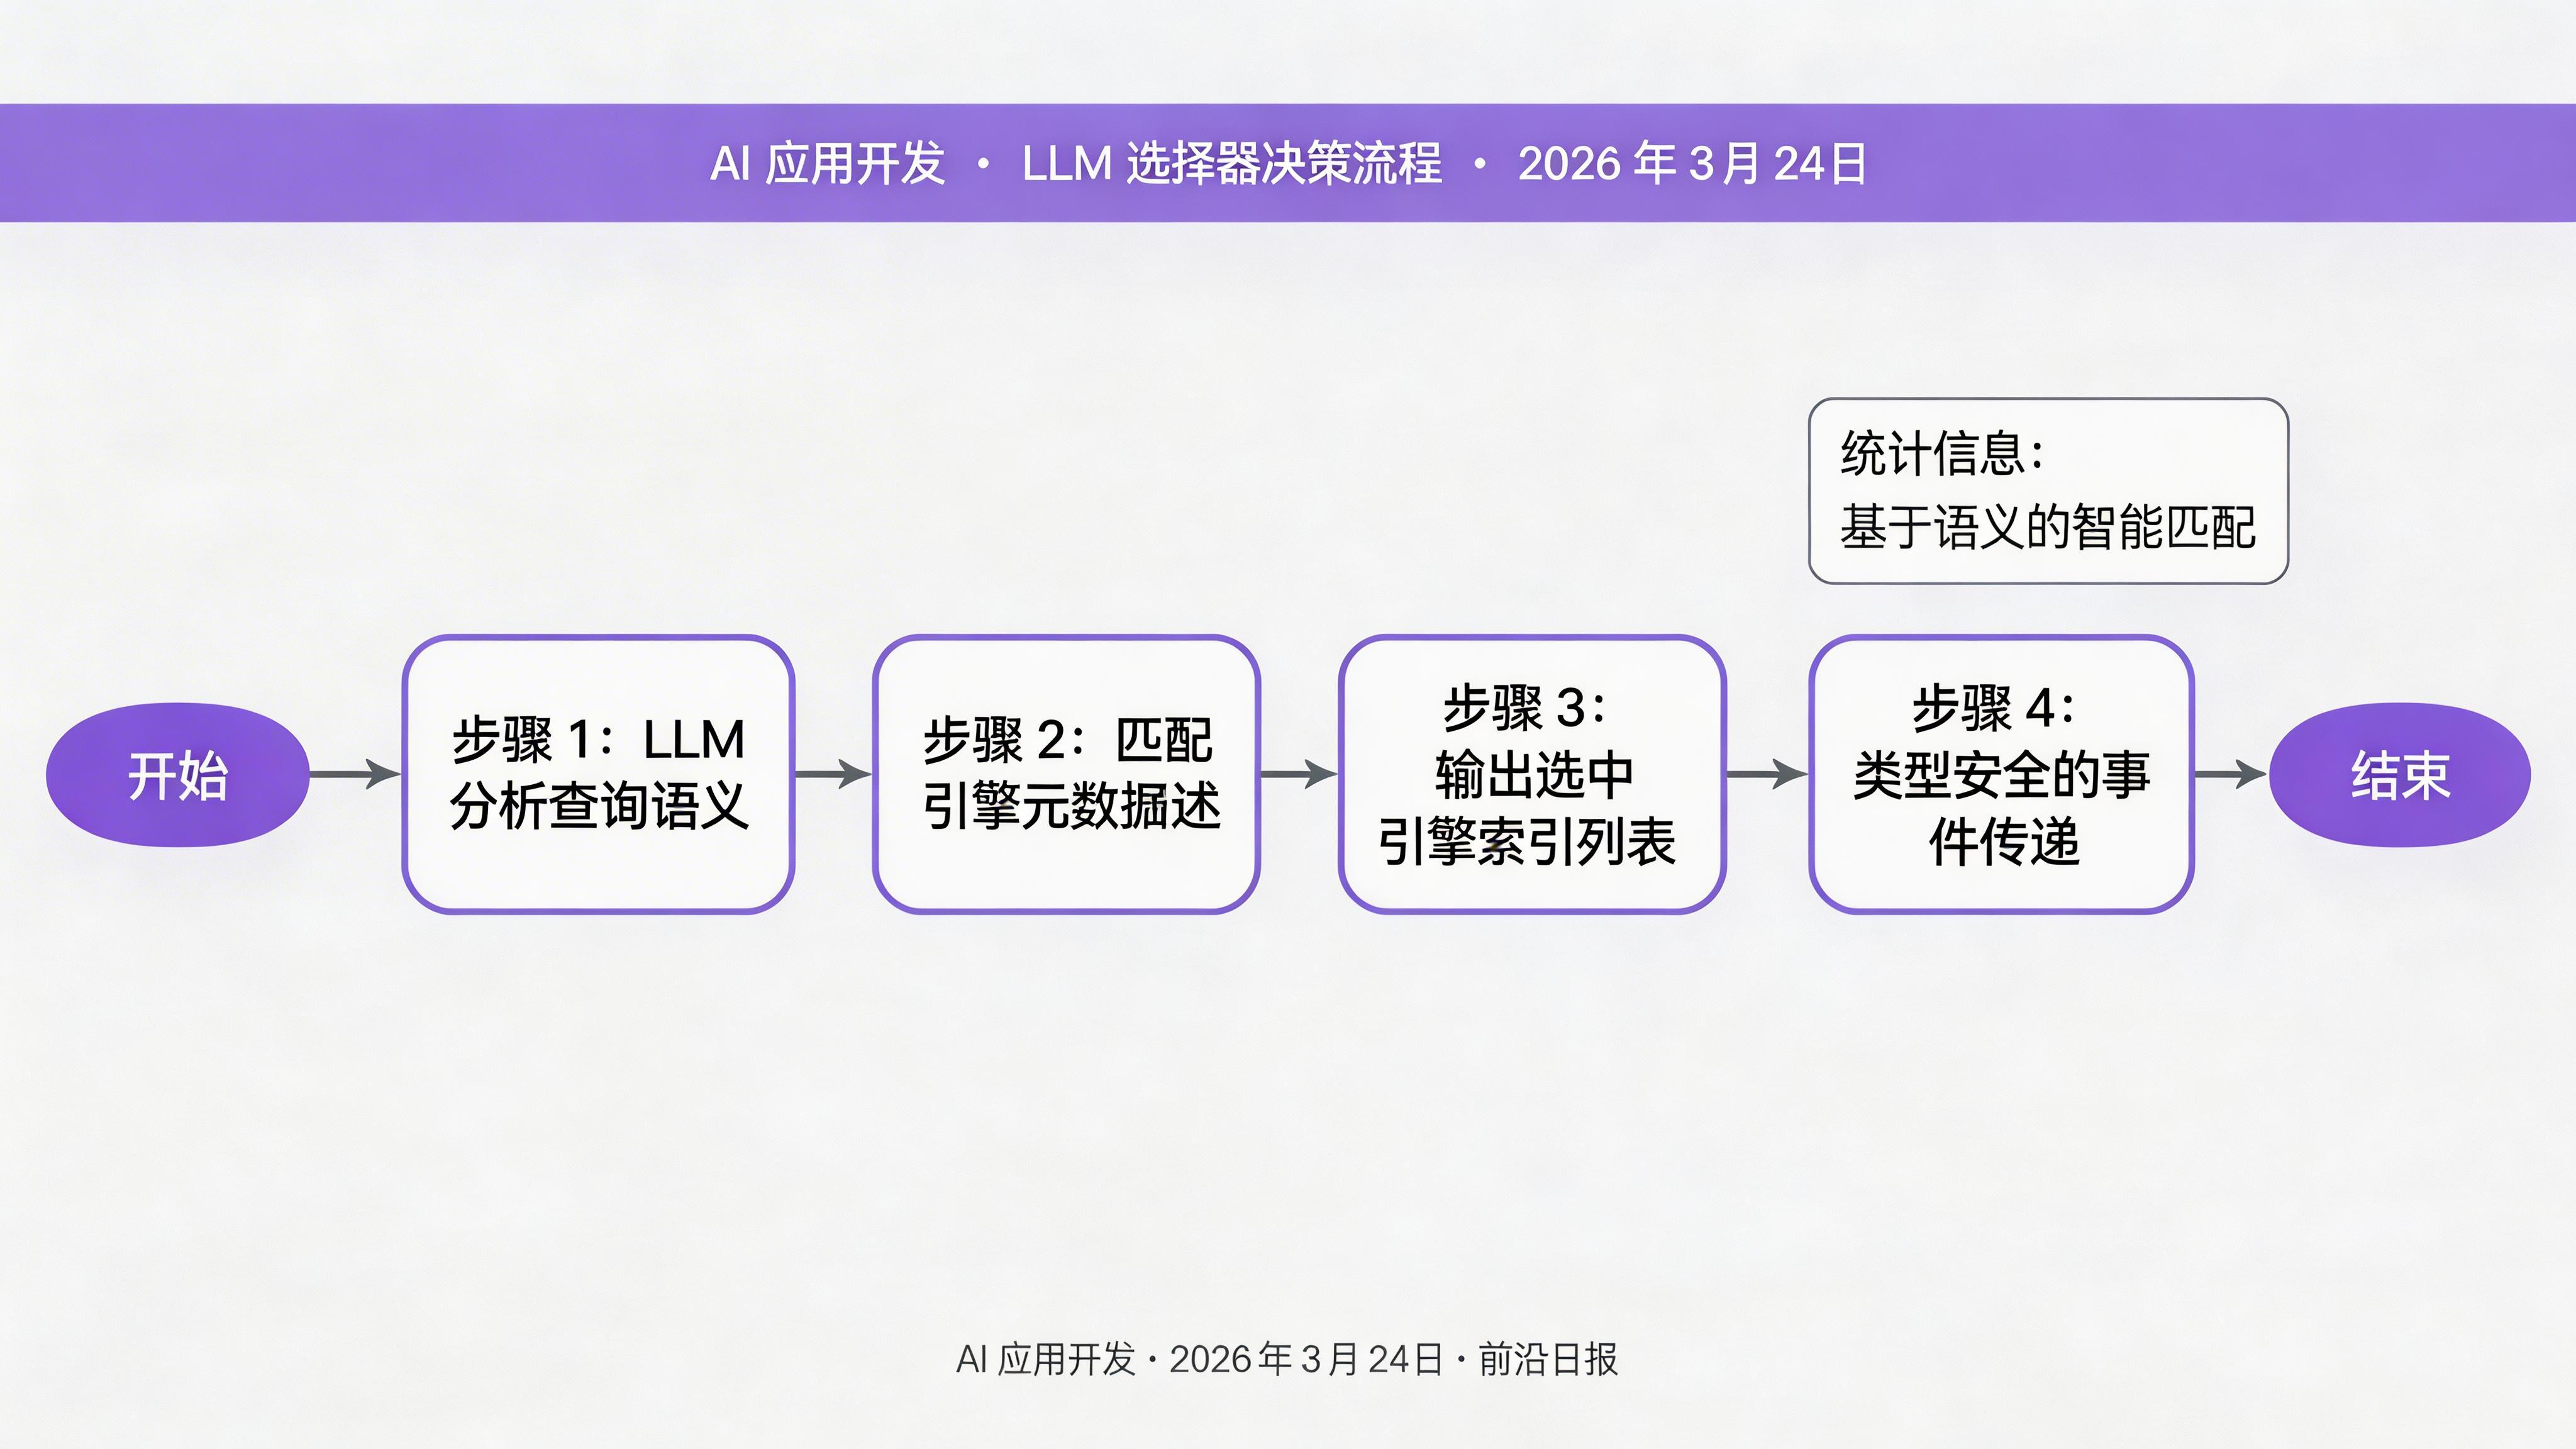
async def selector(self, ctx: Context, ev: StartEvent) -> QueryEngineSelectionEvent:
"""步骤 1:根据查询选择最合适的引擎"""
query = ev.get("query")
query_engine_tools = ev.get("query_engine_tools")
# 使用 LLM 选择器
selector = ctx.get("selector")
selection = await selector.aselect(
[qe.metadata for qe in query_engine_tools],
query
)
selected_engines = [
query_engine_tools[i] for i in selection.indices
]
return QueryEngineSelectionEvent(
selected_engines=selected_engines,
query=query
)
第二步,并行查询选中的引擎:
    @step
    async def generate_responses(
        self, ctx: Context, ev: QueryEngineSelectionEvent
    ) -> ResponseGenerationEvent:
        """步骤 2:并行查询选中的引擎"""
        import asyncio

        tasks = []
        for engine in ev.selected_engines:
            task = engine.aquery(ev.query)
            tasks.append(task)

        # 异步并行执行
        responses = await asyncio.gather(*tasks)

        return ResponseGenerationEvent(responses=list(responses))
第三步,合成多个响应:
    @step
    async def synthesize_responses(
        self, ctx: Context, ev: ResponseGenerationEvent
    ) -> StopEvent:
        """步骤 3:合成多个响应为最终答案"""
        synthe = ctx.get("response_synthesizer")

        final_response = await synthe.asynthesize(
            ev.responses[0].get_content(),
            additional_response_texts=[
                r.get_content() for r in ev.responses[1:]
            ]
        )

        return StopEvent(result=final_response)
实战步骤 3:配置选择器与引擎
LlamaIndex 提供了多种内置选择器,根据场景选择:
from llama_index.core.selectors import (
    LLMSingleSelector,      # 只选一个最佳引擎
    PydanticMultiSelector   # 可选多个相关引擎
)
from llama_index.core.query_engine import (
    VectorIndexQueryEngine,
    PandasQueryEngine,
    ToolQueryEngine
)

# 创建不同的查询引擎
vector_engine = VectorIndexQueryEngine(
    vector_index,
    similarity_top_k=5
)

pandas_engine = PandasQueryEngine(df=sales_data)

tool_engine = ToolQueryEngine(tools=[api_tool_1, api_tool_2])

query_engines = [vector_engine, pandas_engine, tool_engine]

# 配置选择器(使用 Pydantic 多选)
selector = PydanticMultiSelector.from_defaults(
    llm=llm,
    choice_batch_size=5
)实战步骤 4:运行工作流
最后,我们实例化并运行工作流:
import asyncio
from llama_index.llms.openai import OpenAI

async def main():
    # 初始化 LLM
    llm = OpenAI(model="gpt-4o", temperature=0.1)

    # 创建工作流实例
    workflow = RouterQueryEngineWorkflow()

    # 设置上下文资源
    ctx = await workflow.run(
        StartEvent(
            query="2026 年第一季度华东地区的销售趋势如何?",
            query_engine_tools=query_engines
        ),
        ctx_overrides={
            "selector": selector,
            "response_synthesizer": ResponseSynthesizer.from_args(llm=llm)
        }
    )

    print(f"最终回答:{ctx.result}")

asyncio.run(main())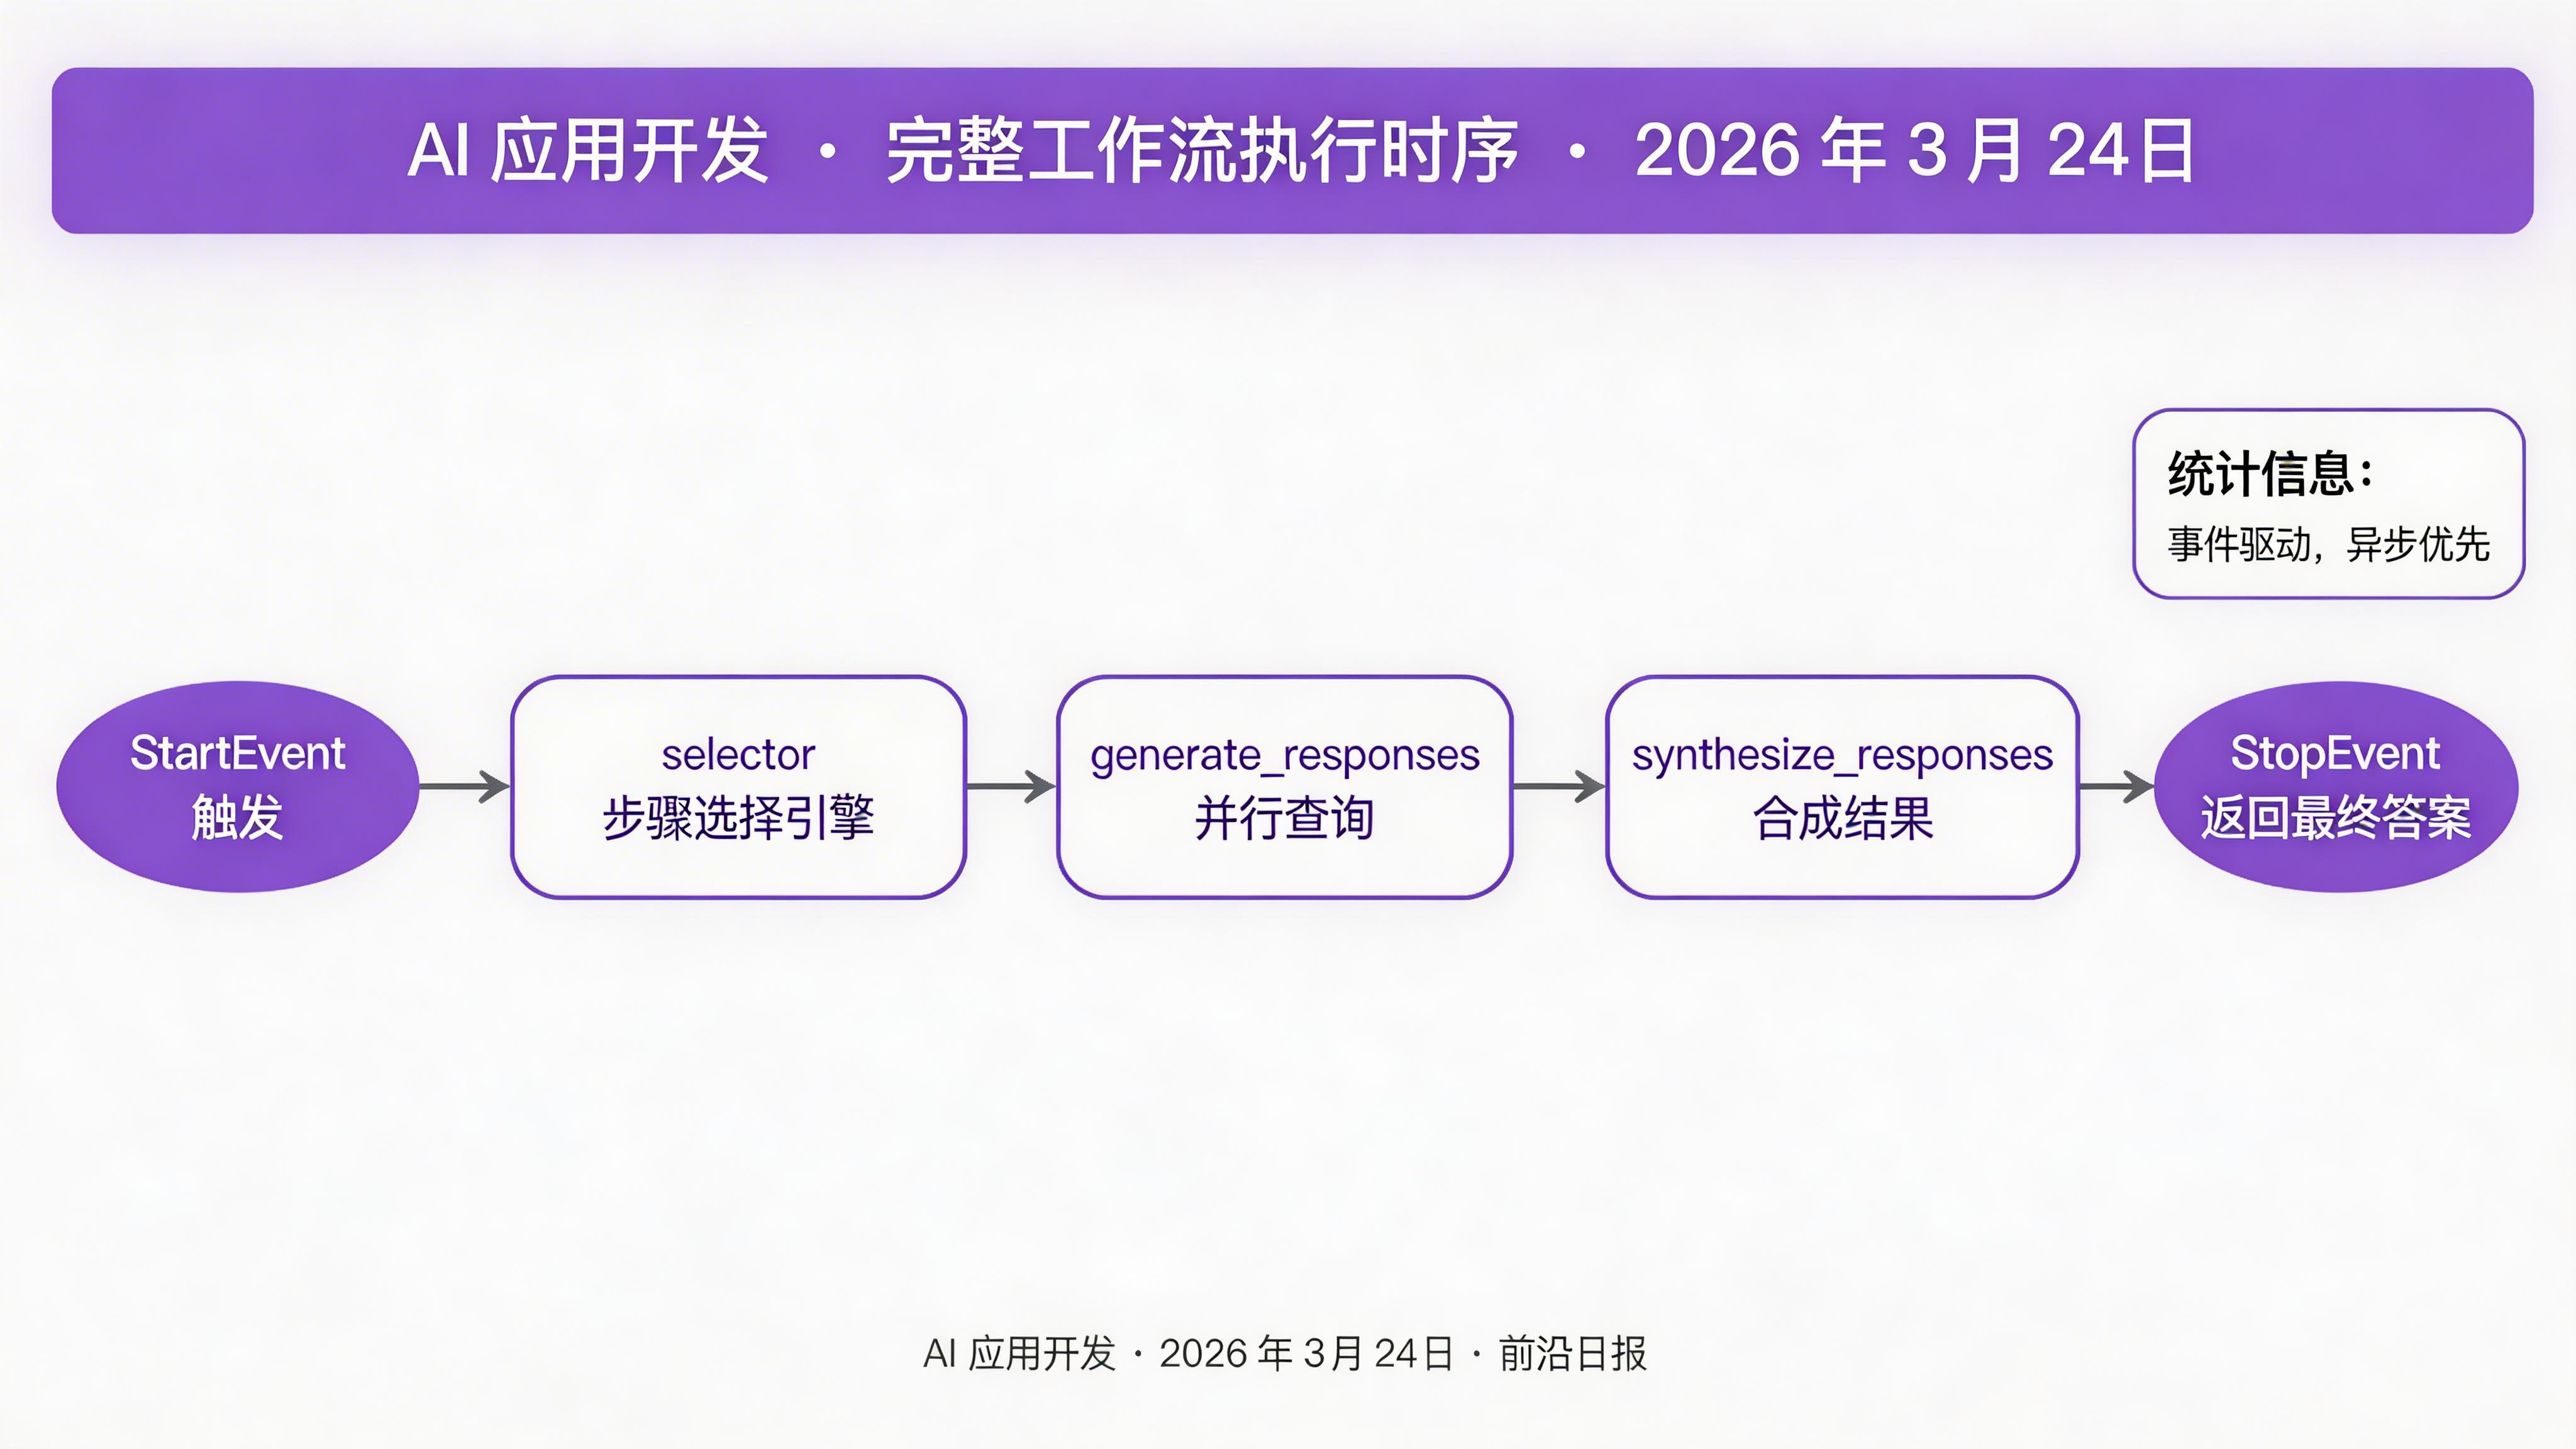
进阶:集成 MCP 工具路由器
LlamaIndex 1.0 原生支持 Model Context Protocol (MCP),可以动态加载外部工具。结合 Composio Tool Router,可以让 Agent 在运行时发现并使用新工具:
from llama_index.core.agent.workflow import ReActAgent
from llama_index.tools.mcp import BasicMCPClient, McpToolSpec

async def build_agent():
    # 连接 MCP 服务器
    mcp_client = BasicMCPClient("http://localhost:8080/mcp")
    tool_spec = McpToolSpec(client=mcp_client)

    # 创建 ReAct Agent
    agent = ReActAgent(
        llm=OpenAI(model="gpt-4o"),
        tools=await tool_spec.get_tools(),
        system_prompt="""你是一个智能助手,可以使用 Composio Tool Router
        动态调用各种 SaaS 工具。先用 reasoning 分析用户需求,
        再选择合适的工具执行。"""
    )

    return agent

# 使用 Agent
agent = await build_agent()
response = await agent.chat("帮我查询上周的销售数据并生成报告")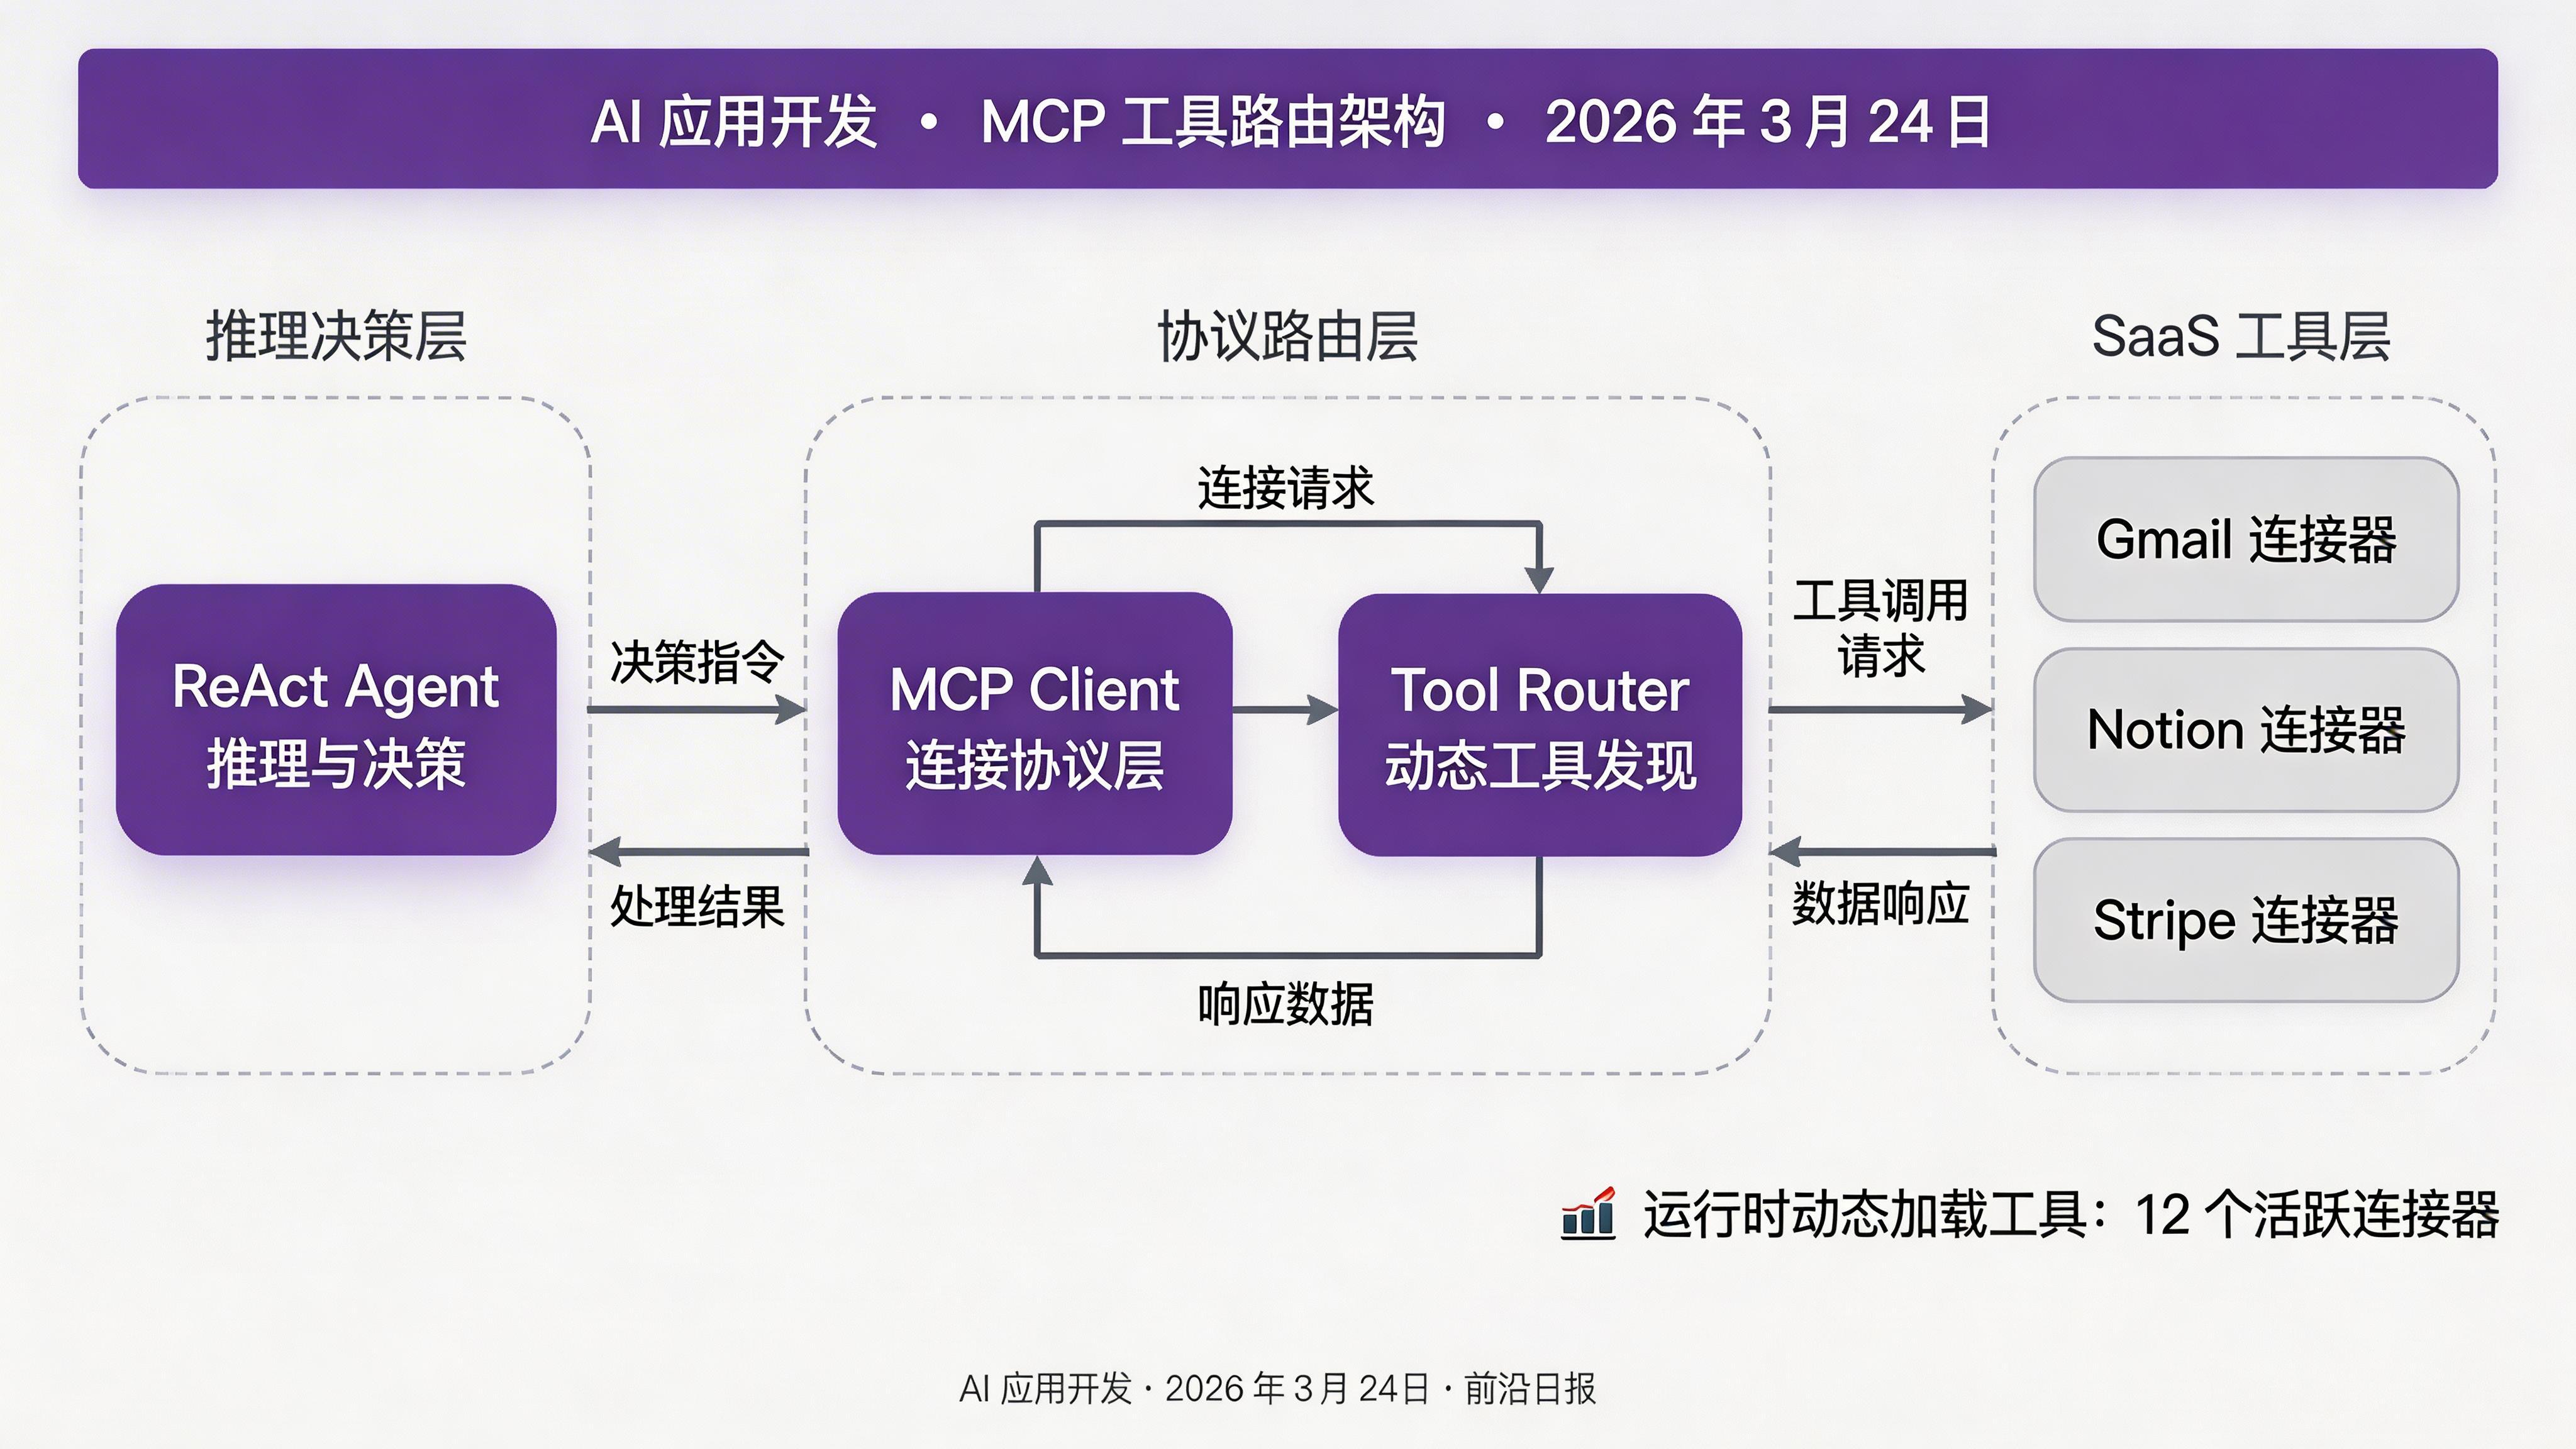
实战步骤 5:添加可观测性
生产环境中,监控和调试至关重要。LlamaIndex 支持 OpenTelemetry 集成:
from llama_index.core.instrumentation import get_dispatcher
from opentelemetry import trace
from opentelemetry.sdk.trace import TracerProvider
from opentelemetry.sdk.trace.export import BatchSpanProcessor
from opentelemetry.exporter.otlp.proto.grpc.trace_exporter import OTLPSpanExporter

# 配置 OpenTelemetry
provider = TracerProvider()
processor = BatchSpanProcessor(
    OTLPSpanExporter(endpoint="otel-collector:4317")
)
provider.add_span_processor(processor)
trace.set_tracer_provider(provider)

# 启用 LlamaIndex instrumentation
dispatcher = get_dispatcher()
dispatcher.attach_span_processor(processor)
配置完成后,所有 Workflow 执行、LLM 调用、工具调用都会在 Jaeger/Zipkin 中生成 Trace。
常见问题与解决方案
最佳实践总结
- 平衡自主性与确定性:在关键业务逻辑(计费、权限)使用硬编码路径,在用户交互层使用 LLM 决策
- 类型安全工作流状态:使用 dataclass 定义事件,利用 Python 类型检查提前发现问题
- 异步优先设计:所有 I/O 操作使用 async/await,最大化并发性能
- 资源注入模式:通过 `Context` 注入 LLM、选择器等资源,便于测试和替换
- 可观测性内建:从第一天就集成 OpenTelemetry,不要等到上线后再补
下一步
LlamaIndex 1.0 的 Workflows 和 Agents 框架为构建智能数据应用提供了强大的基础。你可以:
- 探索 LlamaParse 进行文档解析
- 使用 LlamaCloud 部署生产级应用
- 学习 多模态 Agent 开发